 |


|
#106
 07-28-2017, 09:52 PM
|
|||
|
|||
|
Still watching man, make a channel, I haven't found many good pickup vids out there except tacos
Sent from my SM-G930P using Tapatalk 
|

| Register and never see these ads again. | |
|
|
|
#107
07-30-2017, 12:39 AM
|
||||
|
||||
 So yesterday I posted this 12" x 12" x 4" bad ass electrical enclosure..  And although I'm not going to do a complete play by play of the entire process, I am still going to lay out the plans as they unfold and show you what I am up to.. as annoying as that may be to some lol So as you can see by the pic above, anyone that may be familiar with Blue Sea Fuse boxes and their other products, this really is the best fuse box setups ever and I primarily use them in almost every install or project when applicable here at 12° North Industries. huge time saver and they look great when done up properly with some attention to detail. You should also know that this build has a need for 19 circuits and I'll list those up later on. With two of the 12 circuit fuse boxes [Blue Sea pt #5026] there is 24 circuits available, 5 are still left open for future use, 1 is a single circuit for the on-board ARB air compressor but should I decide to pull the trigger and upgrade to the twin-compressor. I have allocated two circuits side by side to feed power to that one vehicle option as each circuit is good for 30 amps [total 100a serviceable for each fuse box].., The twin compressor pulls a massive 50 amps under load where the single HD unit only pulls 24.4a under load. Having the double fused circuit will field the necessity of more power without burdening the fuses or the panel itself. NOTE: as a rule of thumb I would suggest that you wire your Air compressors and Winches off your main battery. They should be ran off of a regular [main] cranking style battery and NOT a deep cycle battery that you may be using for a second/house battery. You WILL give that deep cycle battery a very short life using a high current device like that. They are meant for slow current draws not fast depletion to drain.   Where this is going to be installed is a slight bit tight fit but it is some real estate I am willing to forfeit for function. On the drivers side bed rail is where it will be secured. I will be building a bracket that will hold it in place as well as a stud in the bed rail. I'll point those features out. I do need it to sit off the edge about 1.25" to allow for the wiring and for the bracket that the enclosure will mount to securely it well.  Panning back the camera you can now see that the cavity encroaches on the window area. Now there is almost 1.75" space between the glass and the rear of the enclosure and thats about where the bracket will hold it away and leave me the forward room for the waterproof connectors I am using to keep unwanted moisture from inside along with aluminum brackets, matte finish carbon fiber prepreg double twill plates, and all stainless hardware just because it "can be" in what would be considered an outdoor environment by being exposed to different elements rather than say, in a conventional house setting. This is the stud, minus the extra nut and the temporary attempt at a smaller box tie down; the main reason why I am doing this to this extent is because it really needed to be addressed and done right finally as I am trying to get a lot of small fires put out to showcase some work and more of what we do, or I do if you will. Hopefully this gives some people some better ideas too for their own.  This mini rat nest annoys me considering out of all the detail I've shown in my build.. and this exists to power up a single 12volt power point outlet, the rear liftgate LED light kit from 12° North Industries and the two factory light boxes with LED upgrades in them from Flip-Pac in exchange for the inefficient halogen 921 bulbs that were there. Just as an addendum; the rear light still contains a 7w white [4800K] LED light for use of finding stuff in the bed of the truck. The forward light has a 5w red LED bulb as when the Flip-pac is in use, its reachable from the bed and saves the night vision a bit better when used.     Marking off all of my 0.875 holes to be drilled in the bottom. I need 5 but I have room for a 6th one should I need it for anything later. This is where the 4ga Streetwires power & ground cable will go. The other 3 (4?) will have similar waterproof connectors that hold nine 18ga wires in a 4ga O.D. sized insulation and with the use of 3 (4?) Molex plugs and the Anderson plug for the main power connection. If I should ever have to take the top off, I can without major time or effort into the disconnect. Four main connections will be all that is needed to remove and the top comes off fully all self contained.   Next is the inner workings of the electrical panel. Now this is where I skipped some pics and I do apologize but its pretty simple to see how I made the aluminum bracket so I could minimize some space taken up by the 16-18 relays that will go into this cavity without taking up a lot of space. As you can see in these two photos the first relay is in place.  With simple harness I was thinking I may be able to work with the tight tolerances of the shorter leads but i think as this project starts to really unfold. I think you are going to see a bit more custom wiring done rather than the standard relay harnesses. For purposes of serviceability, there will be connectors soldered onto the wires and used to make the pin out connections vs soldering directly to the relays. if I am out on the trails or just in general needed to swap a relay out, desoldering one isn't going to make me too happy. --------- 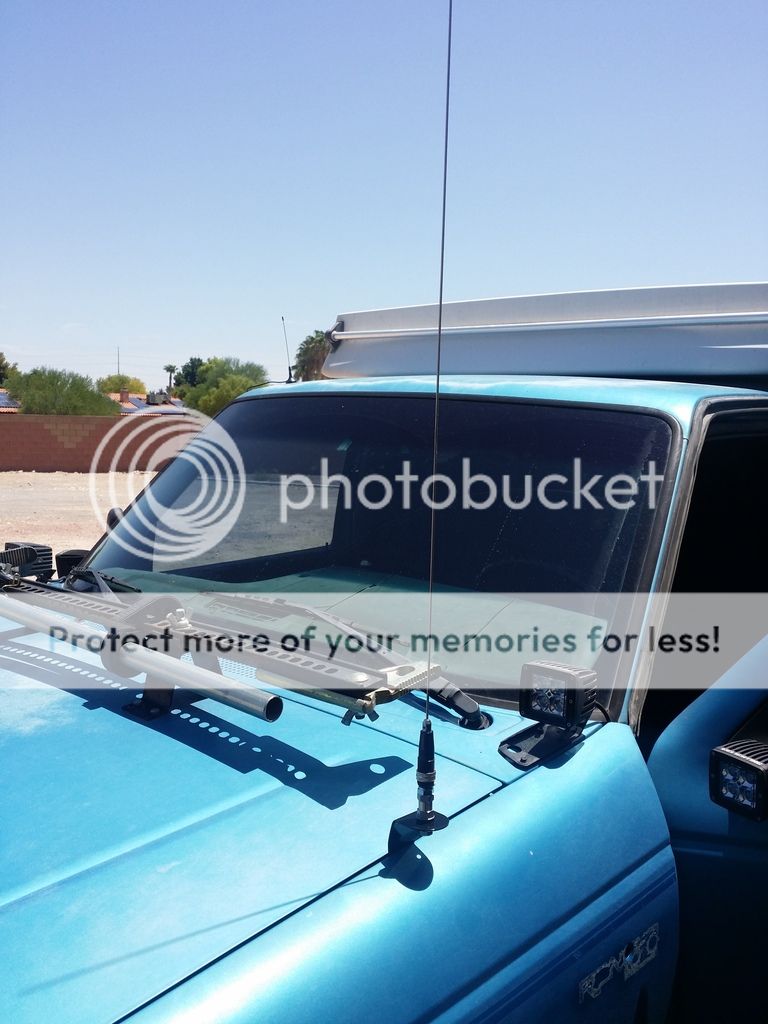 On another note, I've added the citizens band radio antenna today as well this morning. I think it took me a fair amount of time to sand down the chrome bracket and shoot it satin black before mounting it as I am not a big fan of anything chrome really. Not going to go into a lot of detail because this was just a bracket mounting but to show the work I am going to post the pics at least so you can see what was mostly involved and kinda how I did it and why. 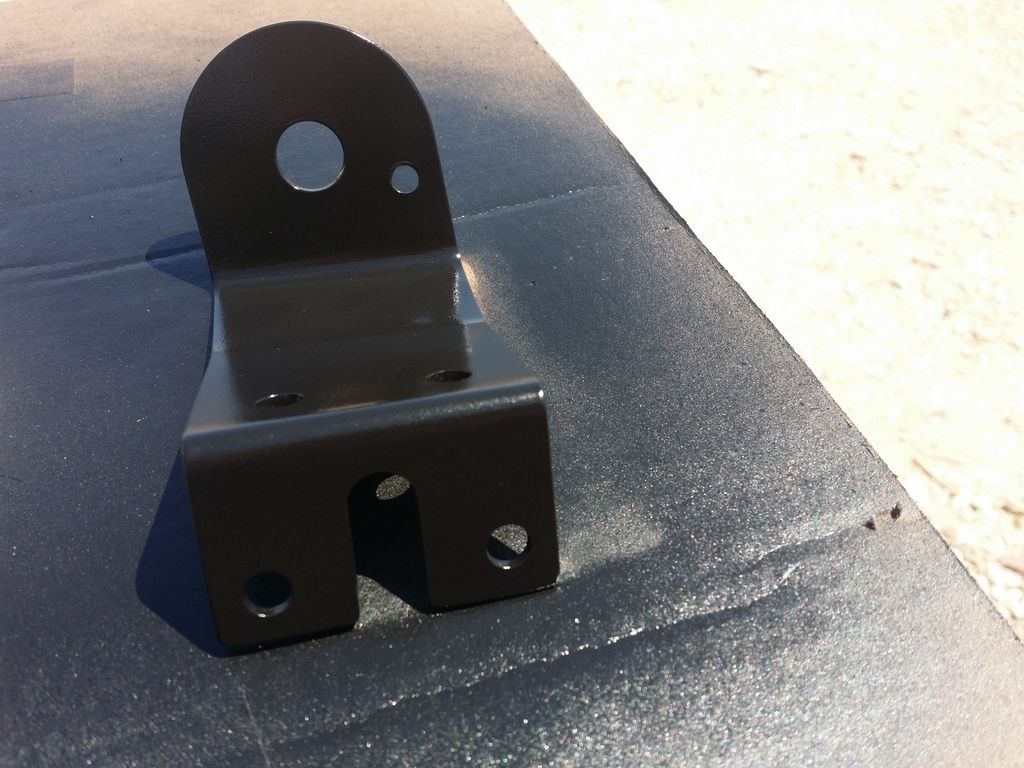 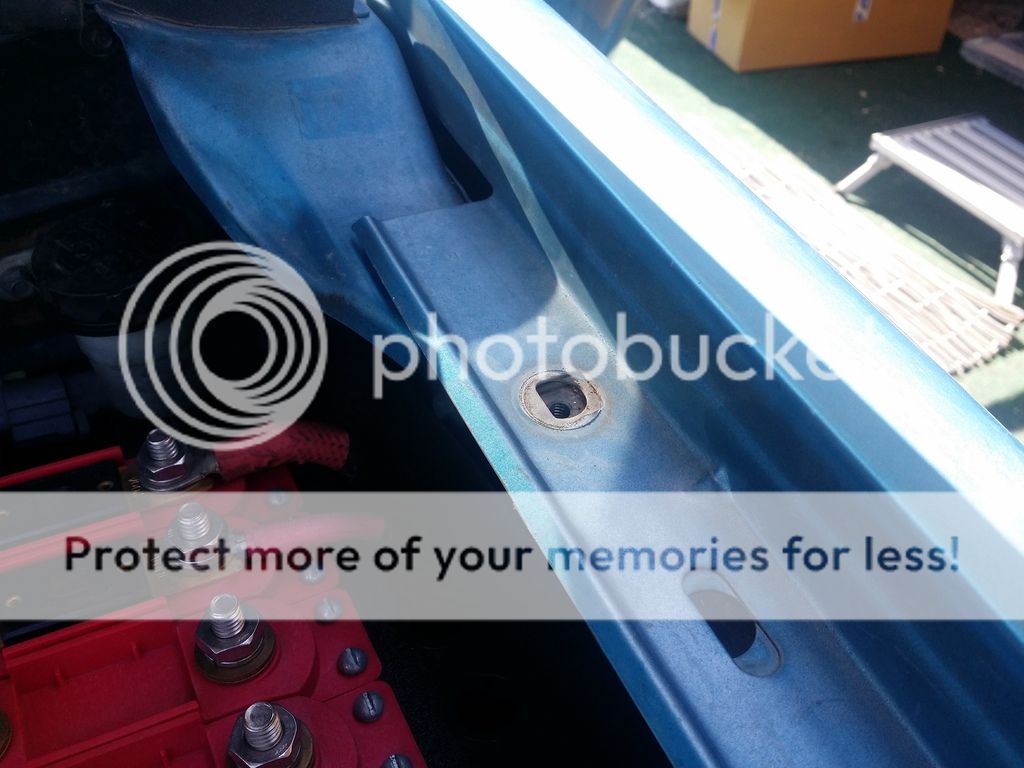 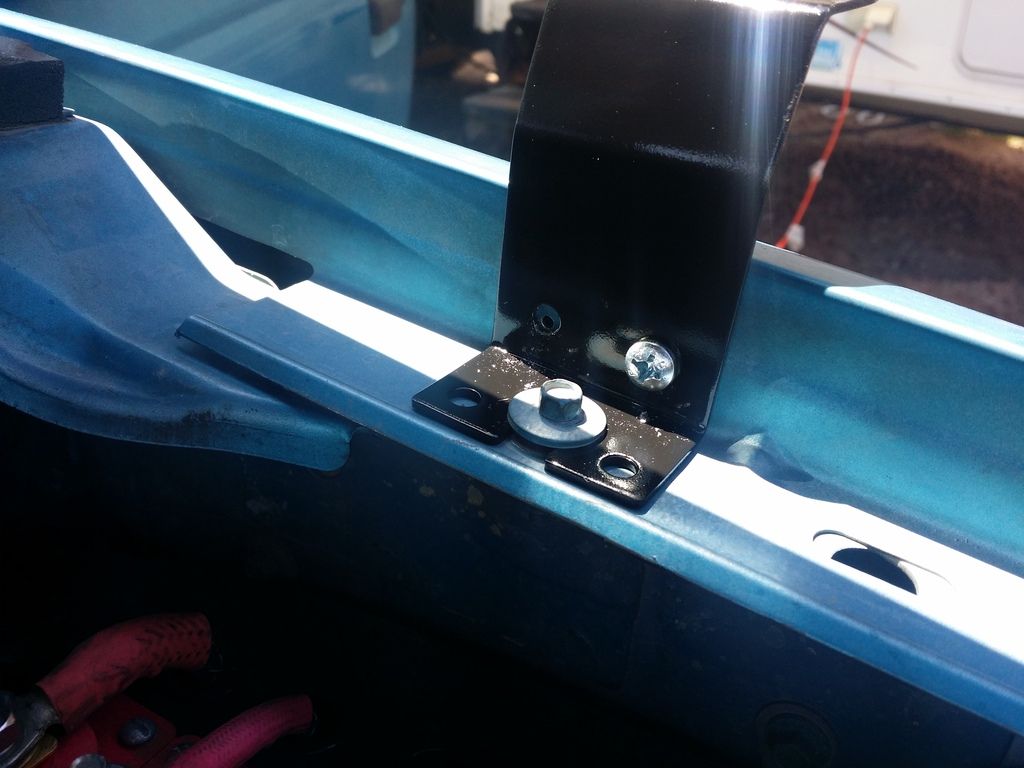 And then finally... 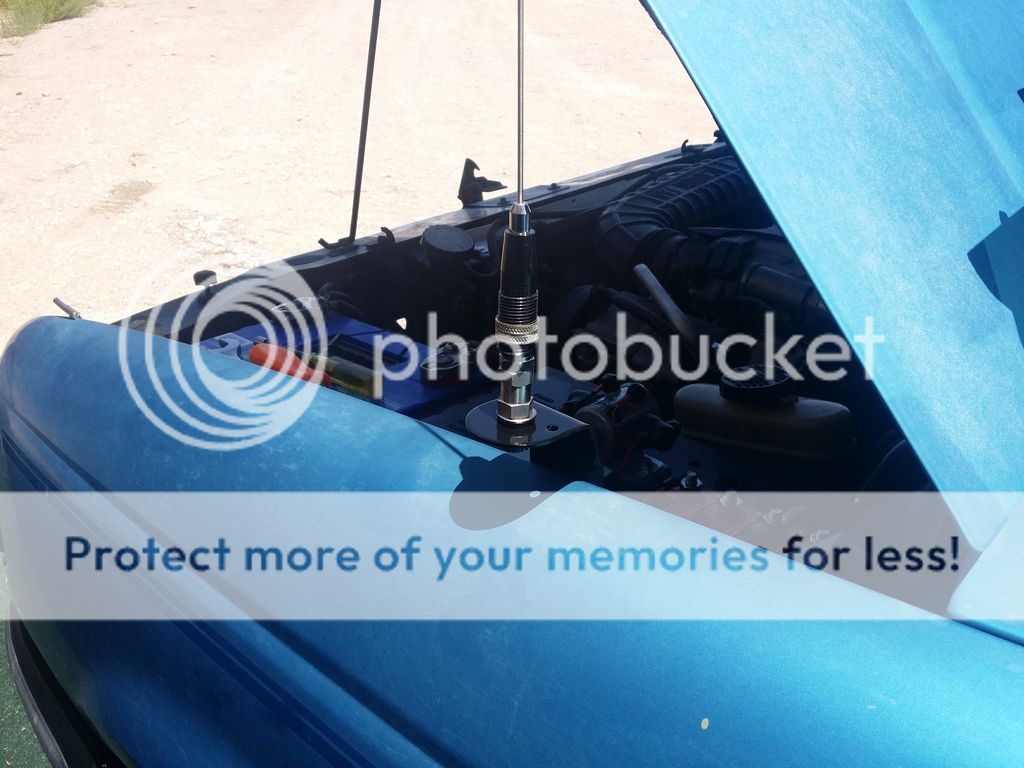 ---------- Quote:
Not to mention, I'm no toad but i feel I have a face really meant for radio.. LMAO
__________________
_______________________ My Build Pg. Threads + 93' Ranger Overlanding Build + 94' Ranger Bed Overlanding Trailer Build + 12° North Industries ~ I Support Last edited by Undrstm8ed; 07-30-2017 at 12:52 AM.
|

|
#108
07-30-2017, 01:14 AM
|
|||
|
|||
|
I'm looking all over for a ranger and a contractor cap so I can start building again, my last rig was a Cherokee so your helping me out tons. Just set up a camera and narrate it after. Edit when your bored late at night the info will still help tons even if they're posted far between. Plus when you do build a bigger following YouTube will pay you I just don't know what and that's more money for parts
 Sent from my SM-G930P using Tapatalk ---------- Oh yeah, check your pms you might like this but I don't know the guy personally Sent from my SM-G930P using Tapatalk
|
|
#109
07-31-2017, 08:03 PM
|
||||
|
||||
|
Quote:
With the addition to the garage the Xterra, i'm already excited for the plans on it. And as far as you tube.. the people with millions of views and with the huge and not so recent demonitization by Youtube/Google.. Aint no one on youtube making money but the people they want to... All my videos would have minimal worth im sure and minutely appreciated lol On a more positive note; I ordered a small sheet of 0.125 double twill Prepreg carbon fiber today from one of my suppliers and I should see that in a few days or early next week actually. Once I get it I will have to cut it down, to proper dimensions for the backboard for the double fuse blocks which means tonight I'll be ordering not only a 2nd 12 circuit but the additional 6 circuit one to replace the interior one with.  I will also have to run and grab a sheet of 0.0625 Aluminum sheet Wednesday to make the bracket for the electric panel that needs to be added to the drivers inside of the Flip-Pac. But to give an idea, although obviously not a to spec drawing and short two dimensions I need to get but I must be able to mock it up first to get them. When you look at the second pic of in the Flip-Pac, the bracket makes more sense. I'll have to pull the light fixture, mark everything and add at least the two top holes of the NEW electrical panel. Match those and the E-Panel fully on the template and then transfer all that properly to the aluminum sheet cut it out, drill my pilot holes and the wire pass through hole on the light fixture side of things. Bolt the E-panel to it, mount it onto the front stud, mount the light fixture to it and the Flip-Pac, and then reinstall the light itself and lens and call it done. Before I do that.., I have a gasket that needs to be added to the front edge of the bed in order to seal it off better. The old gasket was over 20 years old and the new one came in a short while ago. So another small fire to put out there in completing as much dust removal. I really should do a good video and or write up of how I achieved that and my results I gained making the cap as waterproof and dust free as possible. Especially since the entire bed work like I said before is a project of its own.
__________________
_______________________ My Build Pg. Threads + 93' Ranger Overlanding Build + 94' Ranger Bed Overlanding Trailer Build + 12° North Industries ~ I Support Last edited by Undrstm8ed; 07-31-2017 at 08:39 PM.
|
|
#110
07-31-2017, 08:10 PM
|
|||
|
|||
|
Quote:
Sent from my SM-G930P using Tapatalk
|
|
#111
08-03-2017, 10:55 PM
|
||||
|
||||
|
Just a random night time dash shot... or two. Thought I'd add something while i am waiting for parts to drop in. So far not too busy or confusing looking and not too bright at this point as far as reflective light. If anything, the tablet can get bad if you cranked up the brightness especially on some apps. The addition of the H.A.M. radio in replacement of the rearview mirror should really make for an interesting look and overall feel to the cab too. Soon...
Mirror mount, RAM mount, are in. just waiting on the magnetic back plate to come available Then I'll show that installed and wait on the delivery of the iCOM 5100. 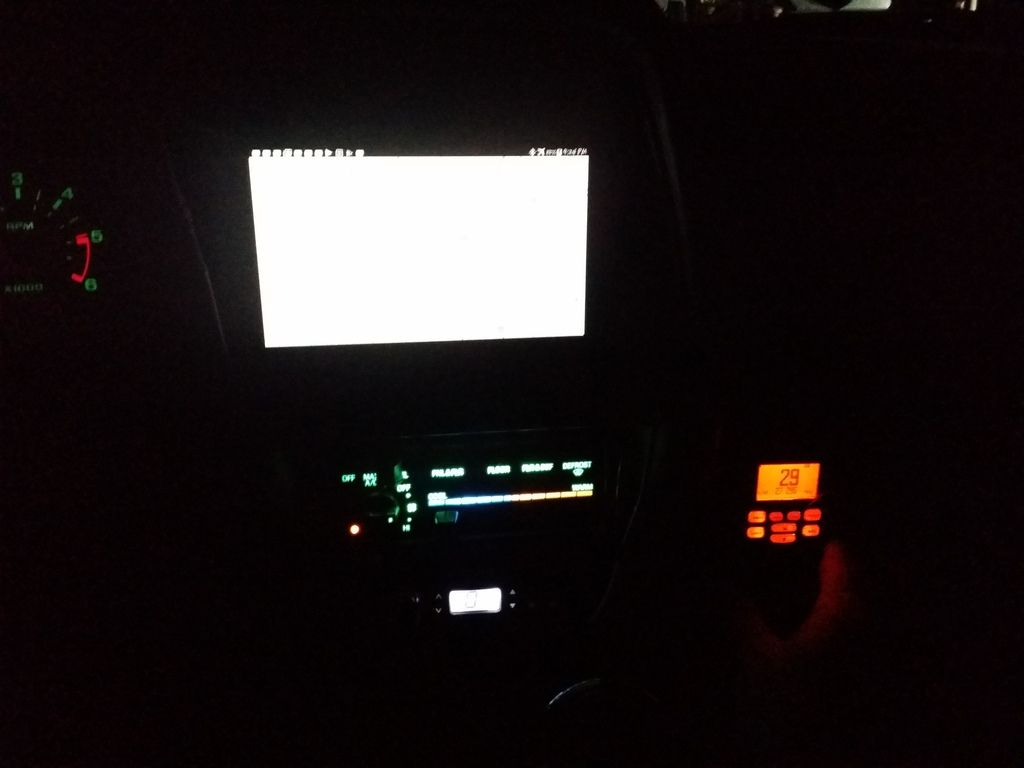 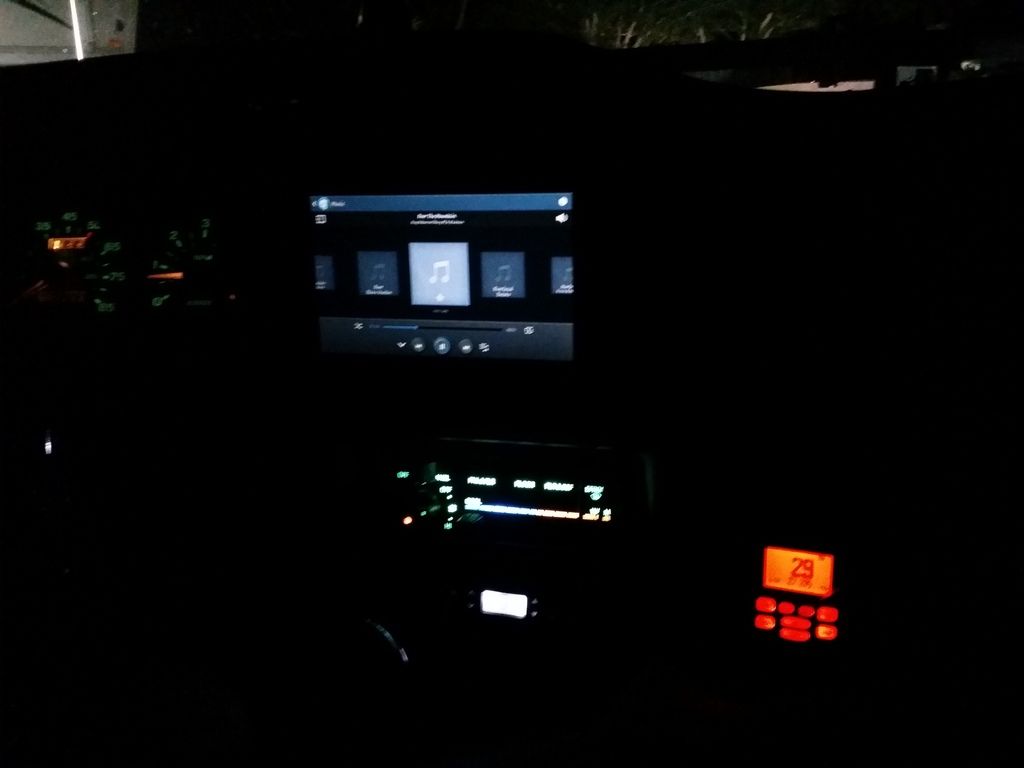 Lit in the center stack [top to bottom] Samsung Galaxy Tab3 7.0 AC/heater controls Midland Mxt105 2 way GMRS radio [to the right] Uniden CMX560 .
__________________
_______________________ My Build Pg. Threads + 93' Ranger Overlanding Build + 94' Ranger Bed Overlanding Trailer Build + 12° North Industries ~ I Support
|
|
#112
08-04-2017, 09:30 PM
|
||||
|
||||
|
Today I figured with a little effort I can not only squeeze 2 really good quality OFC 4 gauge wires through 0.75" flexible conduit, I can run two 0.75" conduit lines in the frame under the truck safely and with minimal interference..!
Can anyone say "STOKED!" ? I can... That saves me a few dents in the wallet from the pre-thought of having to actually use 1.00" fittings and conduit and actually having to run two at that. Just in conduit alone I'm saving more than $18 per run, almost $54 in fittings and connectors, and a heck of a lot of grief which is near priceless in my book.  First mistake, I know right... Not properly identifying ALL needed aspects of the stake pocket in the bed. Which means great I had a pre-existing hole I thought I could use but with no real way to modify, at least what I wanted to do AND the space available was even more shallow than what I needed. So the okay news is I milled out the 0.875 lip that existed anyway and I can put a proper plug in place before the special NON-toxic sound deadener/heat rejection bed liner material is laid. In fact may even do the opposite side in similar fashion. One less option for dust to migrate it way within the topper itself. So needing to clear the stake bed itself and an unknown obstacle above I had to add another hole to the left side on another wall which I will point out actually cures another issue I was battling; wire routing of two 4ga wires.  A 0.750" elbow connector with a 90° to it will go in from the backside and between the NON-toxic bed liner material, the waterproof electrical gasket, and if I think it will need it, a bead of silicone around the fitting. Then the conduit will run below to the frame and route towards the spare tire well where it will connect into the house battery reserve waterproof storage locker. More on that later.   Here you can see how well the conduit connectors will work with the design and the cable routing to the E-Panel itself. I am really excited to get the bracket that will mount the E-panel to the truck as well as the carbon fiber backboard to the interior of the E-panel. Then the fun part of wiring comes into play, that's my specialty and I am hoping comes out the way I am envisioning it.. Hopefully as impressive ! So small steps as I can.. but again, adding worth to the build and the thread... As always, thanks for looking.
__________________
_______________________ My Build Pg. Threads + 93' Ranger Overlanding Build + 94' Ranger Bed Overlanding Trailer Build + 12° North Industries ~ I Support
|
|
#113
08-05-2017, 11:31 PM
|
||||
|
||||
|
With things either on order to get me to the next level or next step or things just in a small holding pattern monetarily I decided that I was tired of moving some large pieces of Birch plywood around so I decided to rough cut some of the layers for the sub enclosure/electronics rack so I could at least take up less real estate in some ways and still show some progress to keep those interested.. well still interested.
A while back I yanked nearly everything audio wise out of the truck, sold what was worth selling and tossed everything else in favor of a slow revamp. Now someone undoubtedly is going to tell me I should have used MDF because its the most dense wood.. blah, blah, blah.. Ya.. I know But I am not making a ground pounder, the subwoofer is a single 8" Diamond Audio CM3 series with about 400watts from a ARC Audio amp. The birch plywood will also have a more warmer-live sound to it in a natural sense and in a musical sense or for Sound Q properties that's better than one note bass from a dense dead wood made mostly of sawdust soaked in formaldehyde and compressed with glue. May not mean much to some but it matters to me. It's also why I chose to use a NON-toxic material for sound deadening and heat rejection for the inner door skins, cab roof, and floorboard and what will be used in the bed in replacement of the typical bed liner material because they actually put off toxic fumes when exposed to high temperatures or direct sunlight itself. With the Flip-Pac being a living quarters and living in 118° summer temps here in Vegas a couple months of the year and camping in those months isn't something I want to subject my body to nor my significant other if she camps along. Trust me when I say 25 years ago seeing this specific post I'd been looking at myself as if I had two heads too on some subjects. Anyway.. back on topic.   Here you can see the basic layers being applied as I rough cut them out into smaller size. The base layer itself also has a double 0.50" layers that make up a more finished leading edge below the base layer itself and then two studs and two 1.25" x 6" Aluminum standoffs that I will have to cut down to appropriate size and they will be lag bolted into the front corners for front support and stability. Not only with this give support but it will also allow the down firing subwoofer to breath correctly without suffocating itself. Ideally the second layer is mostly a standard layer with a ring in it that allows the subwoofer to be flush mounted in it while the base layer itself will have a fully radiused lip to allow good airflow and no "huffing" effects. The subwoofer will be bolted into this ring via T-bolts to insure its seal and allow for any servicing the woofer may need. The inside of the box will also be designed to eliminate any standing waves inside as well. More on the actual design and techniques as we move forward.  Now the layers will all be identically cut and shaped on the exterior with the leading edge at an 8° beveled edge with a router bit to mimic the natural seat position and to keep inline the character of a seat. As you can see here with my "PMG" [poor mans gauge] gauge here; approximately fifteen layers of 0.75" birch ply are going to be used to create this enclosure cavity and at least two of those layers with allow for additional cross bracing even though the enclosure is relatively small parameters.    Simple mock up to give the idea a better understanding of whats going on here in the sense of the back plate, base plate, and the layers themselves again in the first two pics. The third pic below that gives you an idea of the forward shape between the seats so the least amount of leg room was needed to be sacrificed. I don't mind not being to recline back much after spending so much track time in DTM style race seats and 5 point harnesses but I need room to shift and move about comfortably. I decided to make my own custom router table and pretty much its coming in 4 pieces not including the ridiculously priced Porter Cable router I am still weighing out if I want the PC 690 or the PC 890. If anyone has any experience with either of those routers, I'd be interested in your opinions of either. So as those pieces rotate in to my hands and I make the couple templates needed to get the best results.. as usual, I will do my best not to disappoint. As always thanks for looking and for those of you new to my build page, welcome. .
__________________
_______________________ My Build Pg. Threads + 93' Ranger Overlanding Build + 94' Ranger Bed Overlanding Trailer Build + 12° North Industries ~ I Support
|
|
#114
08-09-2017, 01:10 AM
|
||||
|
||||
|
Took a random road today, somewhat to find an alternative place to dial in my Glock but thought I'd do a quick share along the way.
      I thought the layered rocks were kinda cool and these were the better pics I took. Just didn't have that creative flow this afternoon.. lol .
__________________
_______________________ My Build Pg. Threads + 93' Ranger Overlanding Build + 94' Ranger Bed Overlanding Trailer Build + 12° North Industries ~ I Support Last edited by Undrstm8ed; 08-09-2017 at 03:59 PM.
|
|
#115
08-10-2017, 08:40 PM
|
||||
|
||||
|
So tomorrow...
I and a few trail buddies will be heading out for a day trip scouting out a natural spring that oddly supports not only water all year long but supports its own trout eco system without being or have ever been stocked with trout. I'm a bit excited to see what we'll find there. On top of that, I've found a rather large overlanding group here in Las Vegas that travels all over Utah, Colorado, Arizona, Nevada, and California, early next week I hope either over some beers, worse case scenario coffee, to meet with the group and some of its coordinators and see about collaboration efforts on a couple topics. We'll see where that goes. I'll keep ya posted on the outcome as well.
__________________
_______________________ My Build Pg. Threads + 93' Ranger Overlanding Build + 94' Ranger Bed Overlanding Trailer Build + 12° North Industries ~ I Support
|
|
#116
08-15-2017, 10:46 PM
|
||||
|
||||
|
Had to make a quick trip down to SoCal today, two storage units today I had to clear them out..
 Was quite loaded up front and back.. handled the Cajon Pass well, better than I thought it would even with the manual trans..  And yup, got the extra engine and front end components. going to tear those down further and send the beams over to Solo Motorsports to have turned to match a set of their longer radius arms finally..  Now, I have to finish unloading the back So I'll see you all in the next post 
__________________
_______________________ My Build Pg. Threads + 93' Ranger Overlanding Build + 94' Ranger Bed Overlanding Trailer Build + 12° North Industries ~ I Support
|
|
#117
08-18-2017, 12:54 AM
|
||||
|
||||
|
Dont laugh, I told you all I was gonna do it soon and I meant it. So now this weekend since I got my aluminum metal sheet to mount the rear E-Panel up I'll certainly have enough to double up a small mount for this on the rear exterior of the Flip-Pac like I wanted to do for all to enjoy and the ease of use, especially while camping.
 And since I also got majority of my storage units cleared out, got one more truck load at one that still has a couple totes, my extra 4.0L engine heads and some other parts for it as well as the old spare, misc bullshit. I can at least spend this weekend tearing down these dana35 front beams and cleaning up and going through the transfer case and some other things in preparation for next week where I'm hoping that when I go get the last of my gear, I can drop them off at Solo and get that ball rolling.. I def need to search through the "fabrication" section of FRF for some resources on the frame work which is next to get here at the house. .
__________________
_______________________ My Build Pg. Threads + 93' Ranger Overlanding Build + 94' Ranger Bed Overlanding Trailer Build + 12° North Industries ~ I Support
|
|
#118
08-18-2017, 07:35 PM
|
||||
|
||||
|
I have the same bottle opener on my new rear bumper, works awesome!!
__________________
2006 Fx4 Level 2 setup for overland travel!
Youtube/Instagram - OverlandRanger https://www.youtube.com/channel/UCg4...view_as=public
|
|
#119
08-18-2017, 07:50 PM
|
||||
|
||||
|
Quote:
Also had to pick up a new type of hold down system for the Fire extinguisher mount. Seems as though the last two spur roads shook up the aluminum fasteners so I opted for some one way screws/rubber washers and remount these instead with a drop of lock-tite just in case.  Likely do it later tonight as the direct heat dissipates a little with a beer hopefully.. been a LONG week
__________________
_______________________ My Build Pg. Threads + 93' Ranger Overlanding Build + 94' Ranger Bed Overlanding Trailer Build + 12° North Industries ~ I Support Last edited by Undrstm8ed; 08-18-2017 at 07:56 PM.
|
|
#120
08-28-2017, 10:19 PM
|
||||
|
||||
|
Small update; Got my CB antenna cable in a while back and finally took the time to add it in finally. For not just my application but I thought overall design aspects this ring type connection for not only a better weatherproof connection but one that wasnt pointing down at the end of the antenna making a difficult and aesthetically irritating look.
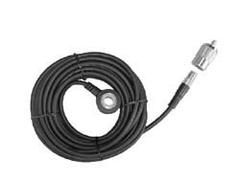 Thanks goes to Local Kelly CB's for the antenna, and Triath from Xterra forums for having a dual SWR meter handy for ease of calibrating the antenna and taking his time to come by and help.. 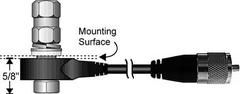
__________________
_______________________ My Build Pg. Threads + 93' Ranger Overlanding Build + 94' Ranger Bed Overlanding Trailer Build + 12° North Industries ~ I Support
|
 |
«
Previous Thread
|
Next Thread
»
| Thread Tools | Search this Thread |


|
|
 Similar Threads
|
||||
| Thread | Thread Starter | Forum | Replies | Last Post |
| Lets see your overlanding/expedition/camping rig. | qhdude | General Ford Ranger Discussion | 50 | 02-18-2017 06:59 PM |
| Undrstm8ed's Audio Build - Ground up | Undrstm8ed | Audio / Video | 2 | 10-20-2014 01:50 AM |
| 96 XLT build | Blue504life | Project Logs | 29 | 12-17-2013 09:37 AM |
| My 99 XLT Build | GoldRangerGuy | Project Logs | 9 | 01-18-2013 02:17 PM |


 |
|
|


 |
|
 |
