 |


|
#1
 06-25-2012, 07:58 PM
|
|||
|
|||
|
Okay, I've seen a few threads about fog lights being dirty and cleaning them and removing them but nothing on the actual 'how to' and whether or not its doable without buying new. It is. Im new to this type of truck and I figured it out and did it within an hour.This is a quick how-to on removing your fog lamp assembly and cleaning out the lense/interior of the fog light housing when you have rust or dirt inside the lense.
Difficulty (1 hard,5 easy): 4.5 (only because you have to be careful with the lense when seperating it from the foglight housing) This requires: -removing the bumper (step 1) -removing the valance (step 2) -removing the fog light housing/bracket (step 3) -removing the fog light lense from the housing (step 4) -cleaning the lense (step 5) -reassembly (step 6) Tools I used (should be mostly complete..i did this fast): 1. heat gun (some use an oven, i avoid that at all costs) 2. flat head screw driver (to pry lense apart) 3. socket wrench (any size, i used my 1/4") -10mm socket, 3/4in DEEP socket (the 3/4 required me to use a 3/8" adapter for the socket wrench) 4. WD40 depending on how old/corroded your bolts/nuts are (didnt use) 5. flat ended plyers (to push/pinch tabs on valance) 6. rubber mallot (to bump tabs back in, can also push with your hand) 7. cleaning agent and shop rags/towels (i had basically a windex material with me so i used that, worked fine) 8. Gloves (any work, protect your hand from the heat gun) Optional but encouraged: 9. BEER (6pack is best, but you can do this before you finish 2 beers) 10. 2nd hand to help hold the bumper (again, i didnt need it but its easier) !WARING! You can ruin your lense if you use the heat gun too much! I am not responsible for you ruining your fog light lense or housing by attempting this! You have to take your time and be patient when prying the plastic lense. !!!!!Before doing anything with your car, unhook the -NEG battery terminal, put the car in park and engage the parking brake. if you want even toss some wheelchucks behind the tires. My truck is high enough to not even need to jack it up, i used a creep and just wheeled in and out underneathe. STEP 1 (removing the bumper) 1. remove both fog lights. unlock (turning counter-clockwise) the fog light rings holding the back of the lights on. Then pull out the fog lights.I just hung these up on some engine parts so they were out of the way. 2. using your 3/4" socket, there are (4) nuts you have to remove. These are located on either side of the center of the bumper on the inside. 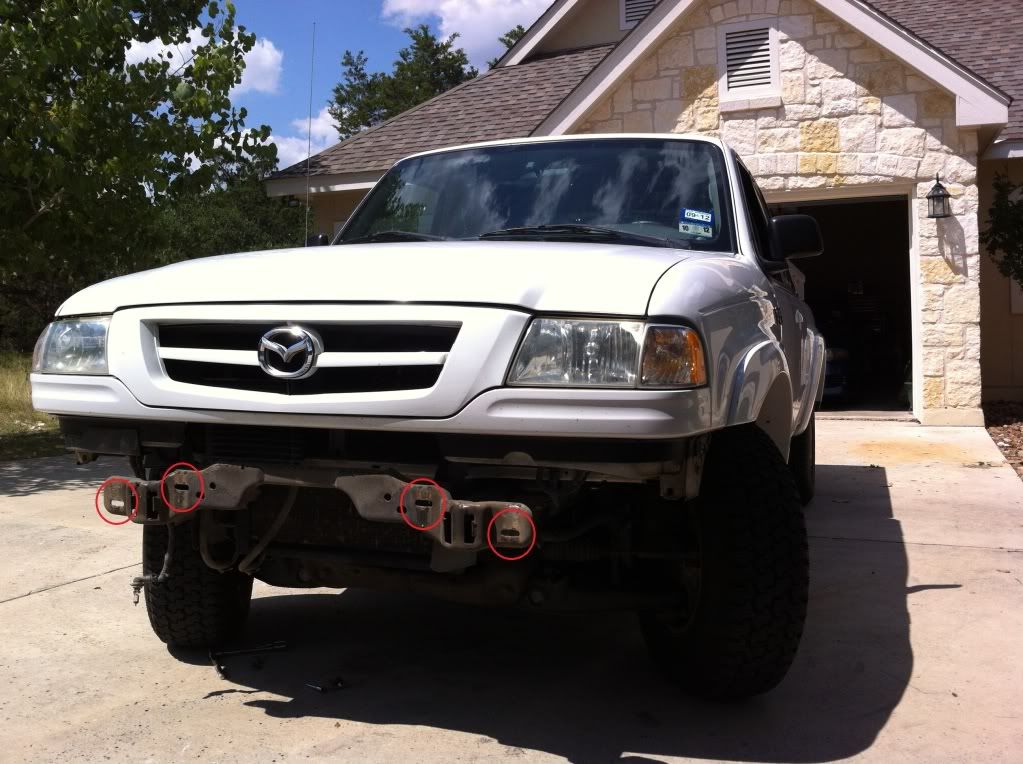 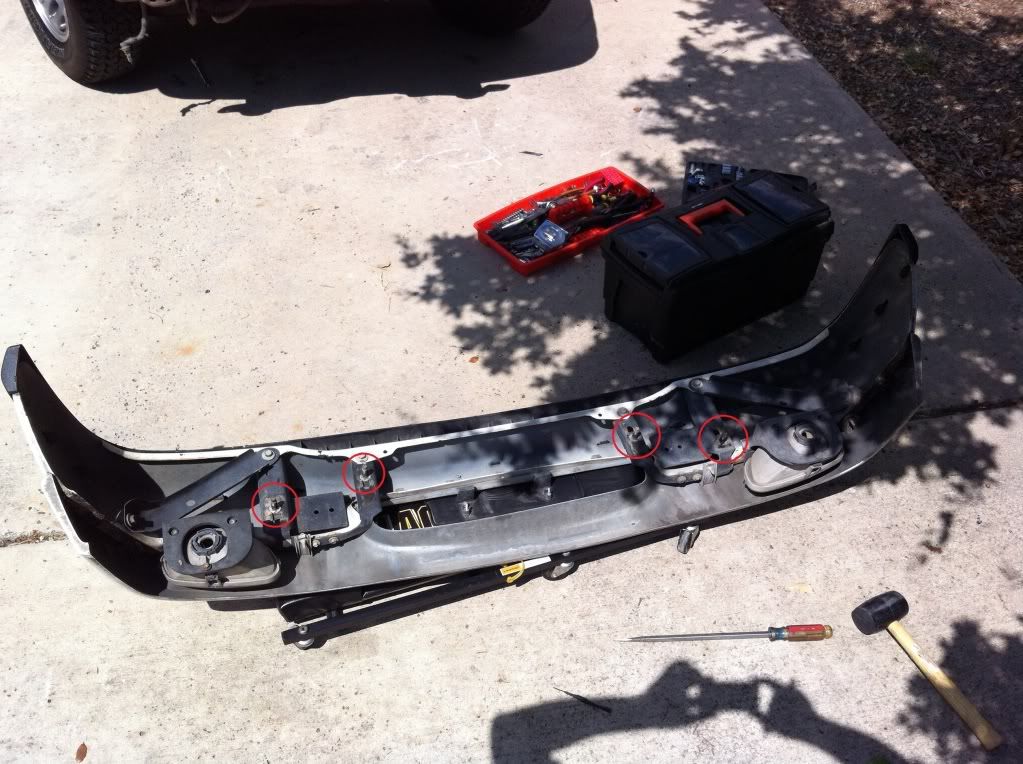 3. I removed all 4 nuts because the bumper stayed on on its own. If you cant lift the bumper or are worried about it falling on you when getting out from under it after removing the nuts, have someone hold it or leave 1 nut on loose and reach under and take it off. But i was able to do it without any issues. STEP 2 (removing the valance from the bumper) 1. using the 10mm socket, there are 3 bolts on each side (6 total circled in GREEN). take these out. 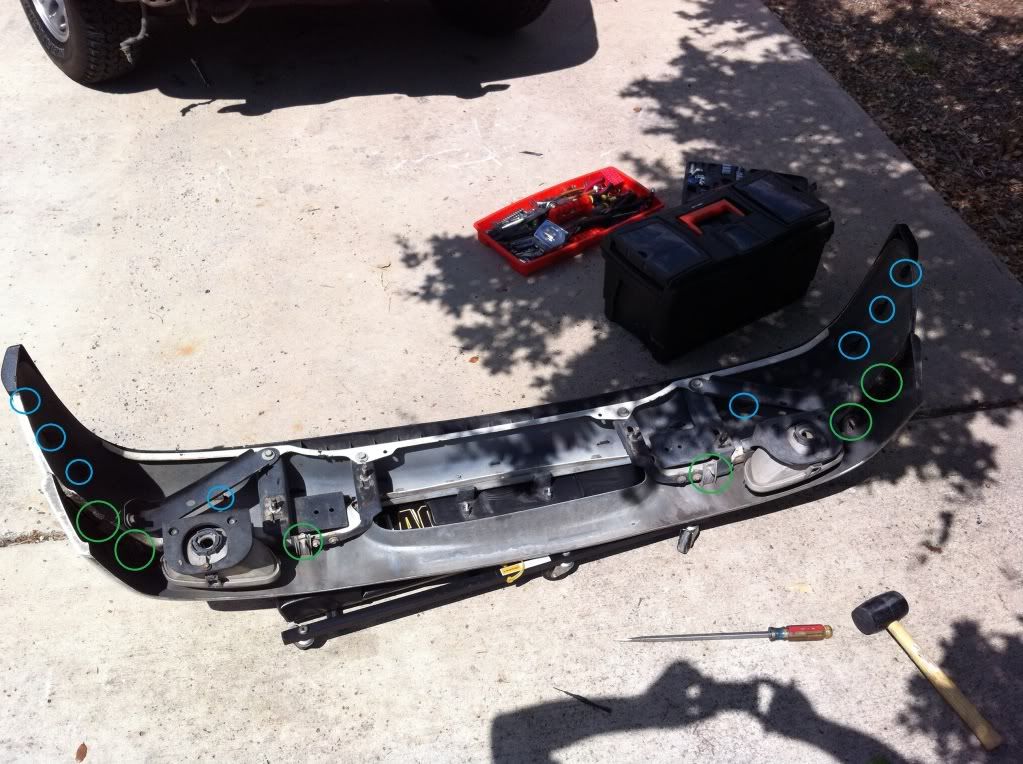 2. using a pair of flat tiped pliers, pinch the tabs enough to push them through the slots (circled in BLUE). I only removed 3 or 4 on each side, this gave me enough room to pull the valance out to get to the fog light bolts. STEP 3 (removing the fog light assembly) 1. Here you can see the valance pulled away from the bumper revealing the fog light assembly. 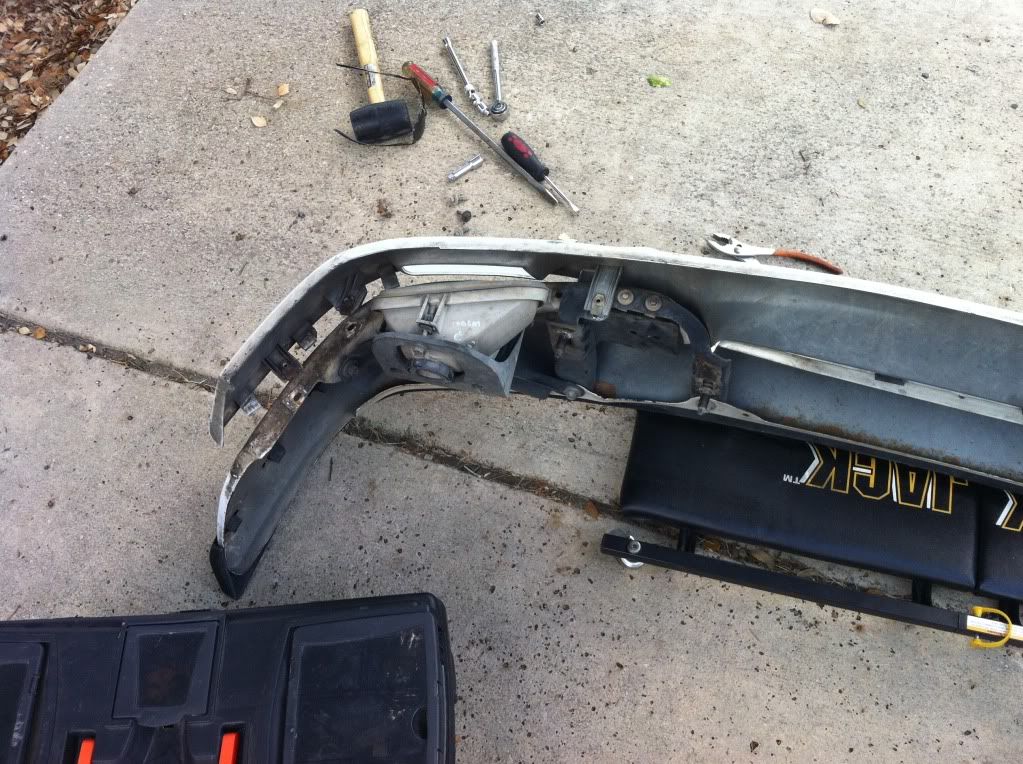 Using the 10mm socket again, remove the 3 bolts holding on the fog light assembly. 2 you see when removing the valance (red circles) and the 3rd (follow red arrow) is easily seen when looking at the foglight from directly behind it. 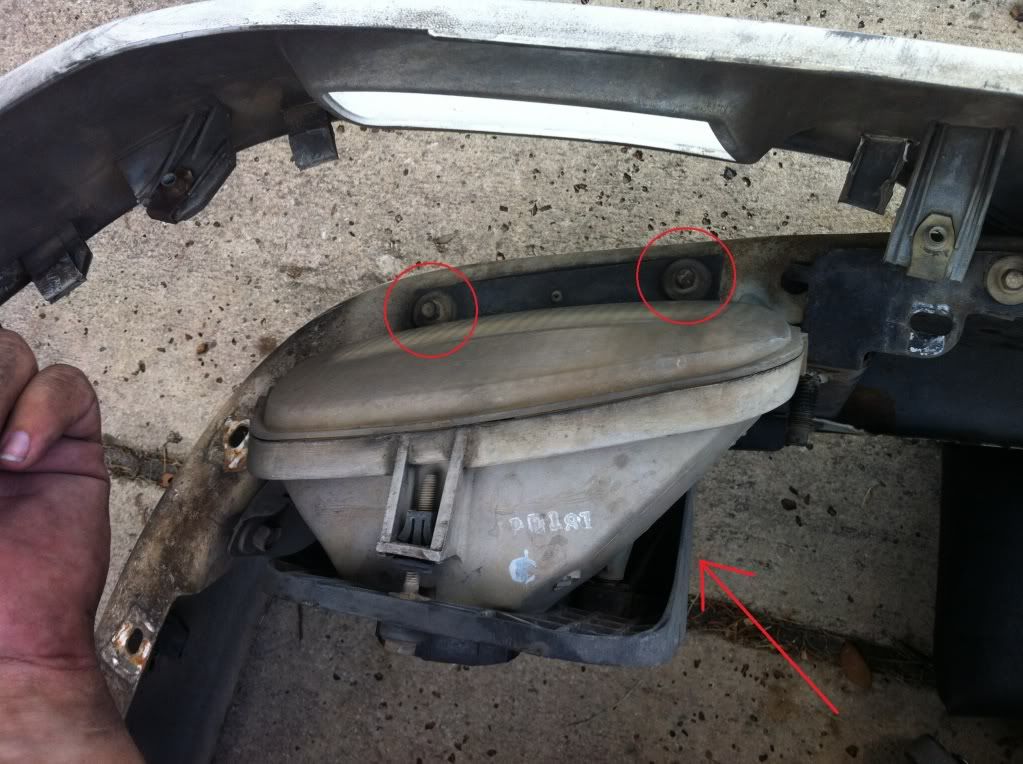  STEP 4 (removing the plastic lense from the fog light housing) 1. holding the fog light (with a glove on), use the heat gun and slowly go around the edge of the lense where it meets the housing. I did this for a few minutes, never holding the heat gun in one spot very long (It can and WILL melt your plastic lense within seconds if you hold it in one spot). Most people prefer the 'oven' method where you put it in there for a few minutes, but i find this unsafe and its harmful to your oven, not to mention it can stink almost permanently any time you put plastics in an oven. I prefer to have full control over my item and not let it sit in an oven and hope it doesnt melt. 2. as you heat up the edge, take a fairly thin but wide flat head screw driver (or anything flat) and stick the tip down between the edge of the plastic lense and the housing. 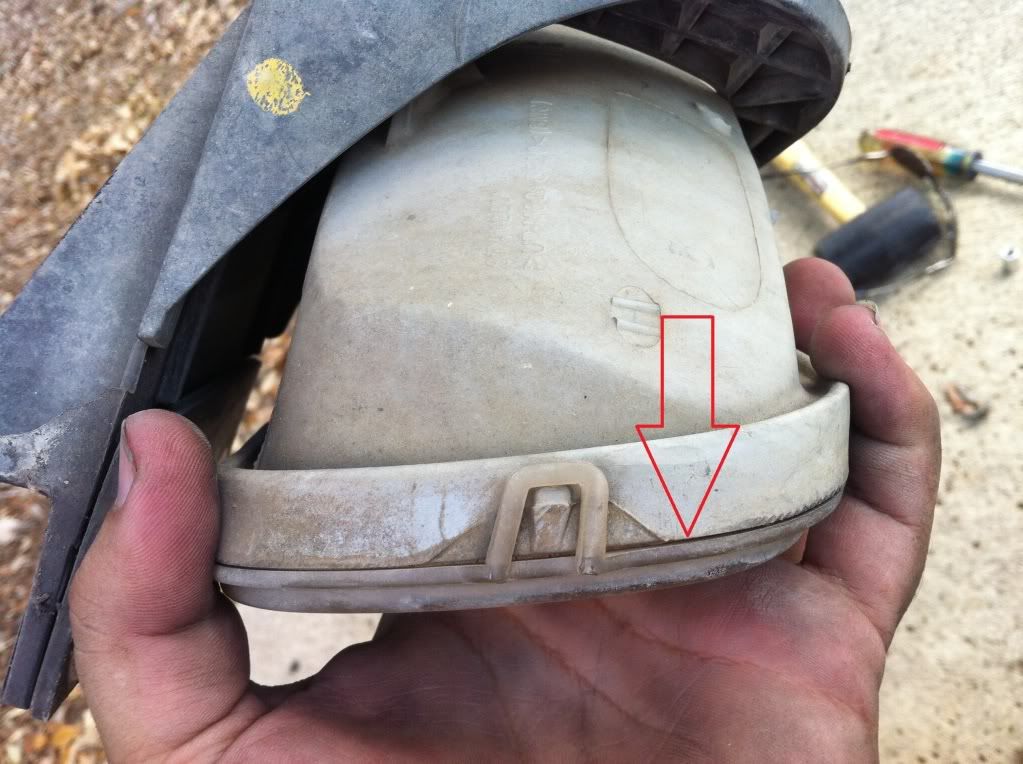 SLOWLY give the screw driver a 'twist' to seperate the plastics. You will also need to be aware of the two tabs on the lense holding down the sides. These really dont do much but dont break them off. Be gentle and they will pry up enough as you start seperating the two pieces. dont force it or do too much at once. go around the lense doing this slowly, one screw driver width or so at a time. twist, move over, twist, move over, and before you know it you can safely pull the whole thing apart. i actually remove the screw driver and go around the edge with the heat gun a few times, this makes sure it doesnt start to solidify on you and you end up cracking the plastic. It will be a sticky, gooey, gray silicone type of material in there. Dont worry, when you heat it up to put it back together it'll hold. This stuff can be heated multiple times. 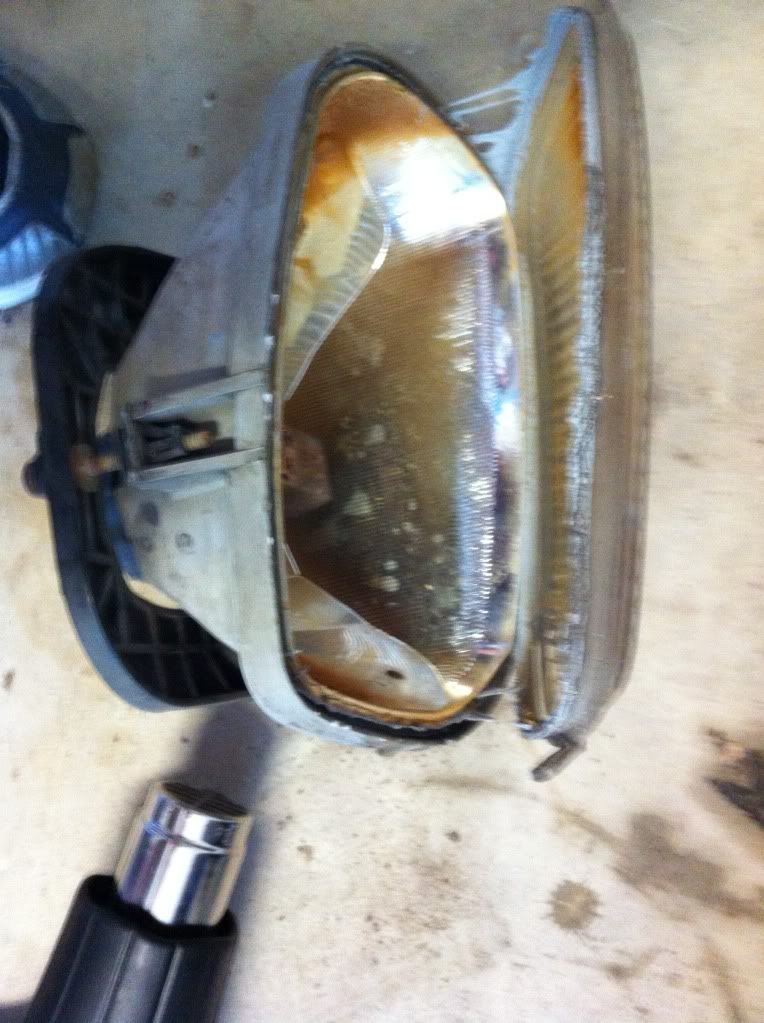 3. both sides will eventually seperate leaving you with the inner reflective backing and lense exposed. 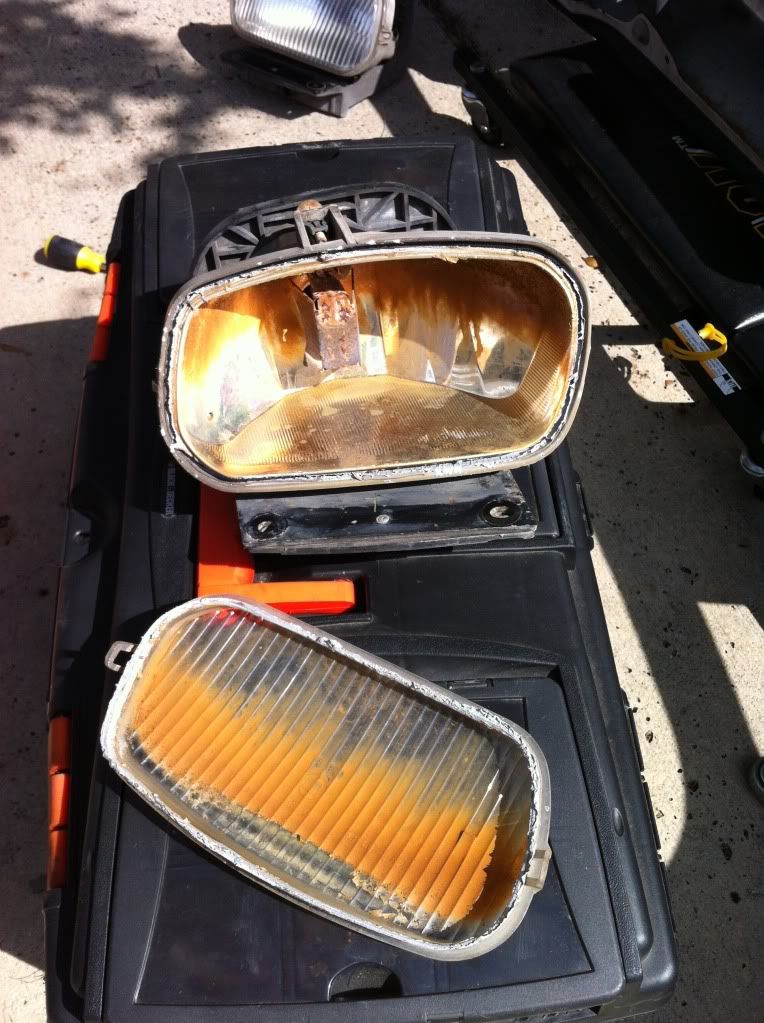 STEP 5 (cleaning the lense out) 1. using a shop towel (i use blue shop towels, tough and work great for almost anything) and some simple windex clean out the two pieces. i sprayed the windex on both surfaces and with very easy simple wipes i was able to clear out all the rustic corrosion on the lense and reflective backing. I was actually surprised at how easily this cleaned up. 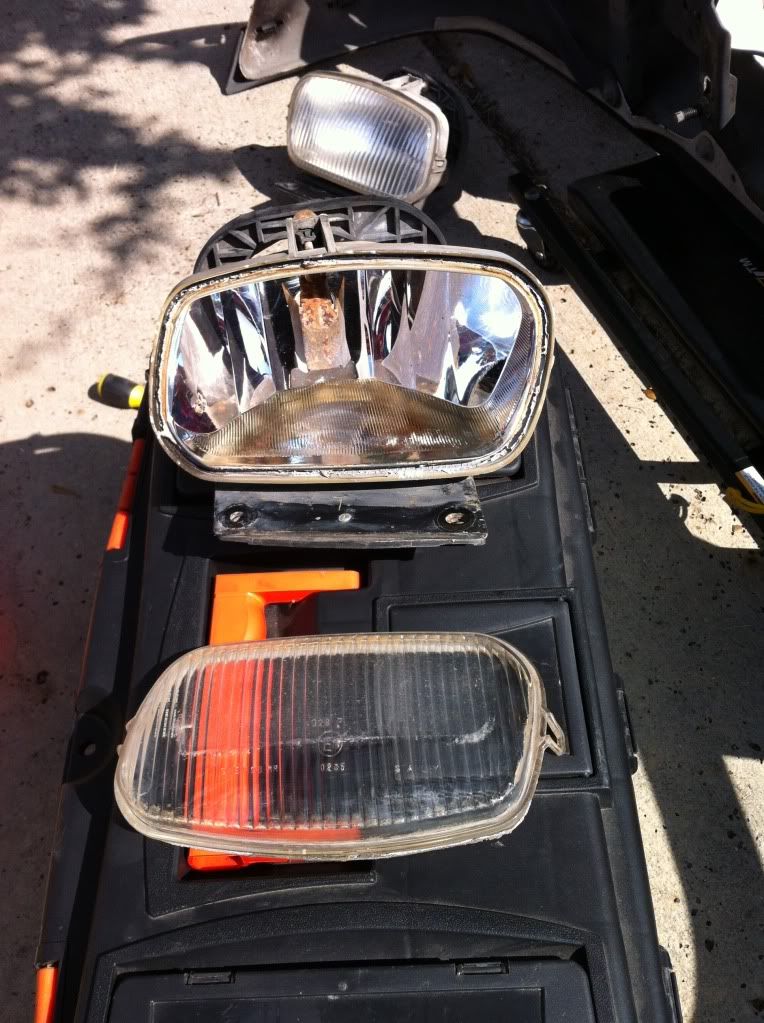 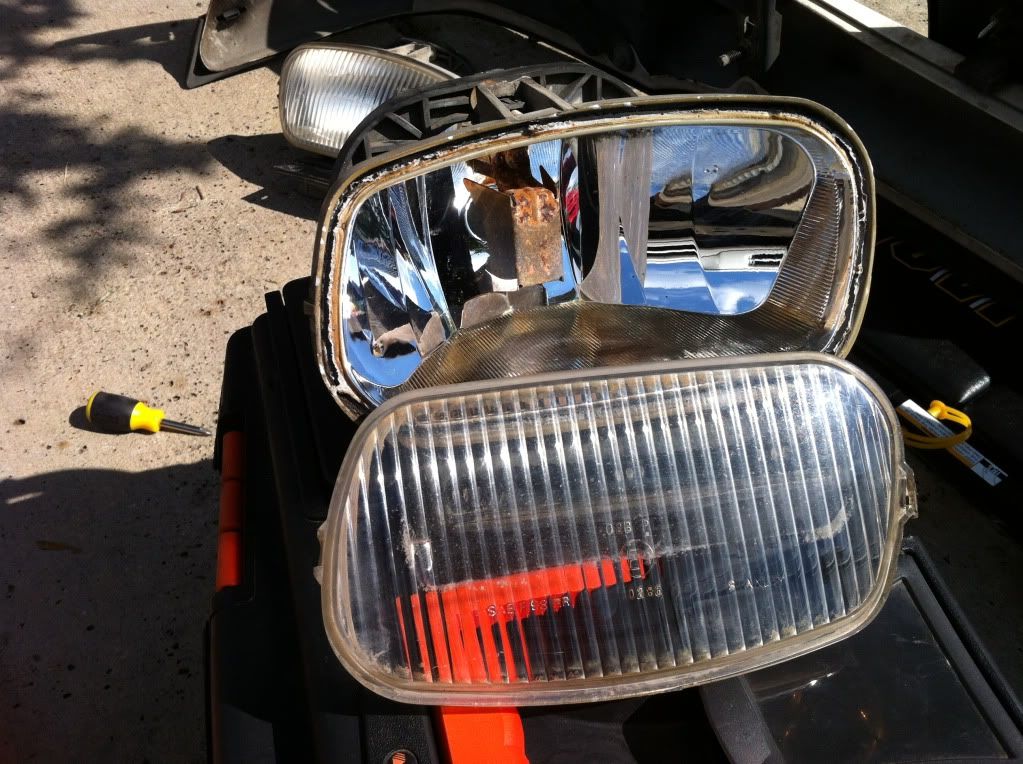 2. be sure to wipe in single wipes and go back and use a dry section to wipe down any remaining streaks or moisture left behind. You dont want to have to remove all this again because you didnt properly wipe it down. If you wanted to get REAL nit-picky, you can even resurface the outside of the lense with a headlight restoral kit (polish compound and buff wheel). But i chose to leave this as is, it is fine for me. STEP 6 (reassembly) 1. take the heat gun and slowly go around the edge of both the lense and the assembly. As you feel its heated up for about a minute or so, gently push the lense back into the groove. it'll go in most of the way without effort. Keep heating it a little at a time as you push it in. Once its in as far as you can put it, heat it up a little more and go around a section at a time and push in the edges a little harder to ensure the sealant properly seats and the lense gap is closed as much as possible. 2. put the 3 bolts back in for the fog light assembly. 3. push the tabs you pulled out for the valance, and then the 3 bolts for that as well. 4. ensure everything is tightened down and snug and mount the bumper bolts back up into the bumper support. Make sure you have it resting in there securely or have someone hold it (preferred) or it could fall on you when you crawl under. its not THAT heavy but it will hurt if it falls on you. quickly get one of the 3/4 nuts onto a bolt then from there its easy peasey. Make sure as you tighten the nuts back up you have the bumper leveled. You will notice the bumper moves to the left and right and up and down even with all nuts on (and loose). you will want a 2nd person to look at the gap all the way around the bumper or youll have to keep getting in and out and slowly tighten them down. once these are back in, its all secure and you're good to go! 5. plug the fog lights back in and lock the rear locking tab. 6. turn on your lights and appreciate an easy job well done. Some before and after shots....any questions? 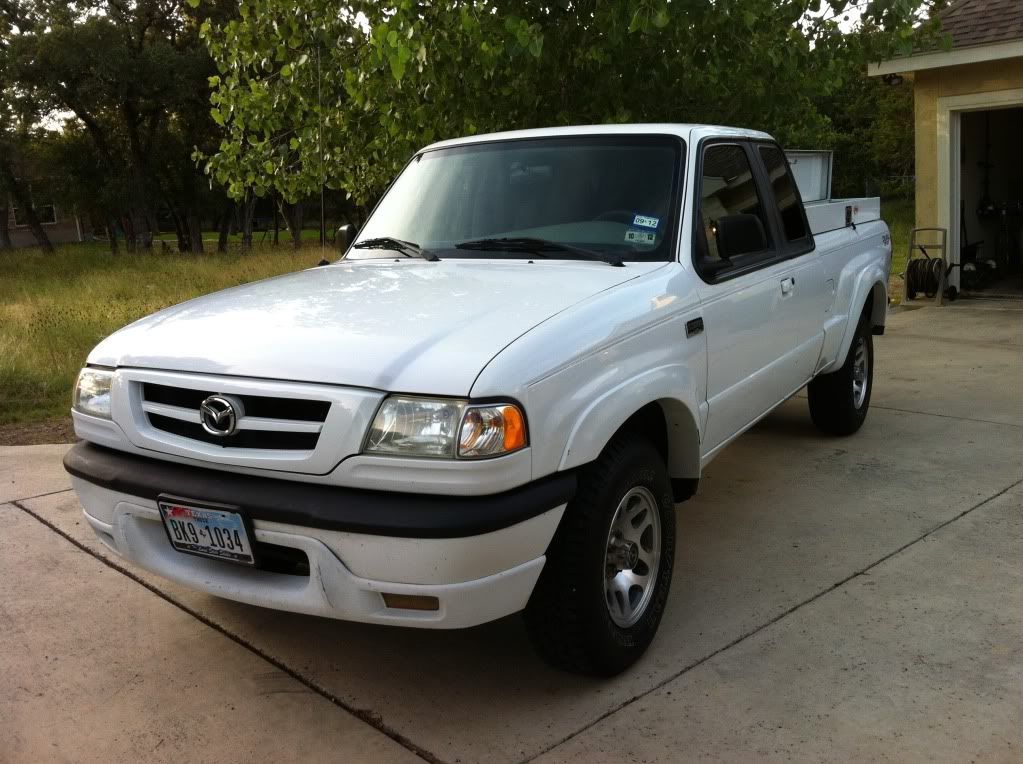 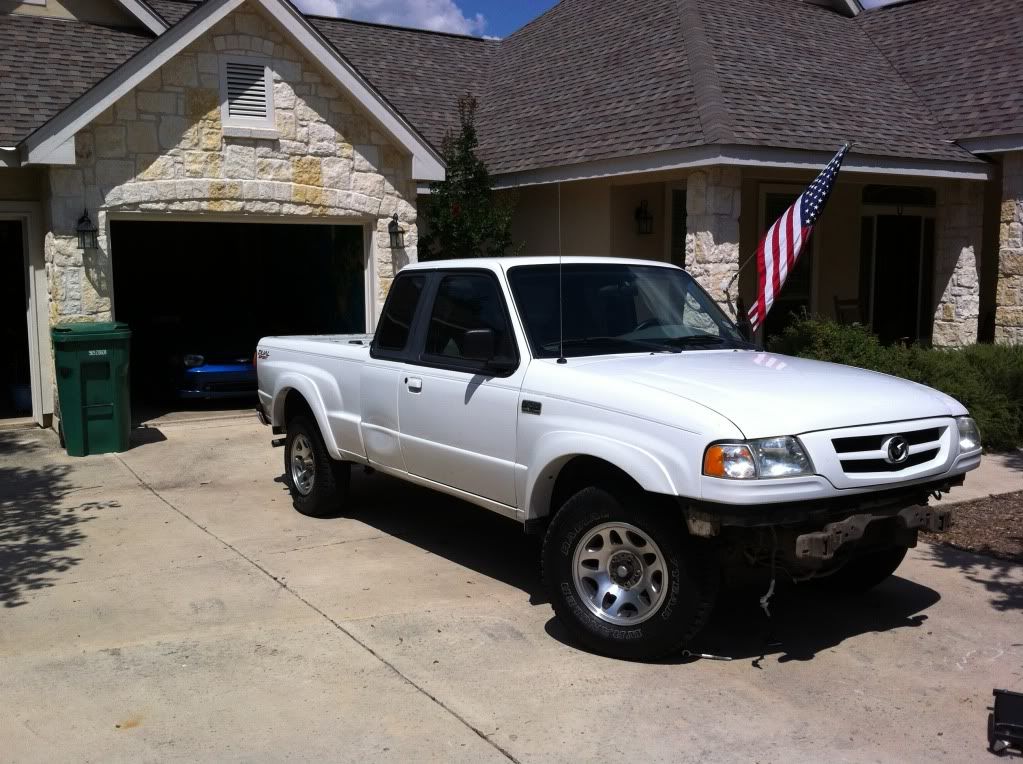 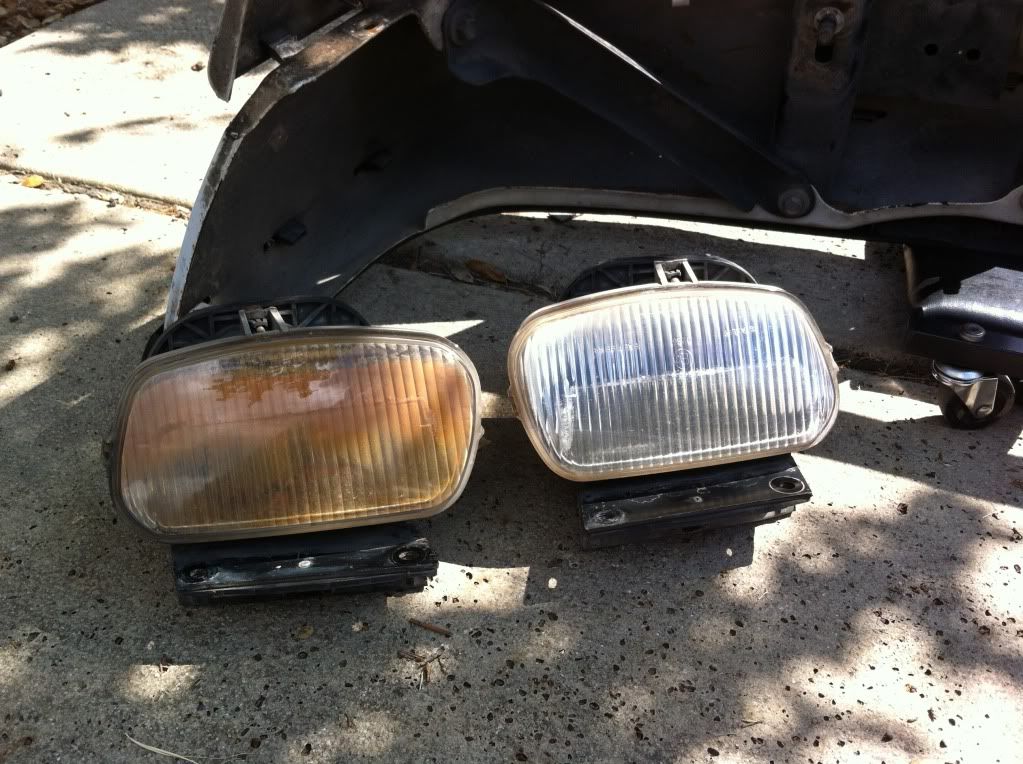 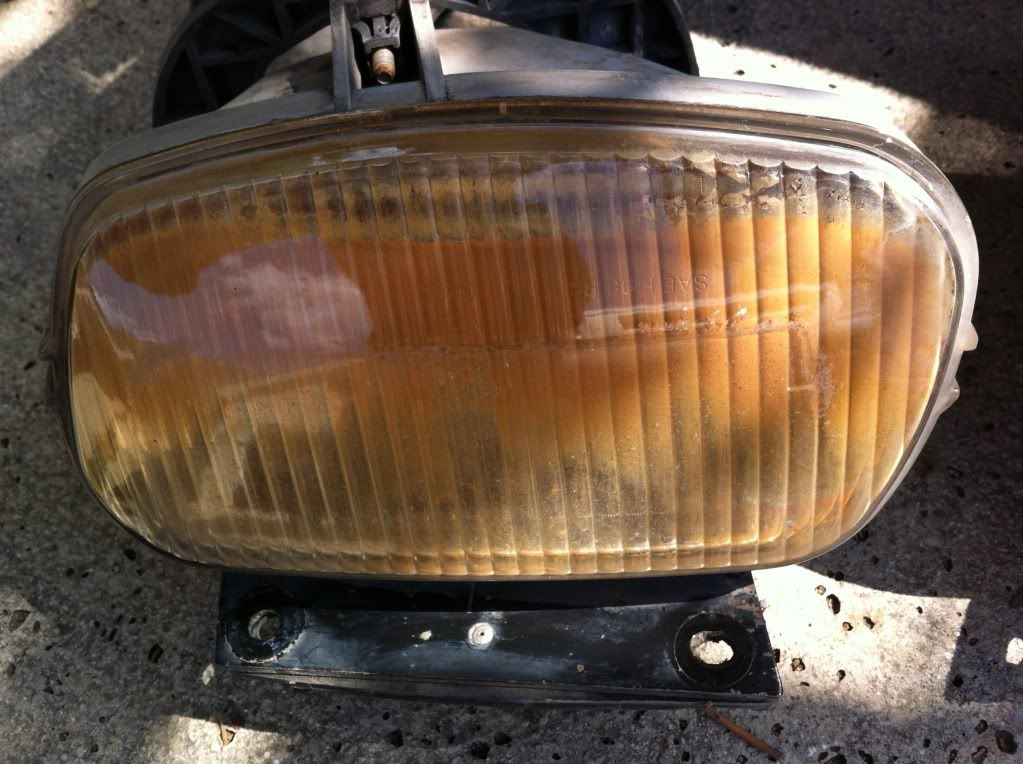 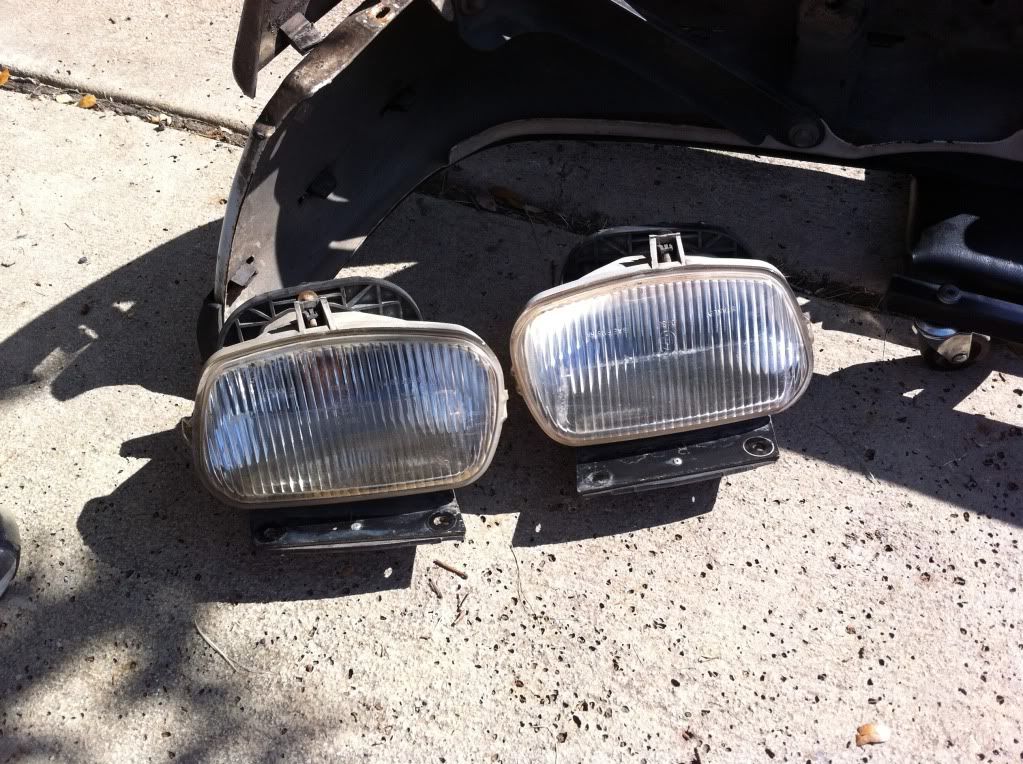 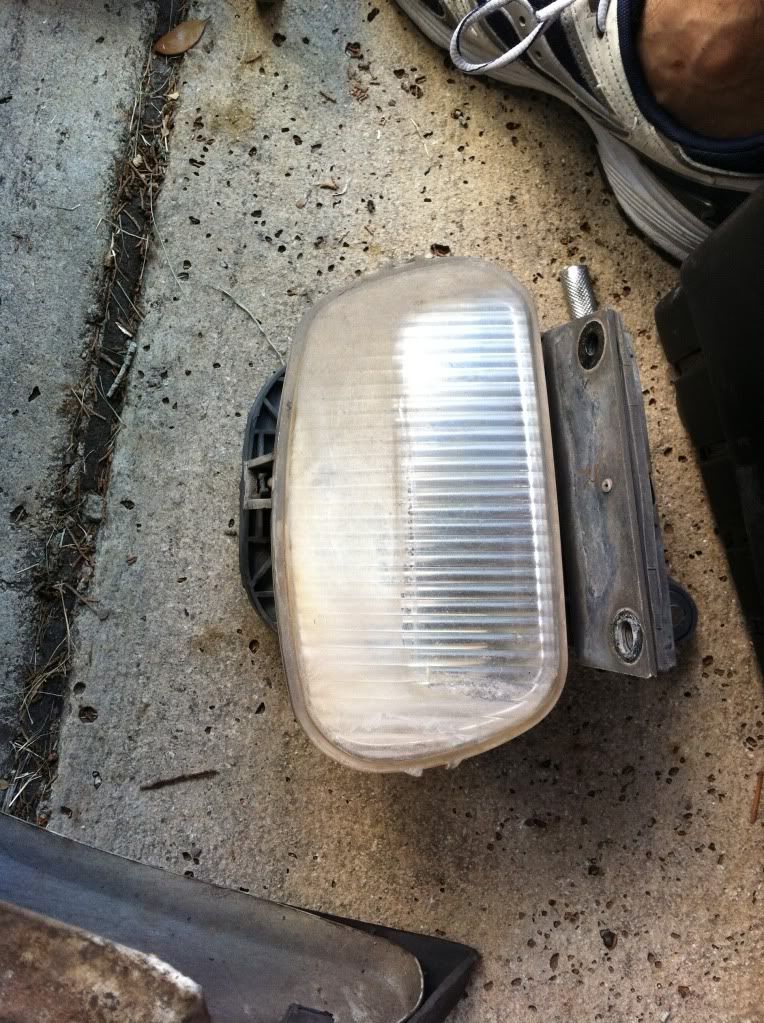 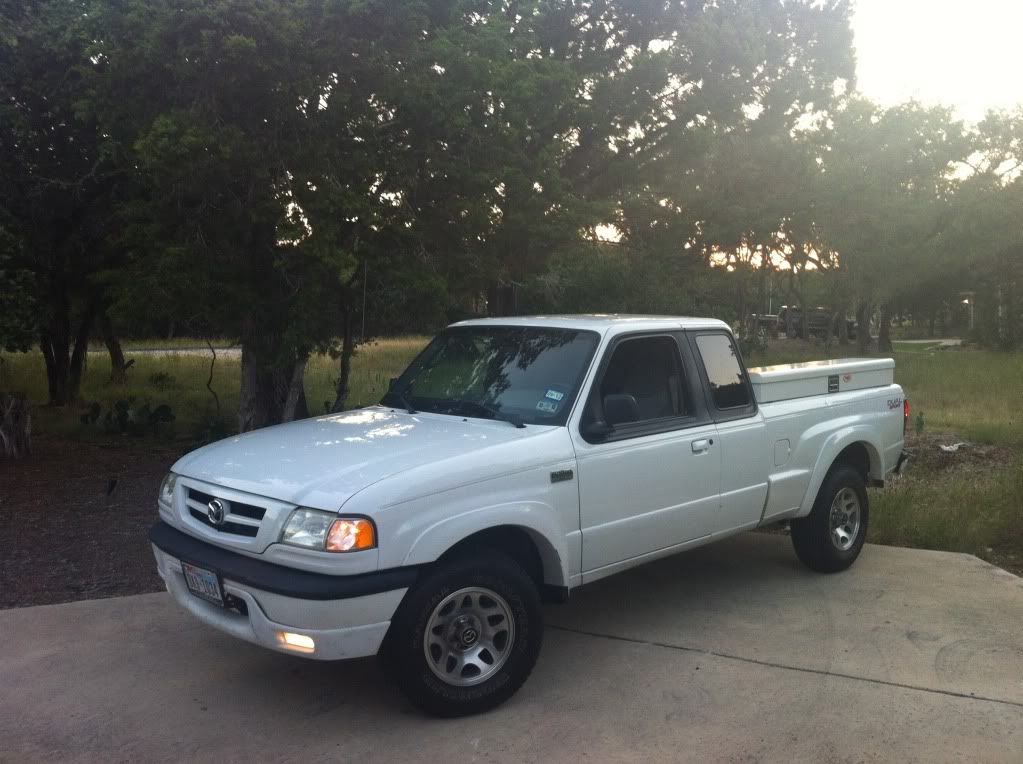 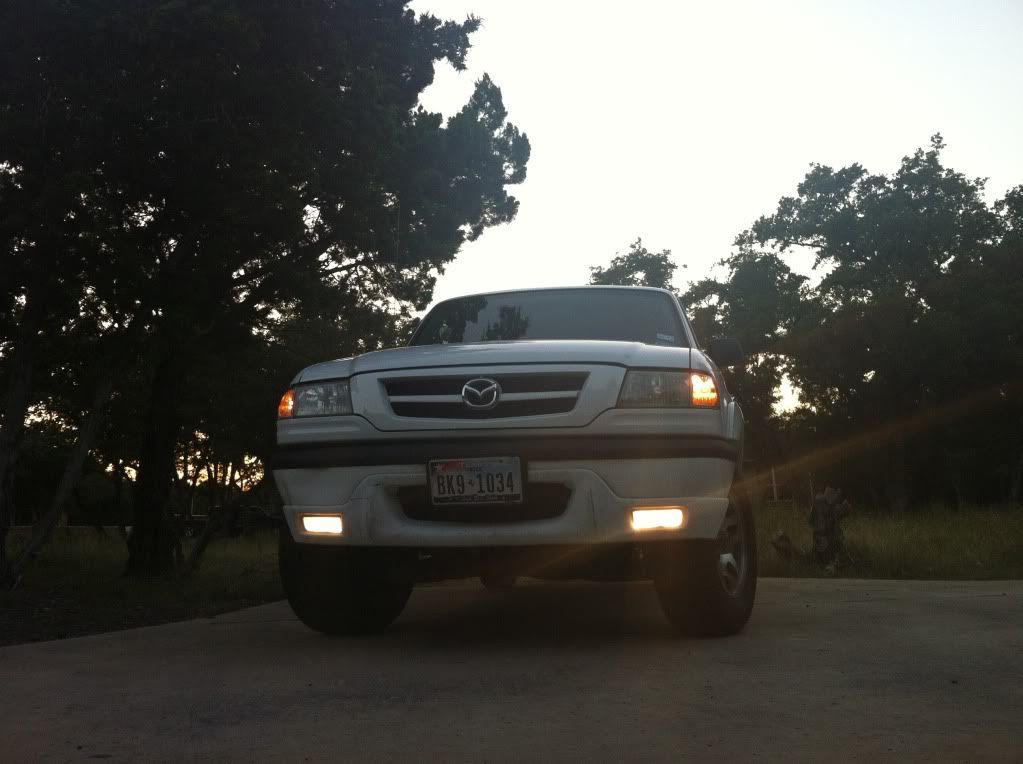  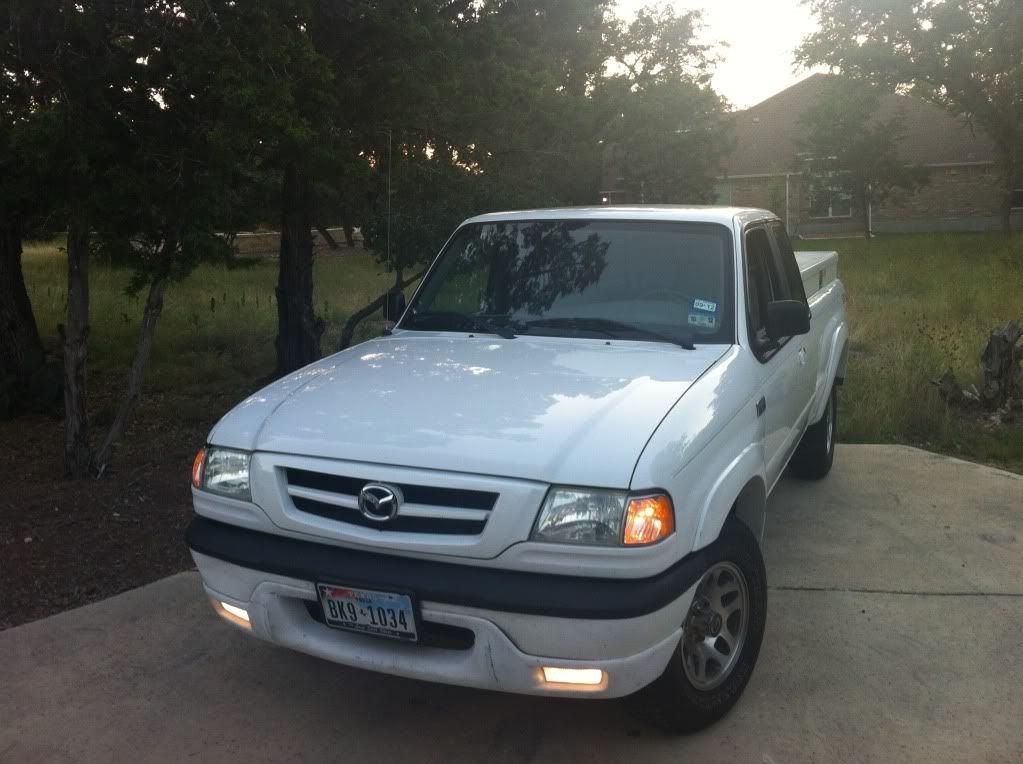
__________________
2003 Mazda B3000, auto, extended cab, dual sport, 2x4 2004 Chevy Cavalier, 2dr, supercharged, 5spd, few other mods  "100,000 sperm and you were the fastest?!" Last edited by 03B3000; 06-25-2012 at 08:29 PM. 
|

| Register and never see these ads again. | |
|
|
 |
«
Previous Thread
|
Next Thread
»
| Thread Tools | Search this Thread |


|
|
 Similar Threads
|
||||
| Thread | Thread Starter | Forum | Replies | Last Post |
| Discuss How To: Fog light mod 2001-2003 | STL | How-To Submissions | 73 | 12-04-2019 03:34 AM |
| My 1994 Mazda B3000 | pamona00 | Vehicle Videos | 3 | 07-09-2012 09:14 AM |
| Can I clean this fog light? Look at the pic and let me know! | rep818 | Exterior Tech | 12 | 11-14-2011 08:11 PM |
| Mazda B3000 owner... | MazdaDS | Introduce Yourself | 13 | 06-23-2011 01:53 AM |
| How To: 2001-2003 Fog Light Mod | STL | Exterior Guides | 0 | 03-07-2010 03:06 PM |


 |
|
|


 |
|
 |
