 |

|
|||||||


 |
|
|
Thread Tools | Search this Thread |
|
#1
 08-20-2011, 02:54 PM
|
||||
|
||||
|
This article will show you how to remove and install the head while performing a headgasket job for the 2.3L 4-cylinder motor [example vehicle is a 1994 XLT 2.3L i4].
I claim absolutely no responsibility for work done to your or anybody elses vehicle. This is simply a helping guide to complete the job. If you don't know what you're doing or aren't comfortable with these procedures, seek professional help. As I progress through this project I will be posting new pictures daily and including my write-up. My personal reason for a headgasket job is oil in the coolant - praying to god that my head/block isn't cracked or warped. - You should ALWAYS have your head checked for flatness and machined accordingly at a professional machine shop before re-installation of the head onto the block. Failure to do so can result in a poor seal between the headgasket and block/head. (this can and will cause leaks, making you do this whole job over again) 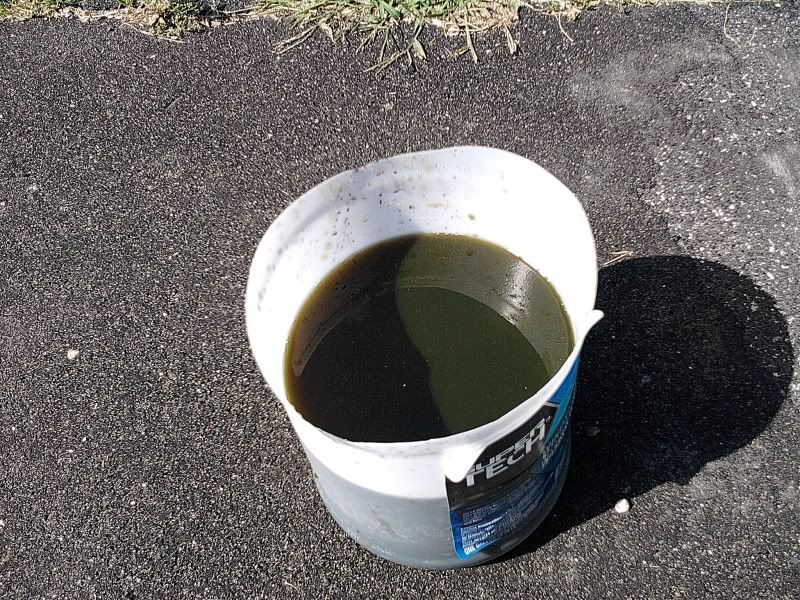 Tools [that I know of so far]: Code:
Pliers Long flathead screwdriver Medium flathead screwdriver Phillips head screw driver 5.5mm socket 7mm socket 5/32 socket 17mm socket 8mm deep socket 10mm deep socket (very important) 11mm deep socket 13mm deep socket 16mm deep socket 22mm deep socket BREAKER BAR 10mm open end wrench 13mm open end wrench 13mm racheting wrench 25-250 in-lb torque wrench 10-150 ft-lb torque wrench Extensions Swivel socket Bolt-on harmonic dampener puller Spring lock coupling tool (1/2" and 3/4") Feeler gauges Flat-edge for checking head and block Parts list: Code:
Felpro head gasket set Head bolts Water pump Water pump gasket Timing belt Timing belt tensioner Thermostat Upper radiator hose Lower radiator hose MotorCraft Platinum plugs Spark wires Oil + filter Coolant Coolant temperature sensor 60+ fluid ounces of carb cleaner Red RTV gasket maker (high temp made for water pumps!) ___________________ ~$355.00 2. Remove battery hold-down 3. Remove battery from vehicle and store in an appropriate place. 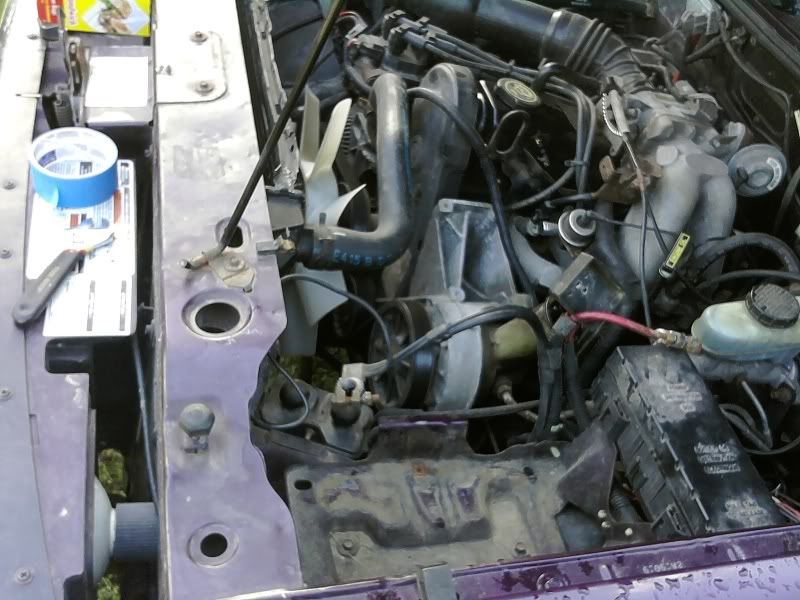 4. Remove two flathead screws from airbox. 5. Remove and label both vacuum lines attached to airbox cover 6. Remove clamp from throttle body holding the airbox tube in place 7. Remove top portion of airbox and set aside.  8. Remove bracket from #4 exhaust cylinder (13mm socket) 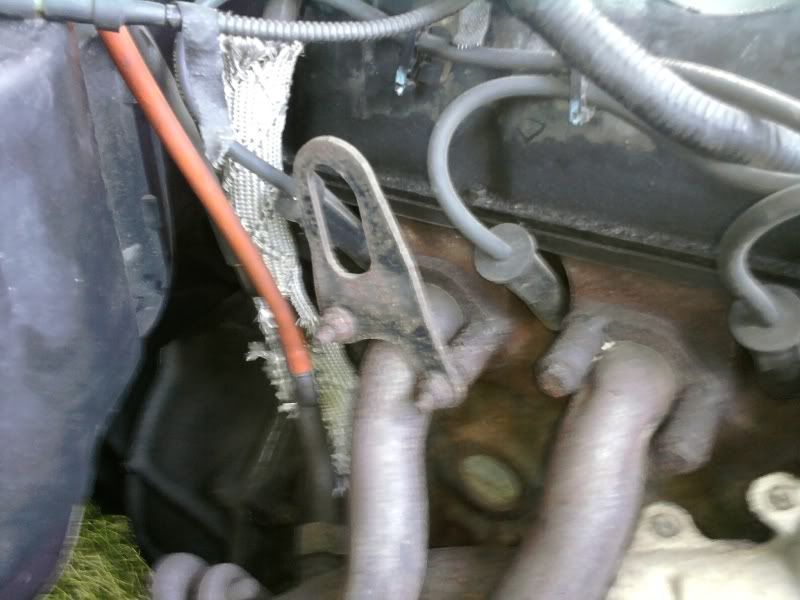 9. Unplug all spark plug wires (FROM ENGINE SIDE ONLY), label the wires driver or passenger side, depending on which coil they are attached to. 10. Unplug connectors from coil packs 11. Remove both coil packs (7mm socket [I believe]) with wires attached and place them somewhere dry. 12. Remove the coil pack bracket (13mm I think) 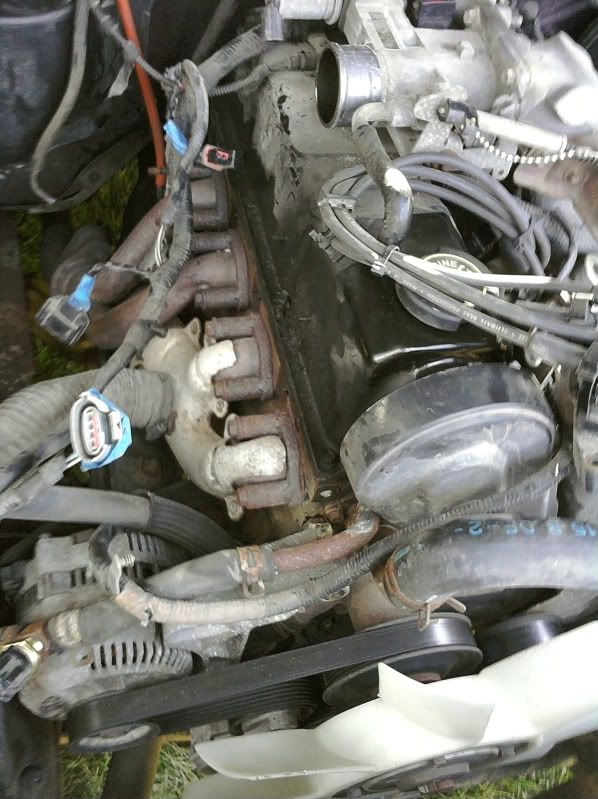 13. Remove throttle cable and cruise cable linkage from throttle body arm (this just pops off - you might want to lightly pry on the clip inside with a flathead) 14. Remove two throttle cable bracket bolts (10mm) 15. Disconnect all wiring from the throttle body and remove the four (10mm) bolts that hold the throttle body to the upper intake manifold. Remove throttle body from vehicle. 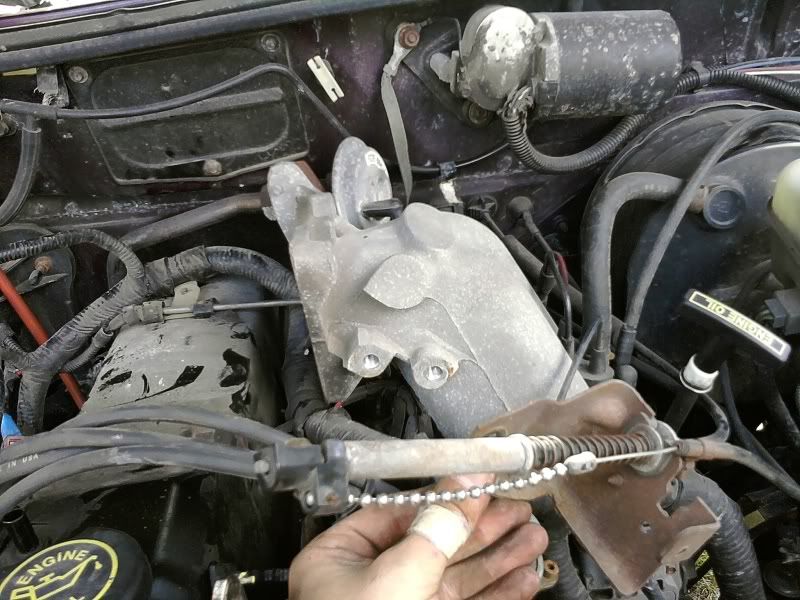 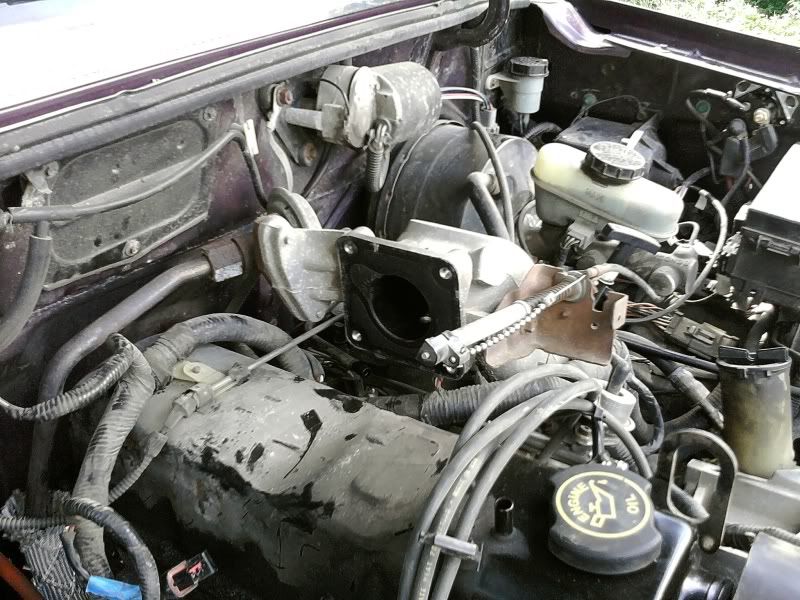 16. Remove bolts holding the upper intake manifold (10mm - make sure you have a deep socket for this one) 17. Remove the bolts attaching the EGR to the upper intake manifold (10mm) 18. Remove all vac lines from intake and label accordingly. 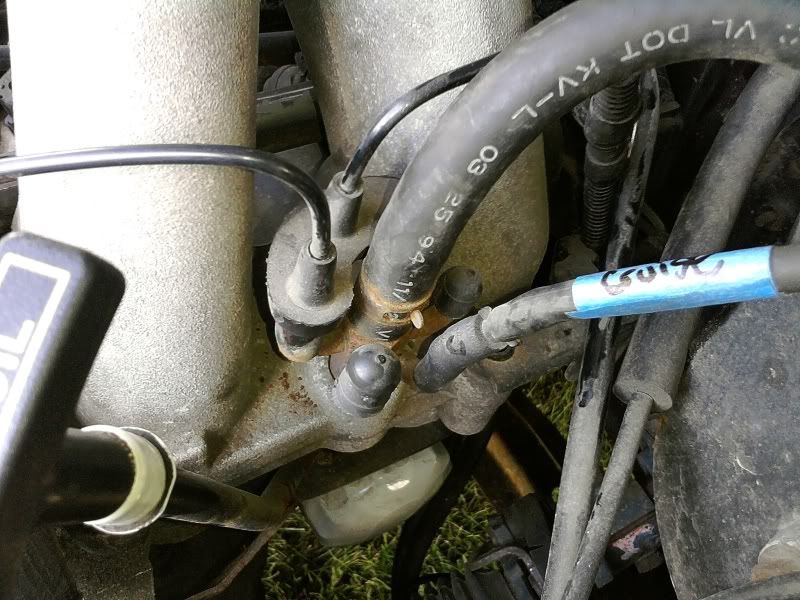  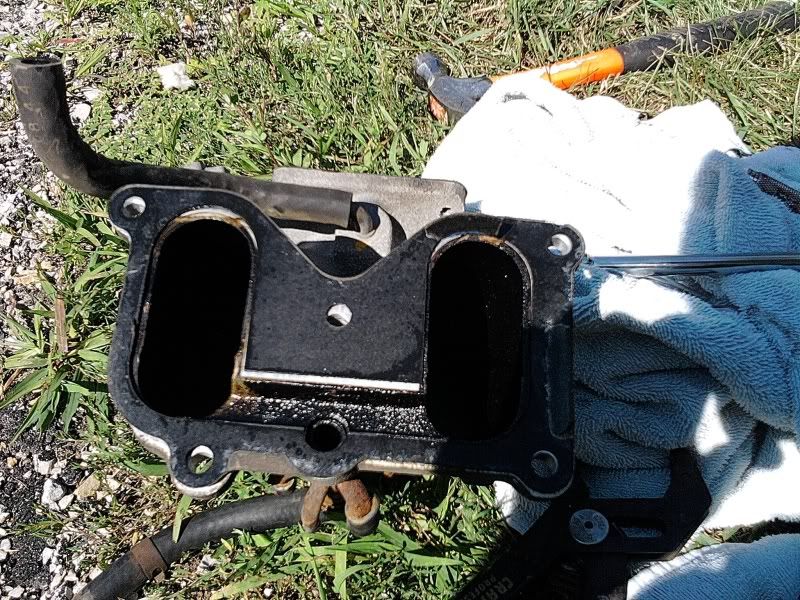 19. Disconnect fuel injector wiring (this might be a good time to measure the resistance of each injector, or once you get the lower intake off the vehicle - personal preference really)  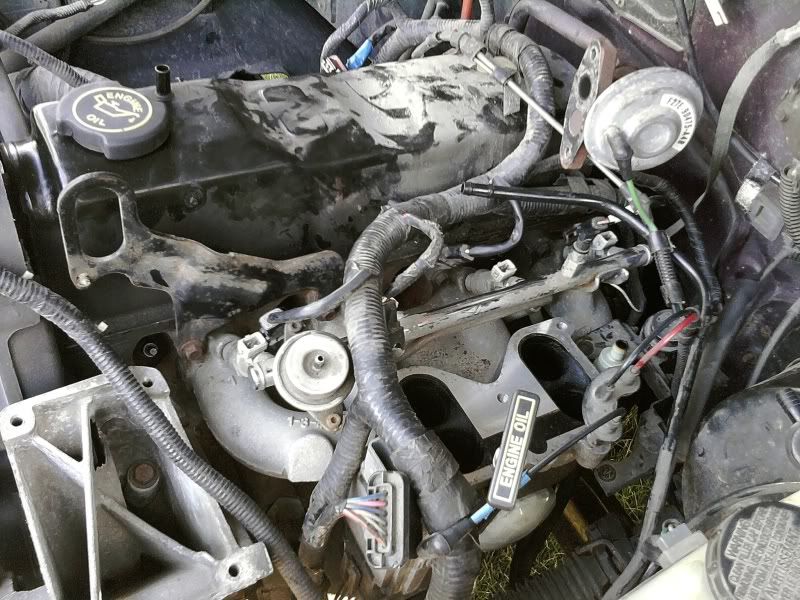 20. Remove upper and lower radiator hoses (flathead) and remove the two radiator mounting bolts (10mm) - Remove radiator and flush with garden hose. - I also removed the front grill and chrome trim to make the job easier later on. This only requires removing the phillips trim screws, then the screws holding on the front grill. 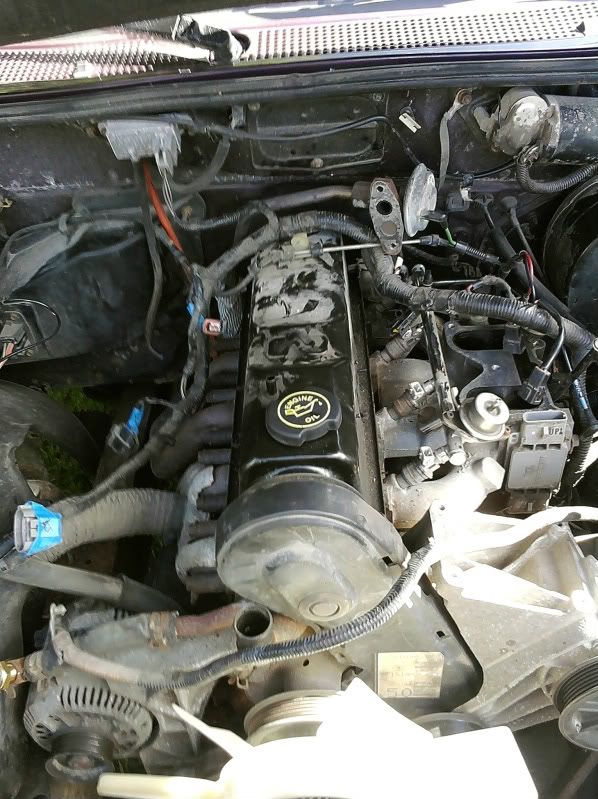  21. Remove four (10mm) bolts holding the fan and fan clutch assembly. - Remove fan and clutch assembly 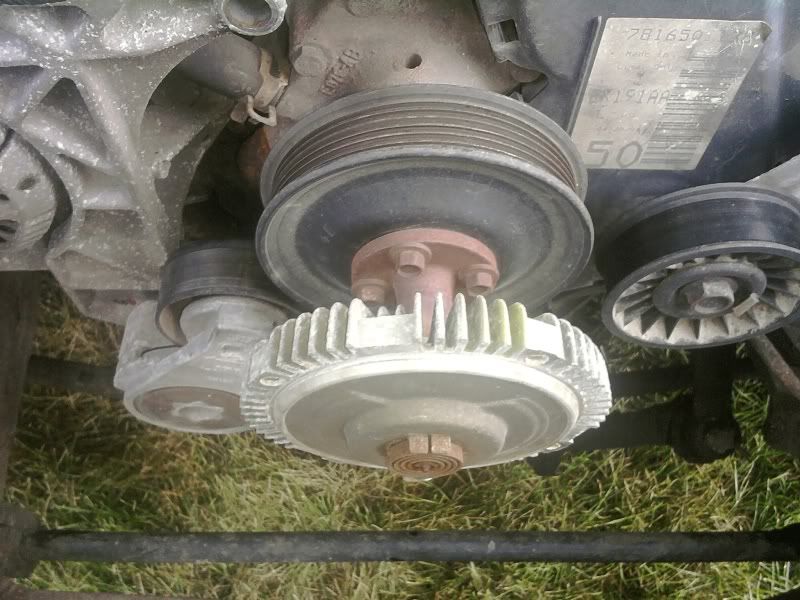 22. Remove four (10mm) bolts holding the water pump pulley. - I used a screwdriver between one of the bolt heads and the middle shaft as leverage as I was loosening the bolts with an open end 10mm wrench - Remove water pump pulley and shaft.  Remove the two hoses going into the water pump. Remove three bolts securing water pump to motor and remove old pump 23. Whenever you get tired of wrenching, or there are too many mosquitoes out to continue, take your throttle body and intake manifold inside and begin the next step. 24. Remove the electronics from the throttle body (two phillips screws and two mounting studs (idk the metric size, all I had was SAE in my basement.. They're small though). - Remove any gasket material that is left over from the IAC, TPS, throttle body gasket, etc. - This will be messy, so pick a good place to do it. I did it in a shower we never use. Make sure you have somewhere that is properly ventilated with no open flames or bulbs! Do not breathe the fumes!!! Shake up one of your cans of carb cleaner and thoroughly spray out the throttle body (all passages, the throttle plate, (I did everything except the EGR, because I hope that clogs haha). Use paper towel to help with this process. It's easier to wipe away carbon while it's still wet with cleaner (this stuff dries pretty fast). Once the throttle body is cleaned to your satisfaction, move on to the next step. 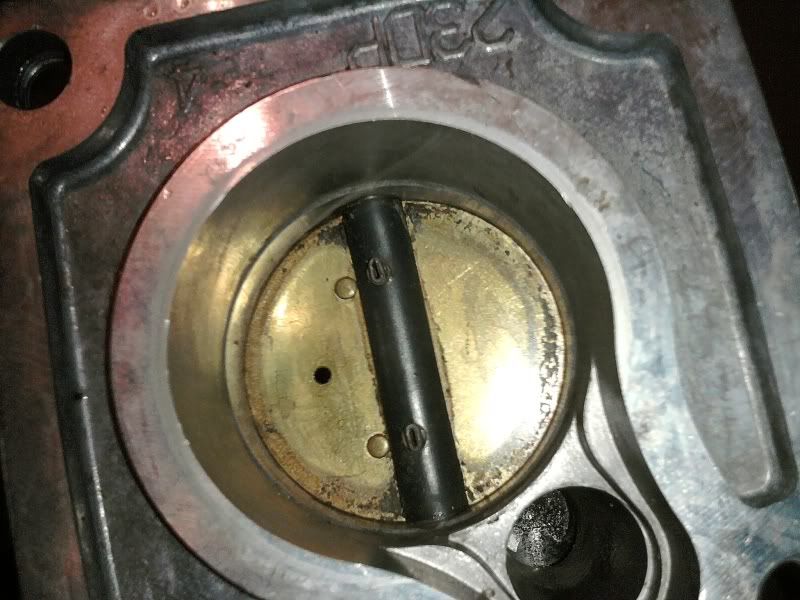  25. Do the same as step 25 (there are no electronics to remove) on the upper intake manifold. If you have enough carb cleaner, you should be able to get the inside of this squeaky clean! (I ran out just shy of getting this as clean as I wanted - between steps 24 and 25 I used 30oz of carb cleaner). Wipe everything down to get as much carbon out as you can, then move on to the next step. 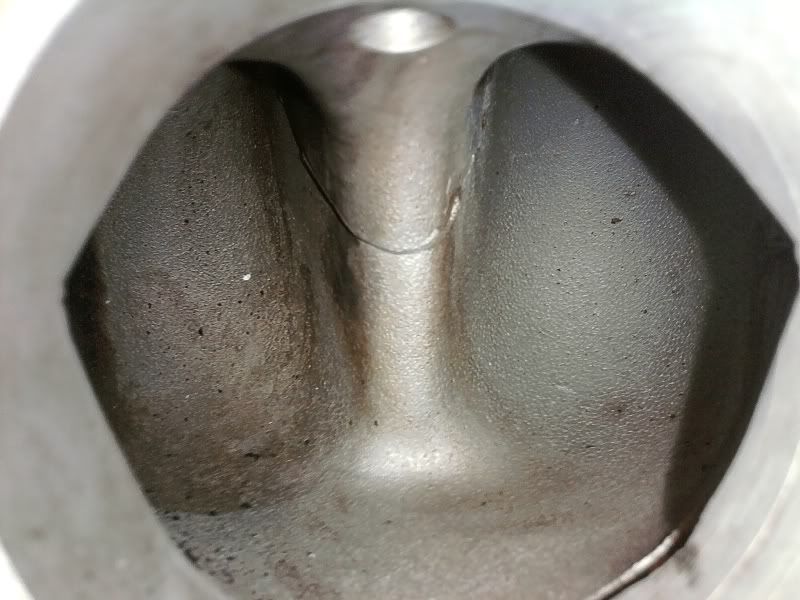 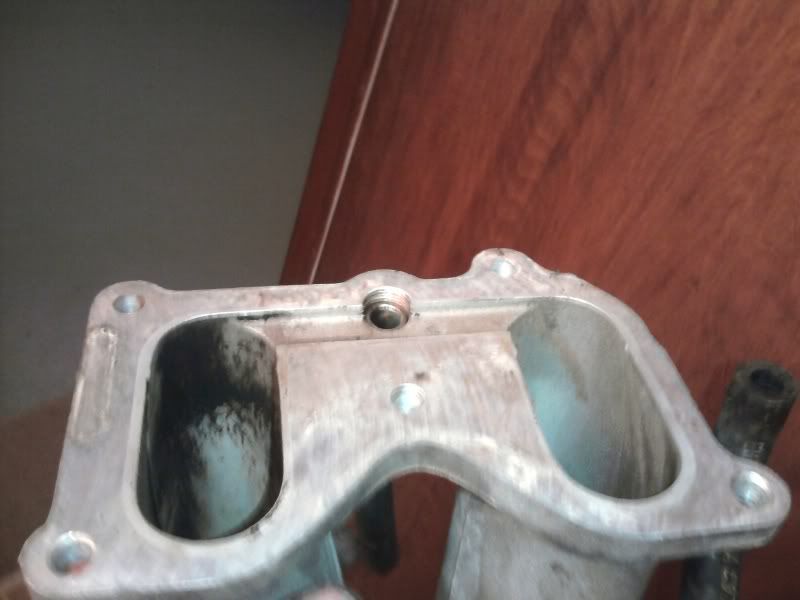 26. In this step we are going to be cleaning the mating surfaces of the throttle body and upper intake manifold. IMHO, this is vital to a proper seal with new gaskets. I used some fine grit sandpaper and cleaned up every mating surface on both the upper intake manifold and the throttle body. This includes: IAC TPS Throttle body mounting surface (on manifold and TB) Mating area of the upper manifold to the lower manifold. Just make sure you remove all old gasket material and have a smooth surface for your new gaskets to seal against. Blow off the inside and outside of the parts with compressed air, or your lungs, but make sure you are wearing safety glasses as these are very fine particles of metal and sandpaper that will be blowing everywhere. Make sure you clean up the surfaces that you need to on the sensors you removed as well before re-installation of new gaskets!!! 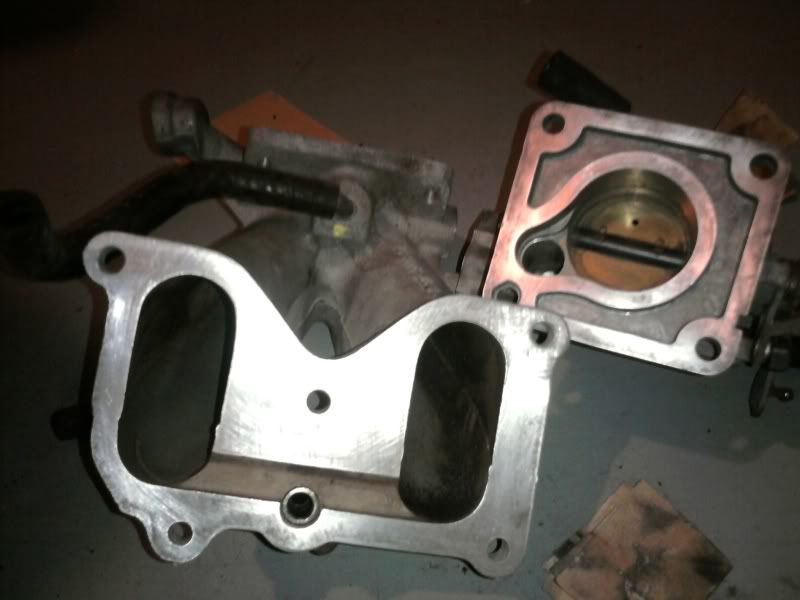 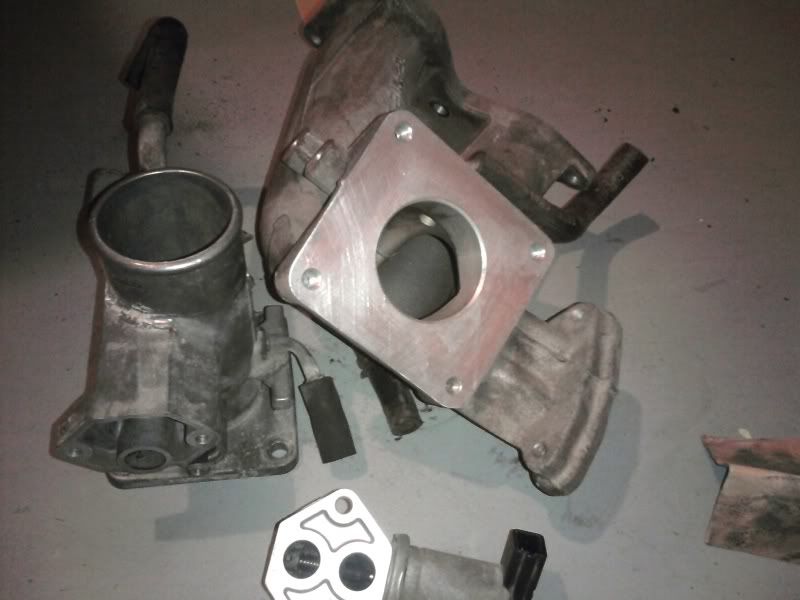 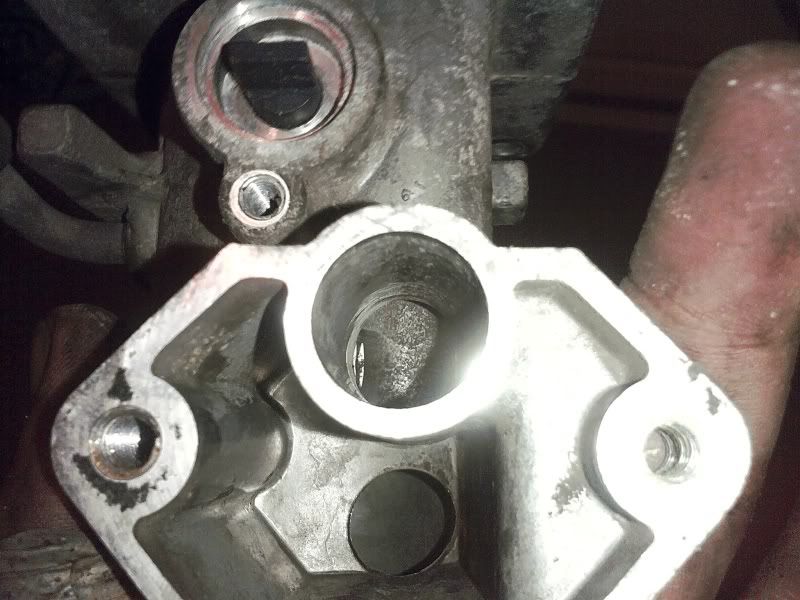 27. Remove exhaust manifold bolts that are securing the manifold to the head. 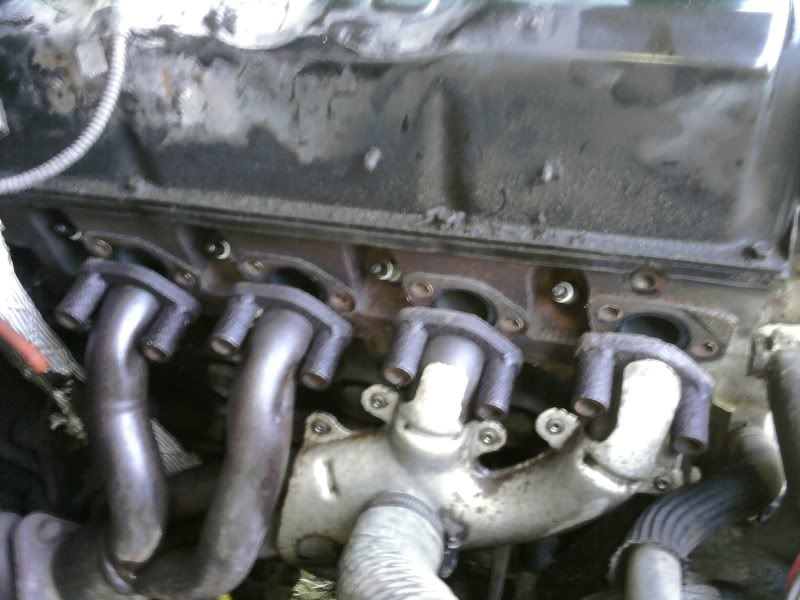
__________________
2000 Ford Ranger XL 2.5L 5-speed RWD 3.73 open - 170,000+ miles Buggman LED 3BL/CARGO, Buggman Stang Dome LED conversion, LED Brake Light conversion, Line-X O.T.R., Air silencer removed 2.3L Headgasket/TIMING/Water Pump replacement guide Last edited by 94mtx; 09-26-2011 at 05:07 PM. 
|

| Register and never see these ads again. | |
|
|
|
#2
08-20-2011, 08:02 PM
|
||||
|
||||
|
28. Remove the lower intake manifold bolts. Some are hard to get at... You will need a 10mm, extension, and an 11mm socket (this one's for a nut that is holding a ground wire onto the rear stud on the #4 cylinder.
(SPECIAL TOOL TIME!) You need to use your spring lock coupling tool to disconnect the two fuel lines connected to the fuel rail. Insert your tool into the side of the coupling that you can see the springs on, push in the tool, (might be a click, might not), and pull the two lines apart... You might have to wiggle the pieces and work them a little bit to get them apart as they have been seated for YEARS. - Remove the lower intake manifold. 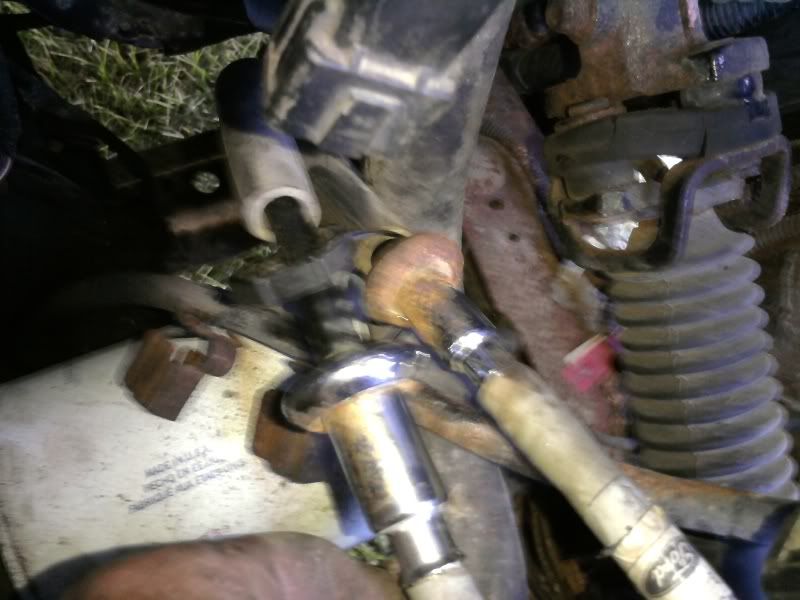 29. Properly align the crankshaft pulley and camshaft pulley with proper (TOP DEAD CENTER) timing marks - use a socket wrench to turn the motor until the notches all line up as they should. 30. Remove spark plugs (8) with a 16mm socket and extension.  31. Using a breaker bar and your socket, prop the breaker bar against the bottom side of the frame on the passenger side, socket attached to the center bolt on the crankshaft pulley. - Reconnect the battery (positive then negative) - Car in neutral, parking break on, crank the motor in a short burst a few times to break the center bolt on the crankshaft pulley free. - Disconnect battery and remove center bolt on the pulley Using a harmonic dampener puller with supplied bolts, remove the crankshaft pulley (for the center, use a supplied bolt that is smaller in diameter than the original crank pulley bolt, but just a bit longer than the original one). - Check to make sure all of your timing marks still align. The notch on the crank pulley should be at 12 o-clock. #1 piston (one closest to the front of the motor) should be in the TDC position. Check this using a flashlight looking into the spark plug holes on the #1 piston. 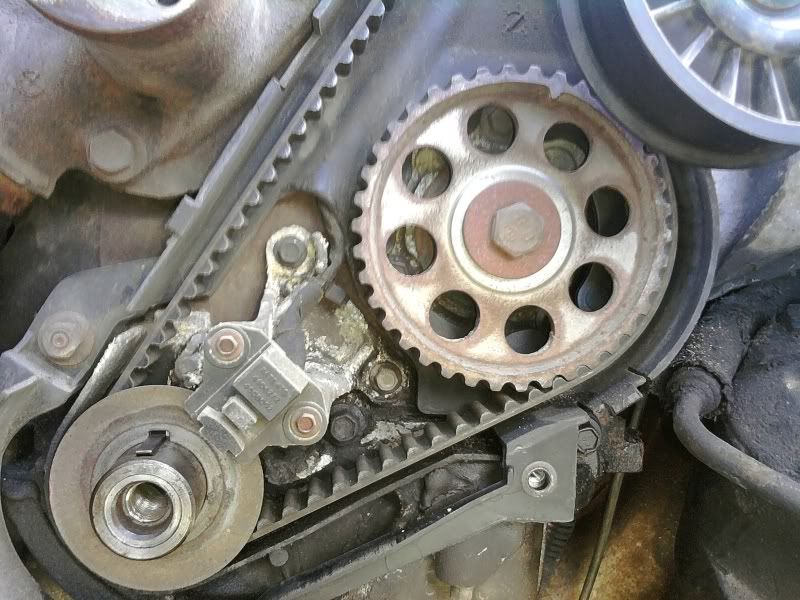 32. Remove valve cover bolts (8mm socket + extension) - remove valve cover 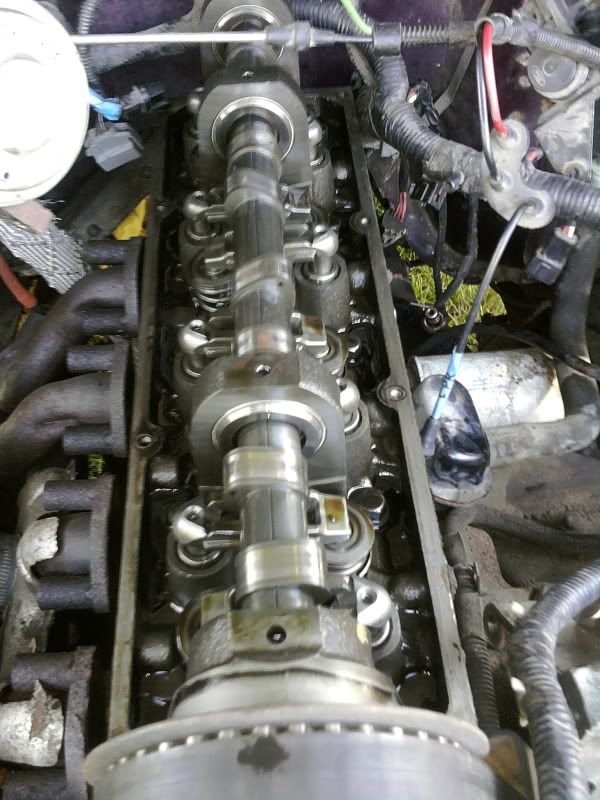 33. Remove the thermostat housing bolts (10mm) - remove thermostat housing 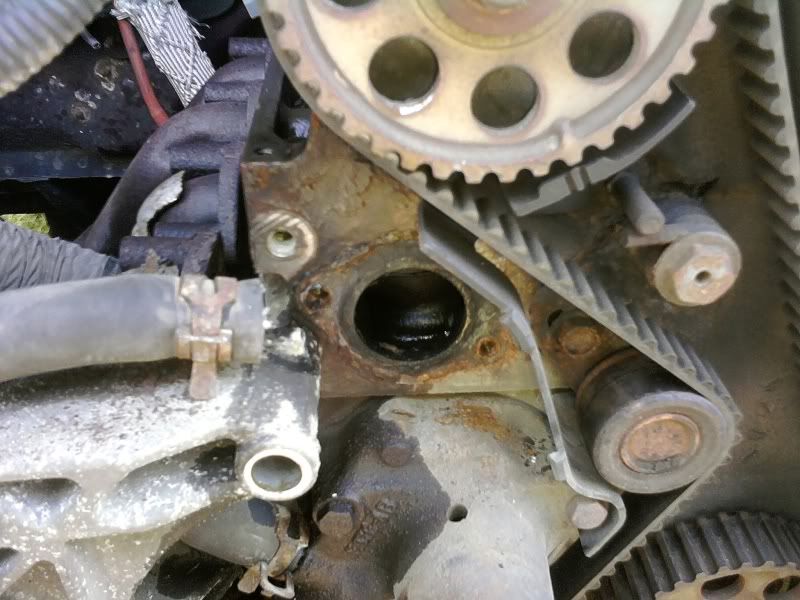 34. Remove the timing tensioner adjustment bolt (10mm?), the timing tensioner mounting bolt (17mm?), and the timing spring retaining stud (10mm). - Remove the tensioner 35. Loosen and remove all head bolts (13mm) with a breaker bar. 36. Remove head from vehicle (woot woot!!!) - Carefully inspect the head or have it professionally inspected for warpage, cracks, excessive deposits on valves, cam/rocker damage. - Make sure to cover up the block with a plastic garbage bag. 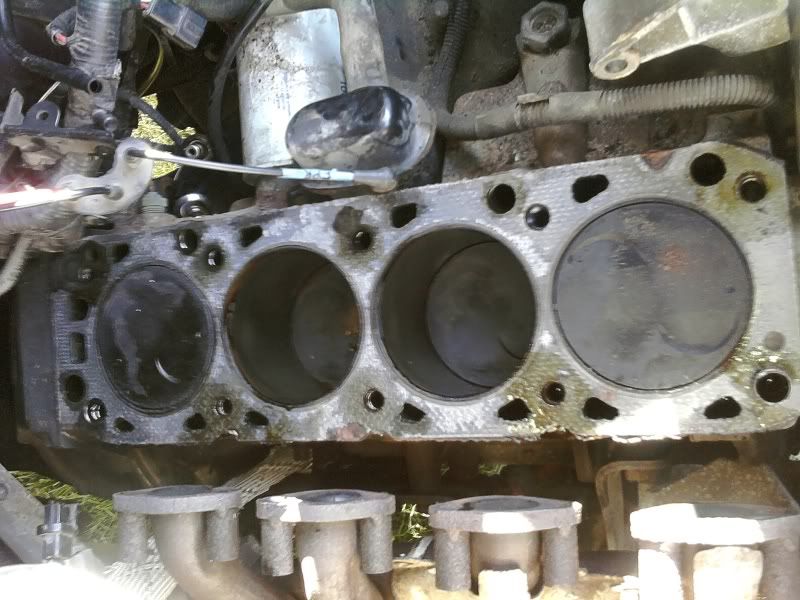 37. Prepare the block and head for the new headgasket. - I used a manual wood sander (just a rectangle that holds the sandpaper) - Use a fine grit sandpaper - Carefully and evenly sand away at the old gasket material and get all corrosion, gasket, anything that isn't metal off the block. - take your time and do it right.  - Vacuum out all sandpaper shavings and metalic shavings from the cylinders, pistons, and crevices in the block. The more you get out, the better. - wipe down cylinder walls and block surface - make sure it's completely clean for the new gasket. - Do the same to the gasket surface on the head - MAKE SURE YOU TAKE YOUR TIME! - vacuum out head, valve areas, and all crevices in the head. - Wipe clean and get all residue off the mating surface and all crevices you can get to. - With feeler gauges and a true strait edge, measure the head for warpage. (MAX WARPAGE LIMIT: 0.006 inch [overall]) 38. Place new headgasket over the dowel pin on the block and make sure it is perfectly aligned with all holes and passages. (If the block isn't completely clean it may leak) 39. Confirm that the crankshaft is at TDC and that the camshaft is at the 5-oclock position. 40. Carefully position the head on the block making sure not to disturb the gasket (you may want a helper for this). 41. Oil the new head bolts (all the way up the threads) and insert all ten of them into their holes. (13mm) 42. Torque head bolts in sequence as shown in the diagram below. - first torque bolts to 51 ft-lbs, then retorque in order another 90-100 degrees. 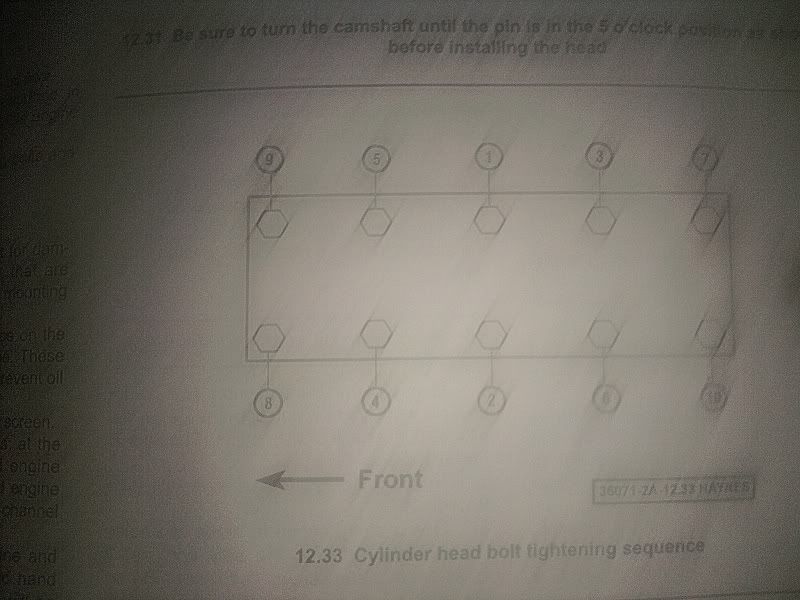 43. Properly align the camshaft at the original TDC position (line up the TDC marks) 44. Install the new valve cover gasket (line up all holes carefully). 45. Place valve cover carefully onto the new gasket, making sure not to disturb it. Make sure all holes line up and that the gasket didn't move. 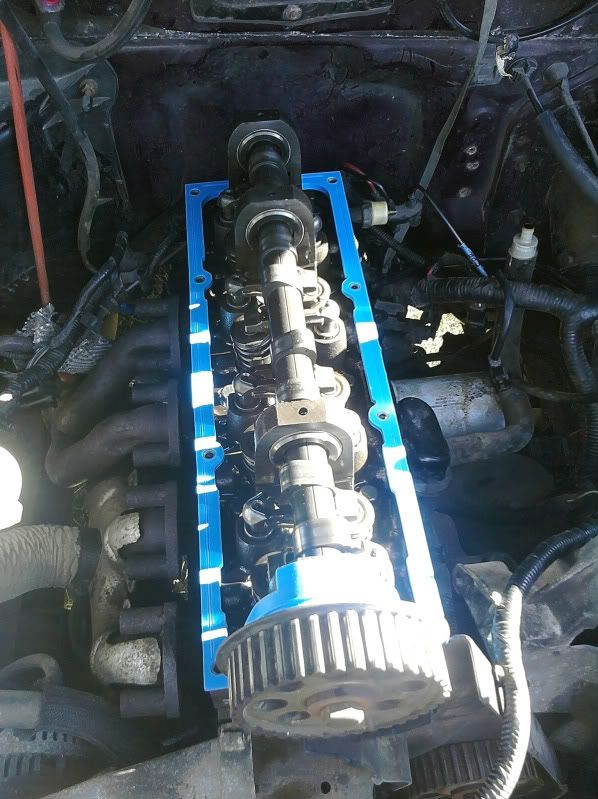 (8mm?) 46. Insert and torque valve cover bolts to 72-108 inch-pounds (I did 107 inch-pounds). 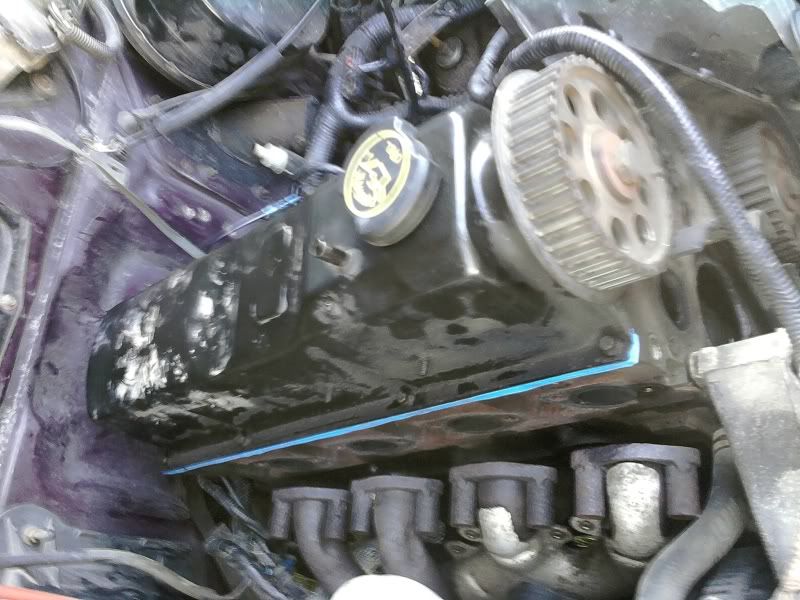 48. Clean all gasket material and residue off of the mating surface for the new water pump. 49. Apply gasket maker (red) on the new gasket (make sure it's the side that is facing the water pump) on every area of the gasket (make sure you get around the bolt holes too!) - Place the new gasket correctly on the water pump. - Apply gasket maker (red) on the side of the gasket that will be connecting to the block (make sure again that you get gasket maker on every area of the gasket). - Slide water pump mounting bolts through the holes in the water pump, making sure the gasket is properly aligned. - Insert the new pump the same way it was attached before (it only fits one way) and begin to thread all three mounting bolts. (13mm) - Torque mounting bolts, 1/4 turn at a time to 89 inch-pounds and double check all bolts for proper torque.  (13mm) 50. Clean mating surface on thermostat housing and the area where the thermostat mounts to the motor. - Remove old thermostat and mount new thermostat in housing - Apply (red) gasket maker to the thermostat side of the gasket and apply gasket to the thermostat housing. - Apply (red) gasket maker to the motor side of the new thermostat gasket. - Carefully insert thermostat housing onto motor (using the bolts as a guide) and torque bolts evenly to 120 inch-pounds  (13mm) 51. If you haven't already, clean the mating area on the head and exhaust manifold to prepare for the new exhaust manifold gasket. - Insert new exhaust manifold gasket onto manifold using two bolts as a guide. - Start all bolts by hand. - Torque exhaust manifold bolts to 60-84 inch-pounds - Torque exhaust manifold bolts to 16-23 foot-pounds 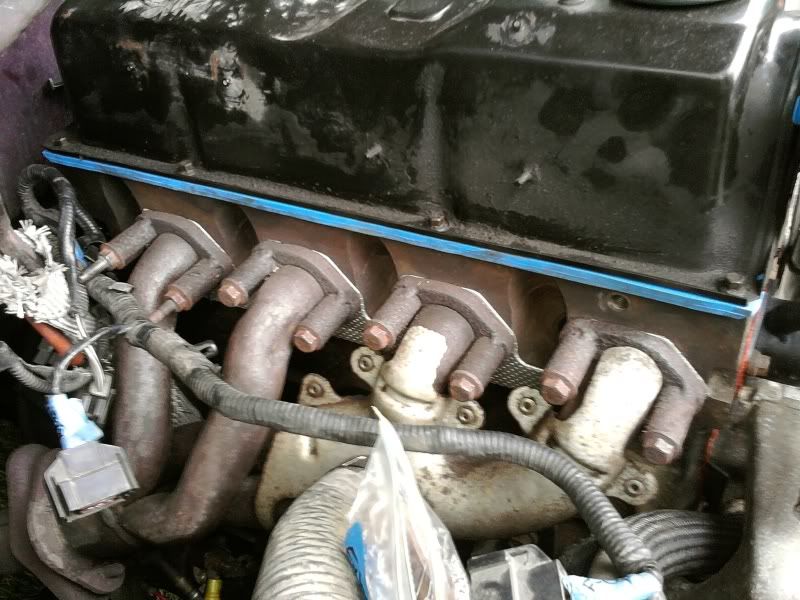 (16mm) 52. Insert new spark plugs - Torque to spec 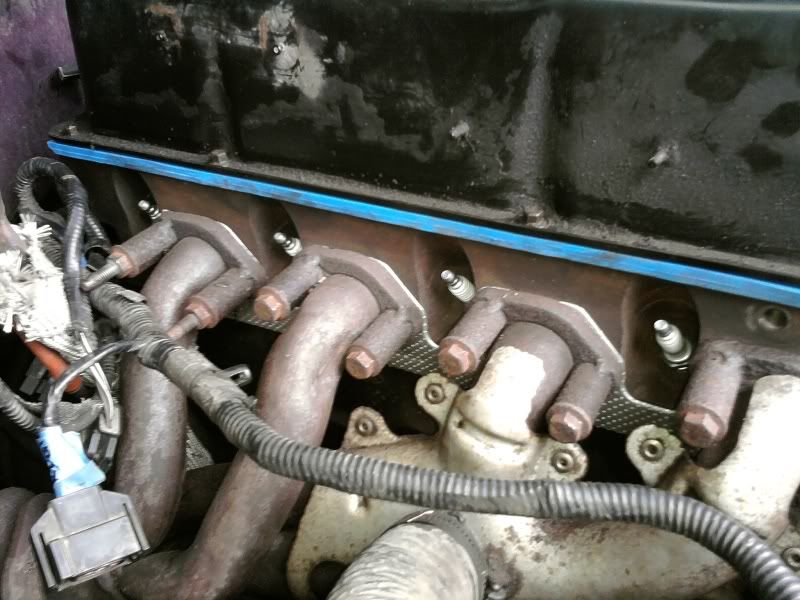 53. Install the new timing tensioner - Tighten tensioner adjustment bolt down with tensioner in the fully "untensioned" position. 54. Ensure that all timing marks align to TDC position, start routing timing belt starting at the crankshaft sprocket. Remove all tension between crankshaft sprocket and oil pump sprocket and route timing belt around oil pump sprocket. Remove all tension between oil pump sprocket and camshaft sprocket. Route timing belt around camshaft sprocket. Route the back side of the timing belt around the tensioner pulley and loosen the tensioner adjustment bolt - tighten adjustment bolt and spring bolt (17mm). Place crankshaft pulley slightly onto the shaft and rotate the motor two full revolutions by hand (and make sure your timing marks still align - if they don't, repeat step 54). Remove crankshaft pulley from shaft. Tighten down all parts (such as the crankshaft positon sensor) that you had previously removed and re-install any components to the crankshaft that you had previously removed. 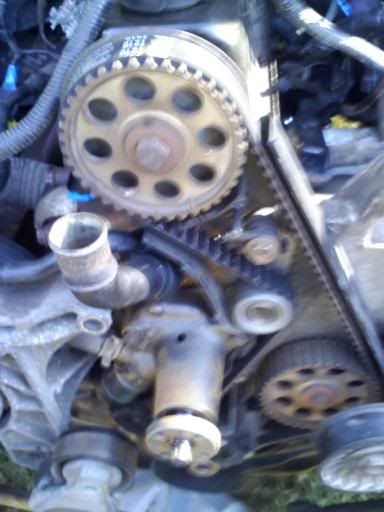 Install the outer timing cover. Install the center crankshaft pulley bolt (reverse of removal) and torque to 103-133 foot-pounds. Install the four crankshaft pulley bolts. 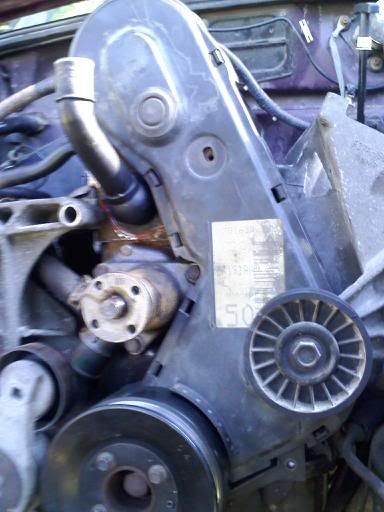 55. Re-install and tighten the five power steering pump bolts.
__________________
2000 Ford Ranger XL 2.5L 5-speed RWD 3.73 open - 170,000+ miles Buggman LED 3BL/CARGO, Buggman Stang Dome LED conversion, LED Brake Light conversion, Line-X O.T.R., Air silencer removed 2.3L Headgasket/TIMING/Water Pump replacement guide Last edited by STL; 01-15-2012 at 12:01 PM.
|
|
#3
08-21-2011, 12:27 PM
|
||||
|
||||
|
placeholder!!!
__________________
2000 Ford Ranger XL 2.5L 5-speed RWD 3.73 open - 170,000+ miles Buggman LED 3BL/CARGO, Buggman Stang Dome LED conversion, LED Brake Light conversion, Line-X O.T.R., Air silencer removed 2.3L Headgasket/TIMING/Water Pump replacement guide
|
|
#4
08-21-2011, 01:36 PM
|
||||
|
||||
|
placeholder!!!
__________________
2000 Ford Ranger XL 2.5L 5-speed RWD 3.73 open - 170,000+ miles Buggman LED 3BL/CARGO, Buggman Stang Dome LED conversion, LED Brake Light conversion, Line-X O.T.R., Air silencer removed 2.3L Headgasket/TIMING/Water Pump replacement guide
|
|
#5
08-21-2011, 02:22 PM
|
||||
|
||||
|
placeholder!!!
__________________
2000 Ford Ranger XL 2.5L 5-speed RWD 3.73 open - 170,000+ miles Buggman LED 3BL/CARGO, Buggman Stang Dome LED conversion, LED Brake Light conversion, Line-X O.T.R., Air silencer removed 2.3L Headgasket/TIMING/Water Pump replacement guide
|
|
#6
08-22-2011, 05:29 PM
|
||||
|
||||
|
Got the head back on today, new headgasket, valve cover gasket, and water pump installed!
__________________
2000 Ford Ranger XL 2.5L 5-speed RWD 3.73 open - 170,000+ miles Buggman LED 3BL/CARGO, Buggman Stang Dome LED conversion, LED Brake Light conversion, Line-X O.T.R., Air silencer removed 2.3L Headgasket/TIMING/Water Pump replacement guide
|
|
#7
08-23-2011, 03:00 PM
|
||||
|
||||
|
Thermostat, plugs, and exhaust manifold installed!
__________________
2000 Ford Ranger XL 2.5L 5-speed RWD 3.73 open - 170,000+ miles Buggman LED 3BL/CARGO, Buggman Stang Dome LED conversion, LED Brake Light conversion, Line-X O.T.R., Air silencer removed 2.3L Headgasket/TIMING/Water Pump replacement guide
|
|
#8
08-23-2011, 04:31 PM
|
||||
|
||||
|
Looks good.......pictures should really help some people in the future. Where was it leaking at? The back drivers side?
__________________
Automotive Electronics Engineer 2000 XLT 2.5L A/T Mods: Explorer OHC Explorer Autodim Mirrors w/ Autolamps Explorer Sport White Face Gauges
|
|
#9
08-23-2011, 05:02 PM
|
||||
|
||||
|
Quote:
It wasn't leaking anywhere. There was a bunch of oil in my coolant. When I took the headgasket off, I inspected it, found not a single crack. Checked the head and block with feeler gauge, and neither were warped. - This is scaring me a bit actually, because I may actually have a cracked coolant/oil passage in my head or block, but that's a 50-50 shot right now - will know when it's all back together.
__________________
2000 Ford Ranger XL 2.5L 5-speed RWD 3.73 open - 170,000+ miles Buggman LED 3BL/CARGO, Buggman Stang Dome LED conversion, LED Brake Light conversion, Line-X O.T.R., Air silencer removed 2.3L Headgasket/TIMING/Water Pump replacement guide
|

|
#10
08-23-2011, 05:05 PM
|
||||
|
||||
|
I would pressure test your cooling system and see if it holds pressure.
__________________
Automotive Electronics Engineer 2000 XLT 2.5L A/T Mods: Explorer OHC Explorer Autodim Mirrors w/ Autolamps Explorer Sport White Face Gauges
|
|
#11
08-23-2011, 05:17 PM
|
||||
|
||||
|
Quote:
I coullld do that, but I almost have the motor all the way back together anyway... Going to run her on pure H2O first to flush out the whole system, maybe drain/refill a few times to get all the old shit out, then fill with a 50/50 mix of coolant/water and see if I end up with oil again. If I do, then I had a cracked block or head and the whole project was in vain, but at least I have a proper write-up for others to use. Worst to worse, I can always park it on the corner with a for-sale sign for $1500, list off all the new work that's been done to it, and sell it off.
__________________
2000 Ford Ranger XL 2.5L 5-speed RWD 3.73 open - 170,000+ miles Buggman LED 3BL/CARGO, Buggman Stang Dome LED conversion, LED Brake Light conversion, Line-X O.T.R., Air silencer removed 2.3L Headgasket/TIMING/Water Pump replacement guide
|
|
#12
08-23-2011, 06:36 PM
|
||||
|
||||
|
Lets just hope you don't see any oil this time. Remember to use distilled water after you have flushed it. The minerals from tap water will eat and corrode just about everything in your system.
__________________
Automotive Electronics Engineer 2000 XLT 2.5L A/T Mods: Explorer OHC Explorer Autodim Mirrors w/ Autolamps Explorer Sport White Face Gauges
|
|
#13
08-23-2011, 06:45 PM
|
||||
|
||||
|
After I have flushed it? Or flush it with distilled? and are you saying, for my 50/50 mix to use distilled water?
__________________
2000 Ford Ranger XL 2.5L 5-speed RWD 3.73 open - 170,000+ miles Buggman LED 3BL/CARGO, Buggman Stang Dome LED conversion, LED Brake Light conversion, Line-X O.T.R., Air silencer removed 2.3L Headgasket/TIMING/Water Pump replacement guide
|
|
#14
08-23-2011, 06:49 PM
|
||||
|
||||
|
You can do it both times. Some people say to use it when your flush and refill, others say just when you refill.
I usually just do distilled (of course with antifreeze) when its gonna be in my truck for a while.
__________________
Automotive Electronics Engineer 2000 XLT 2.5L A/T Mods: Explorer OHC Explorer Autodim Mirrors w/ Autolamps Explorer Sport White Face Gauges
|
|
#15
08-23-2011, 06:51 PM
|
||||
|
||||
|
Any idea how many gallons my system holds?
__________________
2000 Ford Ranger XL 2.5L 5-speed RWD 3.73 open - 170,000+ miles Buggman LED 3BL/CARGO, Buggman Stang Dome LED conversion, LED Brake Light conversion, Line-X O.T.R., Air silencer removed 2.3L Headgasket/TIMING/Water Pump replacement guide
|
|
«
Previous Thread
|
Next Thread
»
|
|
 Similar Threads
|
||||
| Thread | Thread Starter | Forum | Replies | Last Post |
| Water pump replacement help!!!!! | Branger43 | General Ford Ranger Discussion | 0 | 05-07-2011 12:50 PM |
| Colant coming from timing cover above water pump. | homeworks | 4-Cylinder Tech | 2 | 01-28-2011 04:24 AM |
| Water Pump Replacement | Audie1966 | 3.0 Vulcan Tech | 1 | 06-09-2010 06:08 AM |
| im looking for a water pump replacement how to. | mb128 | General Tech | 5 | 02-14-2010 11:30 PM |
| Water Pump Replacement | HGroscup | 4-Cylinder Tech | 8 | 01-17-2010 05:35 PM |


 |
|
|


 |
|
 |
