 |


|
#1
 02-10-2011, 05:37 PM
|
||||
|
||||
|
This is a new how to on the installation of the popular Overhead Console in the Ranger. But,this is for old Rangers . Mine is an 86 xlt. The instructions on this site are good but, some of the info is different. So here goes.
First of all DISCONNECT THE BATTERY!!!! I am a 64 year old combat wounded Viet-Nam Vet. I have aches and pains in places most of you dont even know about yet.What I mean is :If I can do it anybody can. Its simple straight forward and not too time consuming. (unless you screw it up). I have included pictures of my truck and the problems I found but for the most part the instructions found in the other posts are the same. 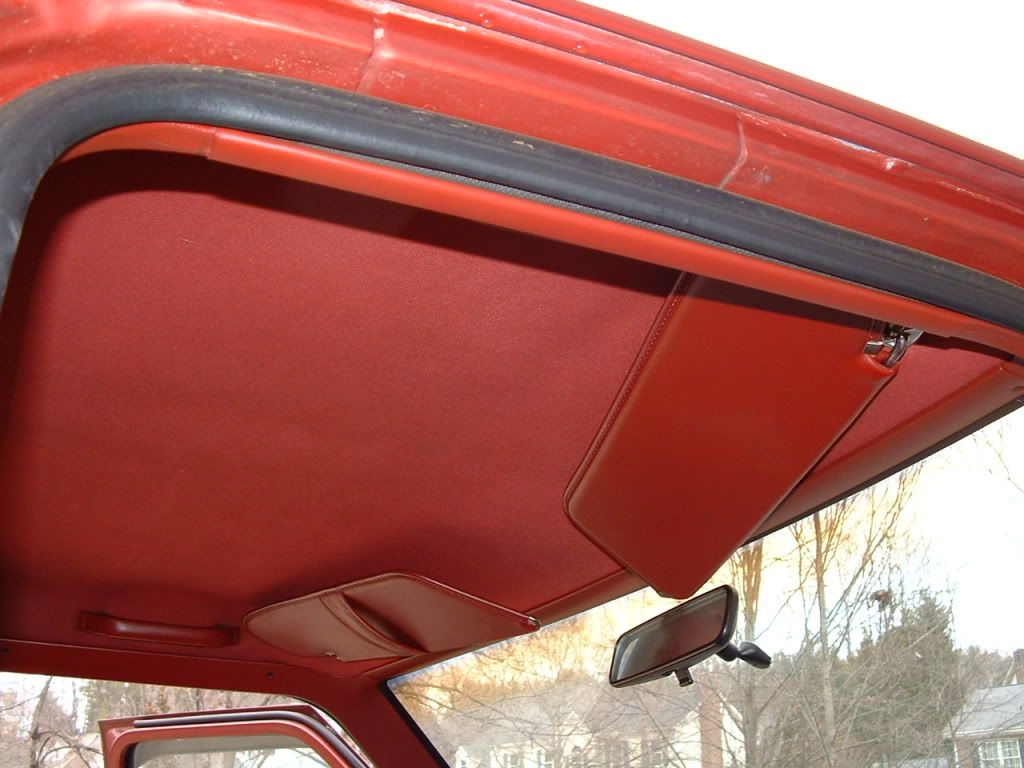 . . This picture shows the "before" of the truck. Here one needs to ask "Do I really want to do this?" Sure you do so go for it. The first thing you need to do is to measure at the apex of the side corner of the windshield trim to the center of the windshield which should be about 22 inches. What you need to do is mark the spot at 19 3/4"from each side . This gap will be the area for the mounting plate for the console. Measure this space and find the middle. Mark it. Make a cardboard copy of the mount plate and center it in the space. Take a marker and outline the cardboard . This will be about 2 1/2-3inches from the edge of the window . Now cut it out to provide a space to mount the plate so it looks like this  The next thing to do is to drill holes to mount the plate. Follow the directions on other install how-tos as this is to tell you about the differences in the age of the truck and how to install it . DO NOT CUT THE ENTIRE HOLE OUT . It will mess you up . Cut to the final bend in the plate. You will find out later 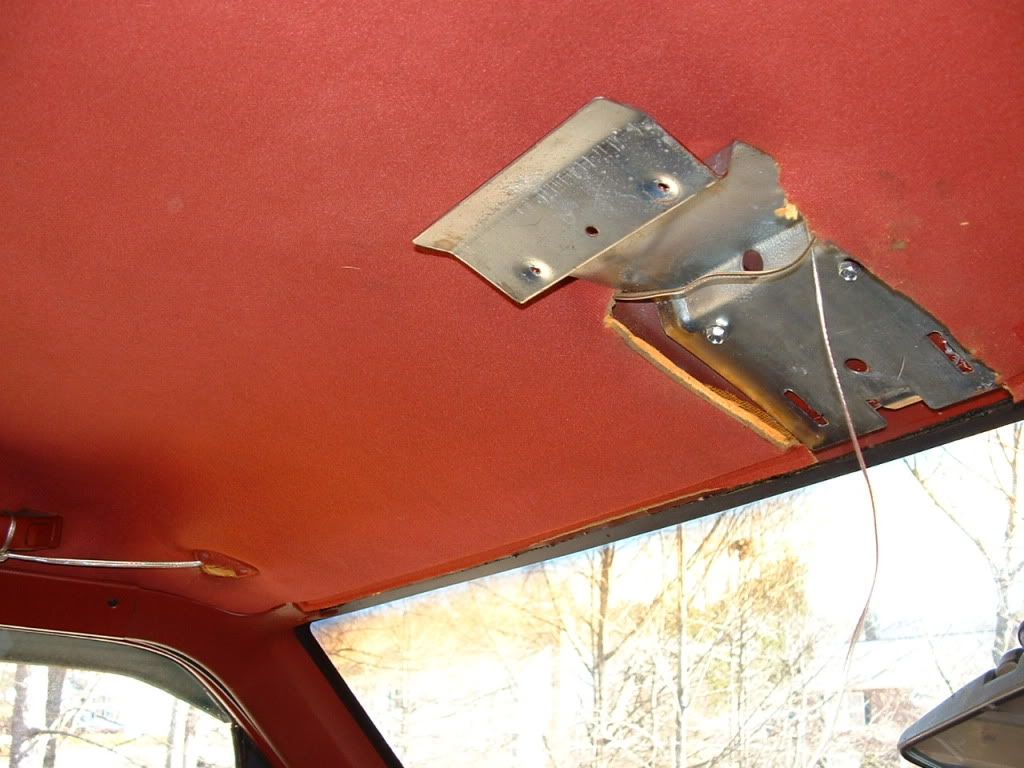 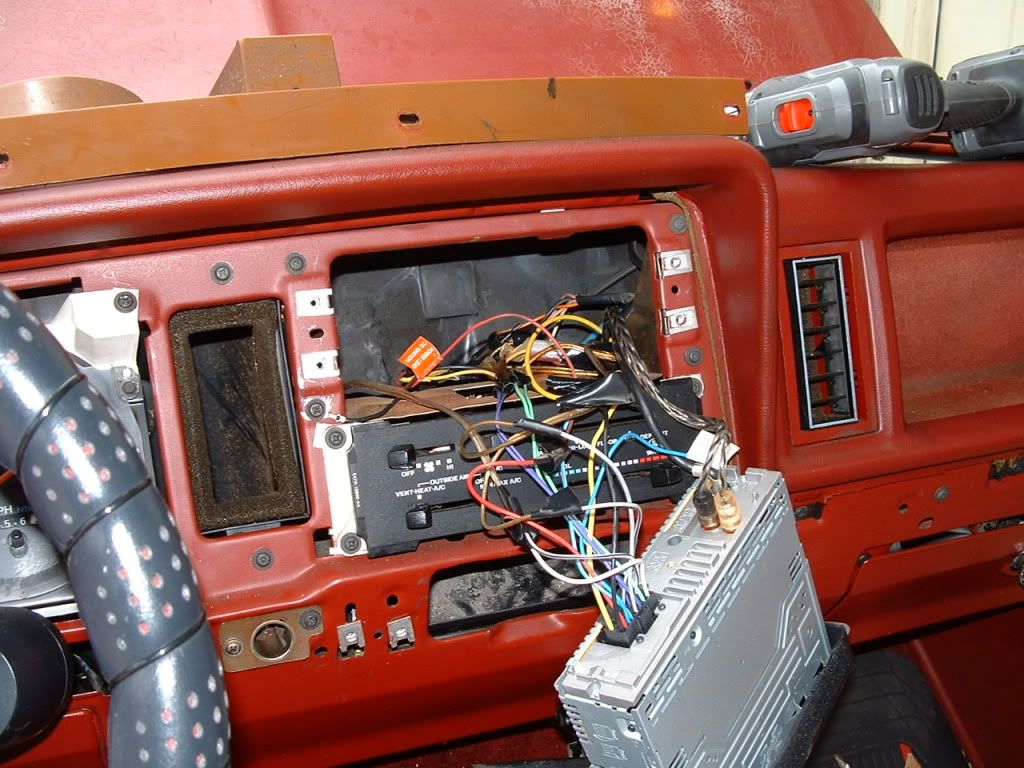 These 2 photos show that I have already began to run the wiring. Wiring colors are the same . I also installed lighted mirrors and the wires you see are for that. Also you will need to take out the radio because you need to get back there to run wires. Also open the glove compartment and pull it forward to open the area behind it. You need the space too. The wiring is basic at first you need to run wires to the power side of the radio,two wires for the temp sensor,and a wire for the VSS (vehicle speed sensor) . Run the wires under the headliner and down the "A" pillar on the passenger sideinto a gap next to the dash. These wires will show up as you look through the glove compqartment. Pull the wires thru to the area behind the radio. Hook up only the wire for power to the console and the console dimmer. This is where a difference is. The other instructions ask you to hook up the wire to the VSS on the GEM(generic electric module) . Well stop looking because ther ain't one on the truck . They never installed this beauty until 1996. So you have to find the VSS. If you dont know where it is ask or as I did look it up online. I used Autozone to find what it looked like and in the description it said where it was. Mine was attached to the speedometer cable as it goes into the transmission. Other trucks have them located on the rear end. 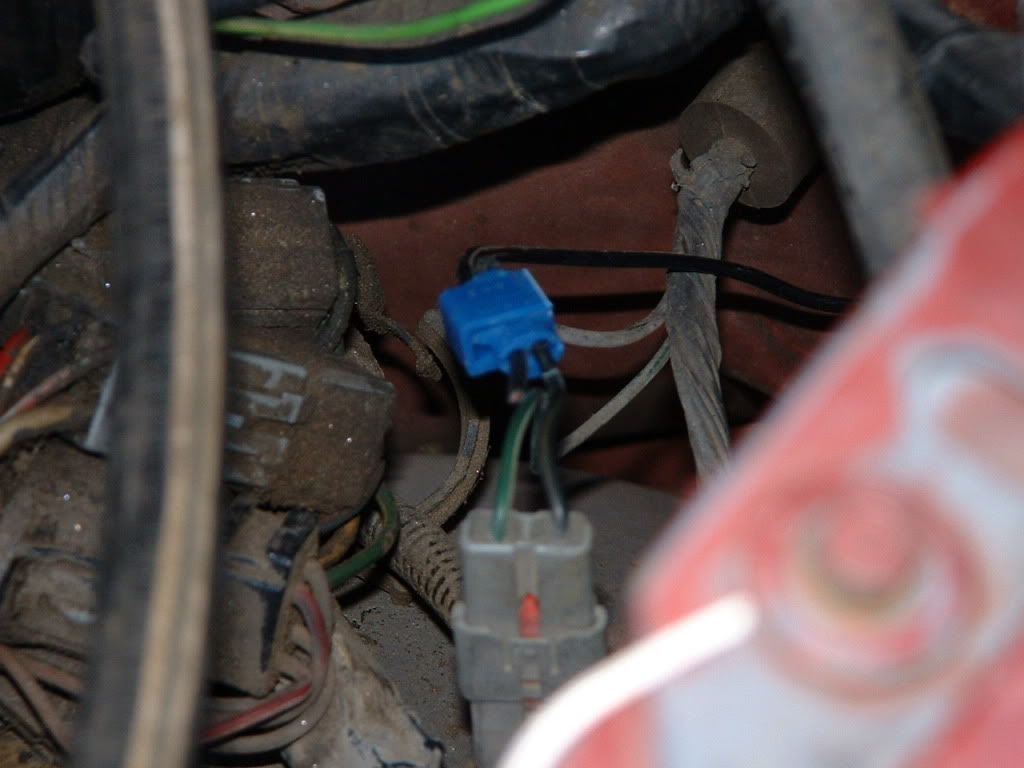 here is wher I connected mine up . there are 2 wires coming out of here is wher I connected mine up . there are 2 wires coming out of the sensor traveling up the frame until is disappears into the fire wall. I tapped it just before it entered . The temp sensor is mounted anyplace you want. Mine is on the sheetmetal next to the radiator but far enough away so the radiator wont interefere with its heat. If it does just move it . But dont put it in direct exposure to the moving air. 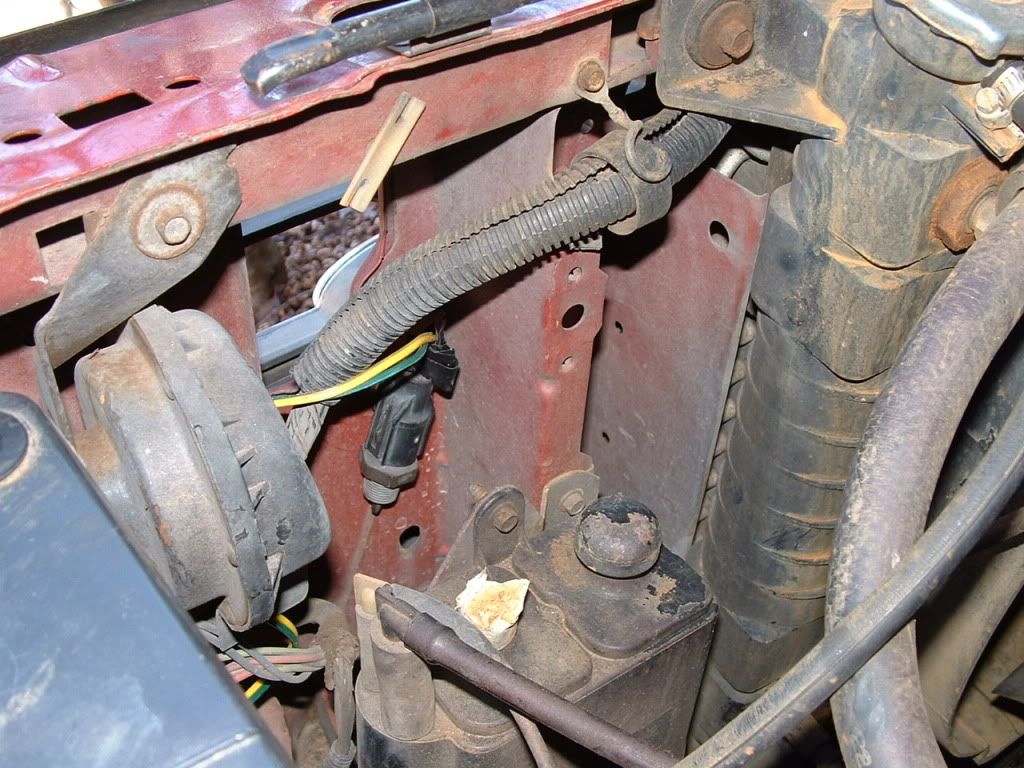 here. here.Run wires to it conect them and you are done with it. The next thng you do is to connect the console to all those wires you got hanging down. ONE AT A TIME and it will be OK. [url]http://i1197.photobucket.com/albums/aa439/1955tbirdman/DSCF0171.jpg[/img] Here the console is attached but resting on the rear view mirror. You need an extra set of hands but SLOW going will do the trick 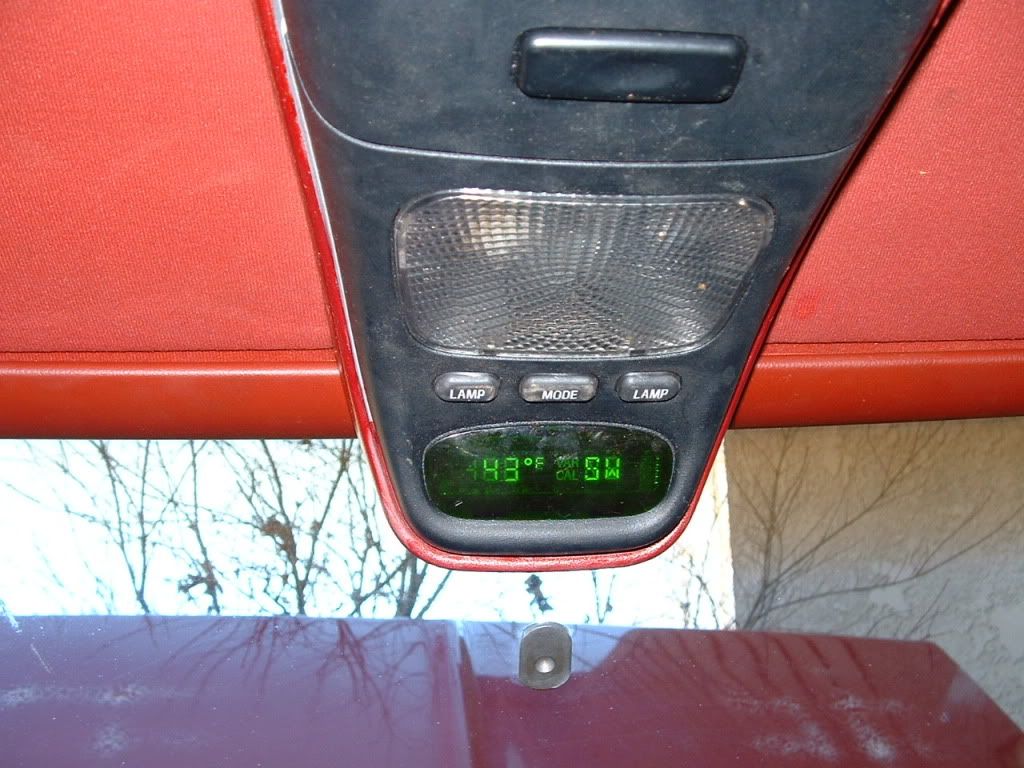 wires connected and an ops check to see if all is well. If it is all you need to do is mount the console to the plate. 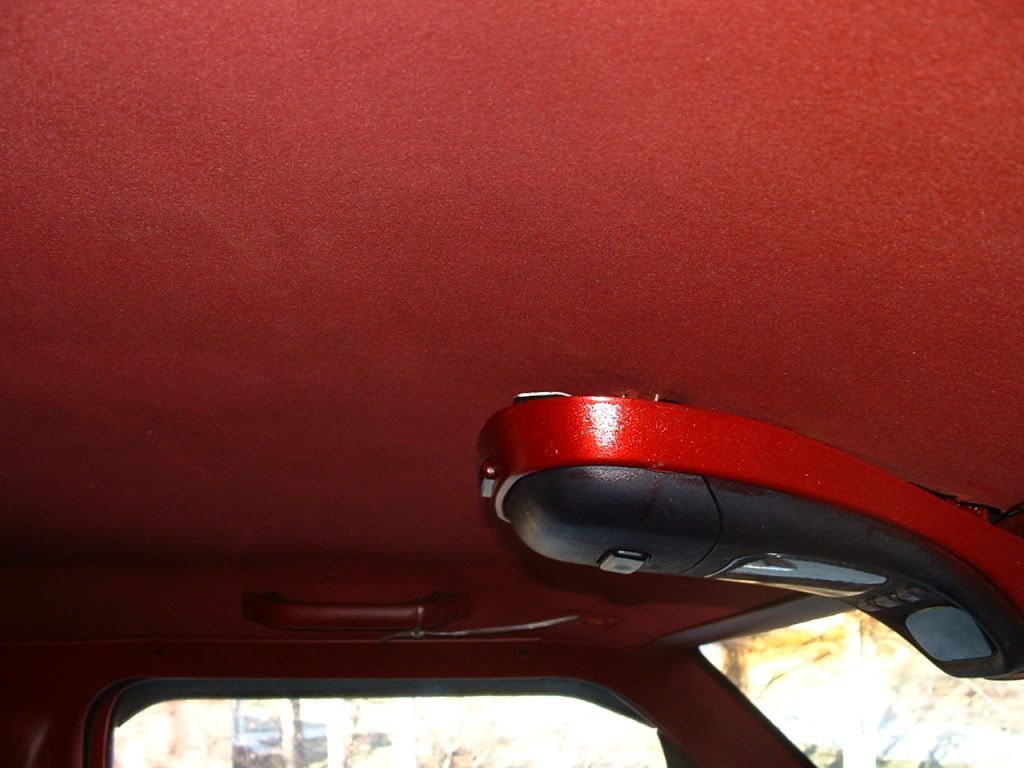 Here you can see the console on the plate and the back of the plate is visible. What you need to do is tuck the end of the mount plate under the headliner. Cut a small hole in the headliner where the screw holes are so you can insert them and tighten them up and the rear of the console will be tight against the headliner. 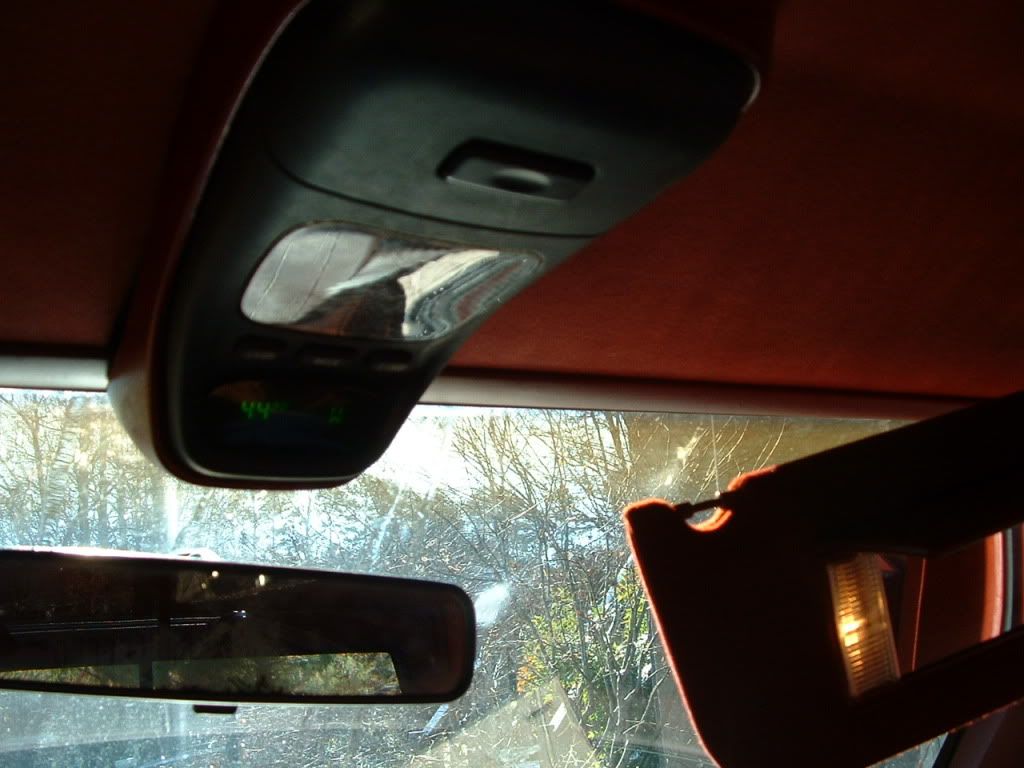 Installed and all wires attached and not burning the insulation . So you did good. radio out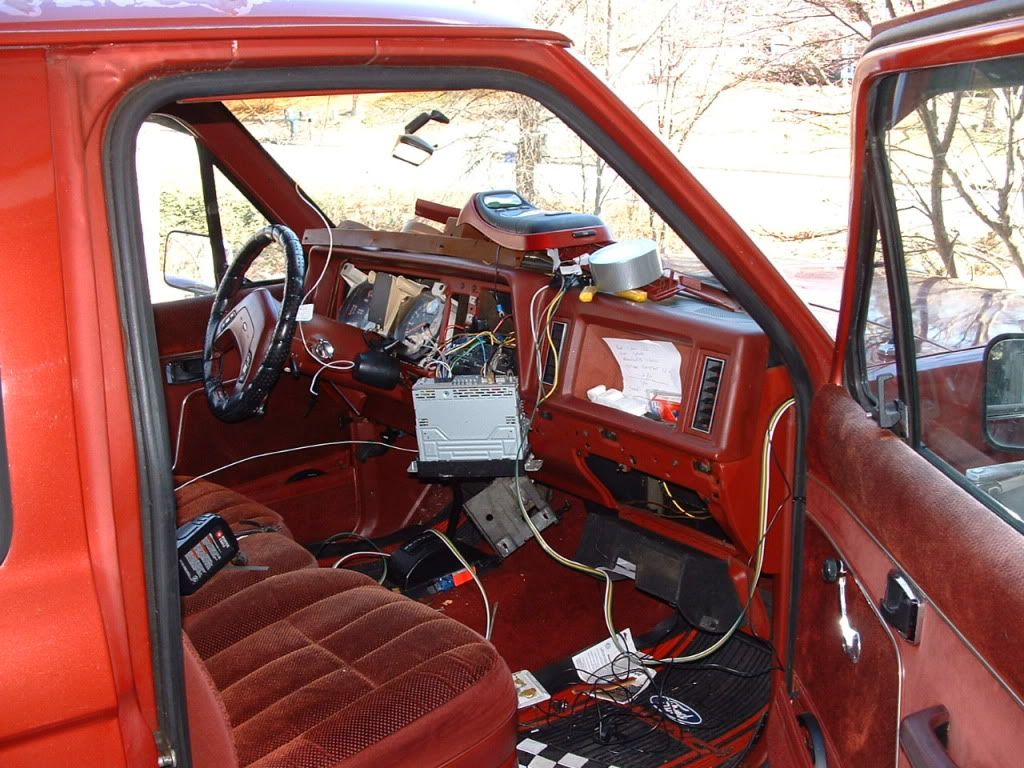 before you begin to run wiring Smile here. before you begin to run wiring Smile here.Put it all back together put your tools away and think of something else to do to the truck. All in all the install is about 3 hours and is fairly easy but do go slow to get it right. I didnt show all the photos because if you look at other installs you will see what I did . Caution: You may have fitment issues due to the older Rangers have windshield trim that must be removed to install and the new Rangers dont have that trim so the curvature of the area next to the windshield may or may not cause a problem. A little time can work it out. Just make sure all wiring is tight and connections are covered some way so no electrical sparks fly and burn the truck up or the console. If you want to do this but have doubts . Dont think about it anymore . Find a console and the parts and jump into it. I think this is one of the best installs one can do to the ranger . Need help send me a message. Good Luck . An afterthought. When you do the wiring in order to save time an maintain a neat install think about getting a 4 wire ribbon. Thats 4 wires of what gauge you need sealed together . You just cut what you need and go from there. That way its 4 wires run at one time. I bought a 4 wire ribbon 25' long for 9 bucks. The wires are 4 different colors . Just keep a piece of paper handy and write down what wire goes where. Its a lot easier to do this way.
__________________
1986 XLT extended cab 51000 miles 2.9 V-6 Automatic. Runs like a dream. 22 MPG "Life is tough...Its tougher if you are stupid" Last edited by redxlt; 02-11-2011 at 10:29 AM. 
|


| Register and never see these ads again. | |
|
|
|
#2
02-10-2011, 06:46 PM
|
||||
|
||||
|
if you got to the bottom of the this thread in the message box, click this box
 ..... ....... paste the codes you have for pictures in the box that pops up.. and the images will show in thread.... or you can edit the thread and add [IMG] at the begining off the pic code, and [/IMG] at the end.. [IMG]code in here[/IMG] ..... ....... paste the codes you have for pictures in the box that pops up.. and the images will show in thread.... or you can edit the thread and add [IMG] at the begining off the pic code, and [/IMG] at the end.. [IMG]code in here[/IMG]
__________________
MY BUILD THREAD  1999 MAZDA 2500SE, 2.5L 4-clanger, 5 speed, Green n slow. Rangers as daily drivers since 1988. 1999 MAZDA 2500SE, 2.5L 4-clanger, 5 speed, Green n slow. Rangers as daily drivers since 1988. ASE Certified Mechanic, Builder of Show Destroying Protouring and Classic cars..
Last edited by terryduanemiller; 02-10-2011 at 06:50 PM.
|
|
#3
02-10-2011, 06:49 PM
|
||||
|
||||
|
Thanks for the write up I fixed all the images for you
Need to make sure it has the IMG in front of the url with the [ ] around the img
|


|
#4
02-10-2011, 07:46 PM
|
||||
|
||||
|
you did an awesome job man. I applaud you for your bravery lol
__________________
YZ the way to be! The Brotherhood! Mods to come: Camburg entry 6.0 system. FiberwerkX Fenders and bedsides. Tube bumper. R.I.P. Jeff Ashton. 1992-2011
|
|
#5
02-10-2011, 07:56 PM
|
||||
|
||||
|
I am still learning the picture posting . Bear with me.
__________________
1986 XLT extended cab 51000 miles 2.9 V-6 Automatic. Runs like a dream. 22 MPG "Life is tough...Its tougher if you are stupid"
|
|
#6
02-10-2011, 07:59 PM
|
||||
|
||||
|
its tricky mang
__________________
YZ the way to be! The Brotherhood! Mods to come: Camburg entry 6.0 system. FiberwerkX Fenders and bedsides. Tube bumper. R.I.P. Jeff Ashton. 1992-2011
|
|
#8
02-11-2011, 12:00 AM
|
||||
|
||||
|
nice! now i kinda wanna do it haha
__________________
Ford Ranger Edge Supercab, 2004 3.0 Auto, 2WD, 4.10 Axle 31x10.5x15 BF Goodrich All Terrain T/A KO's My Truck Is My Mountain Bike's Ride!  Class III hitch, Rhino Bedliner, Almost Maxed T-Bar Crank, Tuff Country Add A Leaf, Custom Low Anchor Points, OEM ('99) Tow Hooks, Pro Comp Offroad Lights , Mustang Dome Light, Clear Corners, Slim Toolbox, Blinker Mod,Cargo Brake Light Mod,Expo Lighted Visors, Ultra Silverstar heads/fogs, Fog/high mod, Reverse/switched lights, Bike Fork Mounts
|
|
#9
02-11-2011, 10:23 AM
|
||||
|
||||
|
Please guys dont think for a minute that I installed the console looking the way it did in the photos all messed up with paint going down the sides and all. I didnt. I installed the console just for pics for the how to. I took console apart afterwards and cleaned it up and painted it all . NOw it looks like brand new. I may be old but I am not blind. Just thought you would want to know. I wanted to clear the air of any thoughts as to my abilities and eyesight.
__________________
1986 XLT extended cab 51000 miles 2.9 V-6 Automatic. Runs like a dream. 22 MPG "Life is tough...Its tougher if you are stupid"
|
|
#10
02-11-2011, 10:35 AM
|
||||
|
||||
|
no worries man
__________________
Ford Ranger Edge Supercab, 2004 3.0 Auto, 2WD, 4.10 Axle 31x10.5x15 BF Goodrich All Terrain T/A KO's My Truck Is My Mountain Bike's Ride! Class III hitch, Rhino Bedliner, Almost Maxed T-Bar Crank, Tuff Country Add A Leaf, Custom Low Anchor Points, OEM ('99) Tow Hooks, Pro Comp Offroad Lights , Mustang Dome Light, Clear Corners, Slim Toolbox, Blinker Mod,Cargo Brake Light Mod,Expo Lighted Visors, Ultra Silverstar heads/fogs, Fog/high mod, Reverse/switched lights, Bike Fork Mounts
|
 |
«
Previous Thread
|
Next Thread
»
|
|
 Similar Threads
|
||||
| Thread | Thread Starter | Forum | Replies | Last Post |
| Discuss How-to: OHC install in older Rangers (´96) | mfernandes | How-To Submissions | 16 | 02-25-2012 12:12 PM |
| How-to: OHC install in older Rangers (´96) | STL | Interior Guides | 0 | 12-04-2010 09:49 AM |
| OHC in older ranger? | Roadkill | Interior Tech | 3 | 06-04-2010 11:43 AM |
| Older 80s rangers | camoranger4x4 | General Ford Ranger Discussion | 6 | 05-23-2010 09:12 AM |
| Why most people use older rangers ? | 00s10killer | General Ford Ranger Discussion | 7 | 08-15-2009 10:22 PM |


 |
|
|


 |
|
 |
