 |


|
#1
 04-02-2011, 09:47 PM
|
||||
|
||||
|
Here is a cheap...Well actually, it is free way to relocate your tailgate handle to inside your bed.
Precautions: Your tailgate latch mechanism and handle plastic may be brittle. Take caution to not force parts or they will break and you will have to replace them! Time to make modification: Est. 1 Hour Tools: Torx head screw driver Flathead screw driver 10mm socket and ratchet Hand held angle grinder with cut-off wheel Drill with 1/4" bit Hand file Pliars Body Hammer and flat dolly Sharpie marker Measuring tape Materials (optional): Addition Torx head screws (same size and license plate screws) First you are going to start by removing the 8 Torx screws holding the tailgate handle mechanism cover on the inside of your tailgate. Once you remove the panel, you will see (2) rods that latch your tailgate shut held to your handle by white and yellow clips. To make things easier when re-assembling your handle, with a Sharpie, mark the location of the plastic clips on the threaded rods. Carefully pop the yellow clips and you will be able to pop the threaded rods out of the white clips. Next remove the (2) 10mm nuts that hold the handle in place and remove the handle and mechanism. 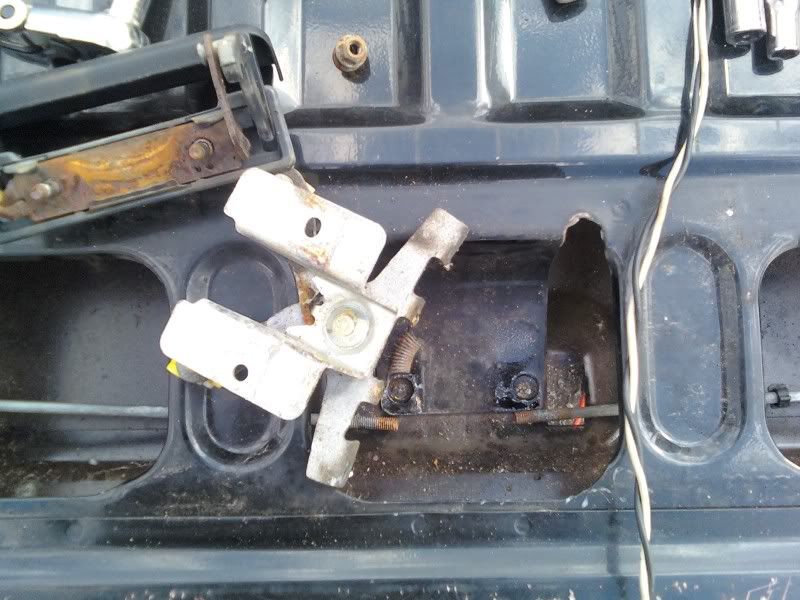 Now you are ready to cut the holes in the cover to mount the handle inside the bed. With the measuring tape, find the center of the panel and make a mark (this is for reference) Take the mechanism that has the (2) bolt holes that you removed from the inside of the tailgate and use that as a template to mark the cover where the 2 bolt holes will need to be drilled. Make sure that it is centered when you make these holes. Now with your 1/4" bit, drill the marks you made on the panel. Now take the handle and line up the stud on the back with the holes you just drilled and mark where the handle will have to go through the panel. With your grinder, start cutting the square holes where the handle will go through the panel. It should look something like this at this point. 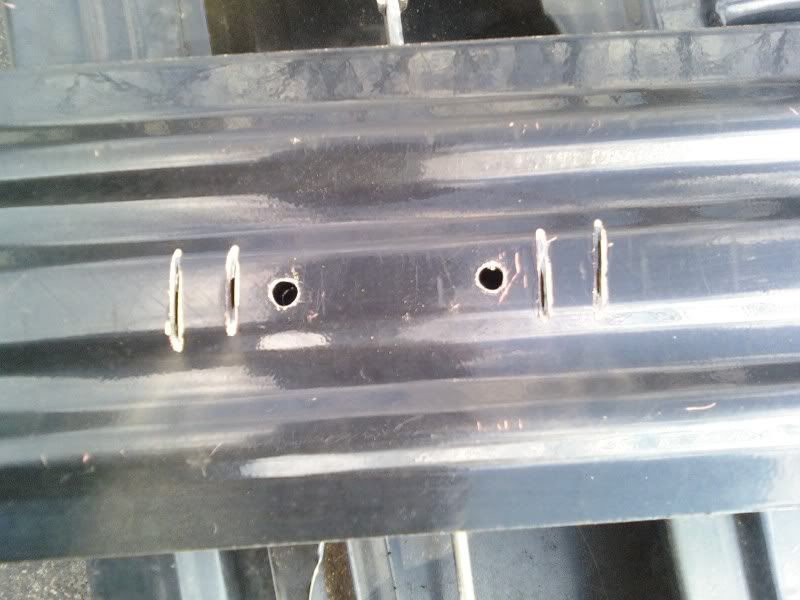 Now finish cutting the holes with your grinder. I find cutting a little on the outside, then a little on the inside then popping the scrap peice out with a screw driver makes for a clean square hole. Then clean up with your file. 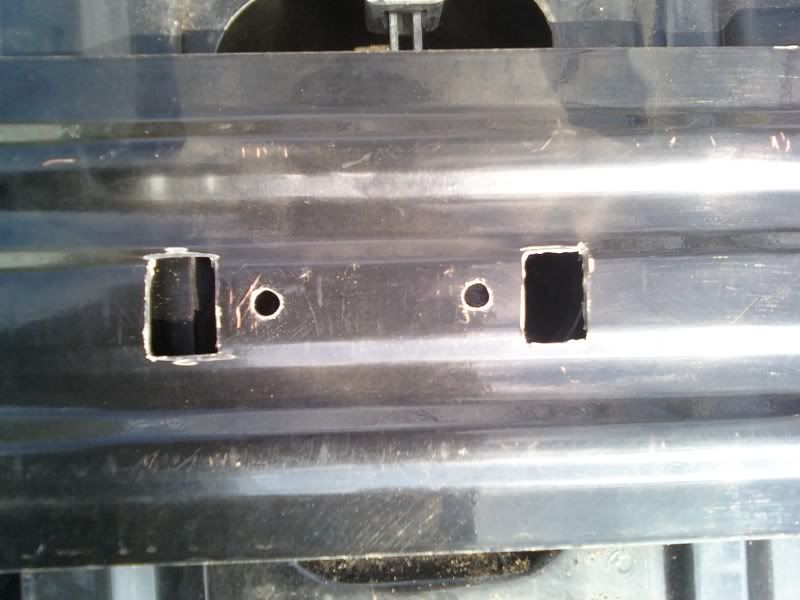 Using a body hammer and flat dolly (or a regular hammer and a block of wood!) start to flatten out the center of the panel so that the inside mechanism and the handle bolt flushly together with the cover panel between. You only need to flatten out between the (2) square holes. You can now bolt the handle and latch mechanism to the panel with 10mm nuts. 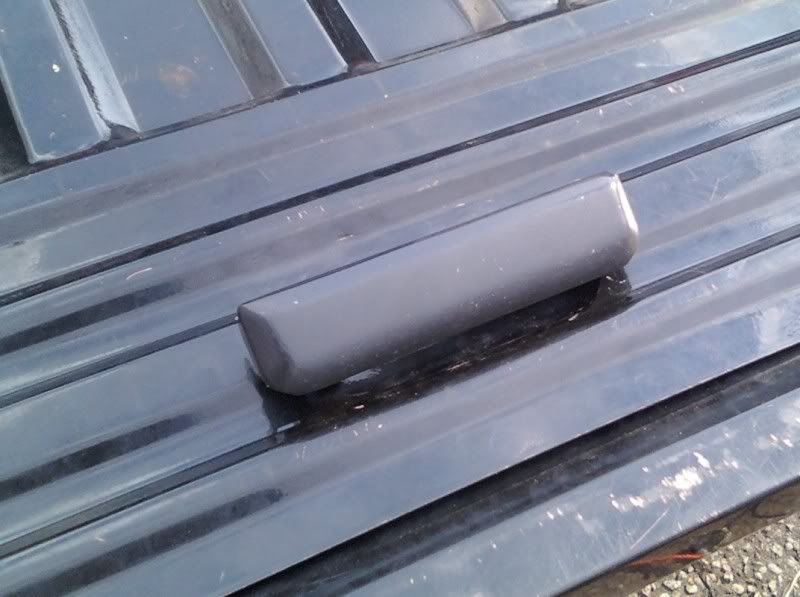 This next step I did not do and wish I thought of as I was re-assembling the latch. With the panel removed you will see (4) "bridges" or "webs" across the opening in the tailgate ( 2 of them are visible in the 1st photo, the latch is sitting on one). The rods are attached to (2) of the "bridges" with black plastic clips. Re-assembly would be MUCH easier if you take your cut-off wheel and remove those. It would make re-attaching the rods much easier. Now re-attach the rods to the latch mechanism inside the tailgate. This will more than likely require you to do some minor bending to the rods. A set of priars helps with this! This can be a big pain if you dont mark the rods like in step 1 or if you do not cut out the bridges. It is critical that you get those rods adjusted so your tailgate opens and closes smoothly. You dont want it to easy to open or your tailgate may fall when you hit a bump in the road. This may take some trial and error, better get it right now before you weld up your old handle location as you no longer have an access panel to make adjustments. I also added an additional screw above the handle to keep the panel from flexing or twisting as you pull up on the handle. Here is the finished product after 1 hour of work. 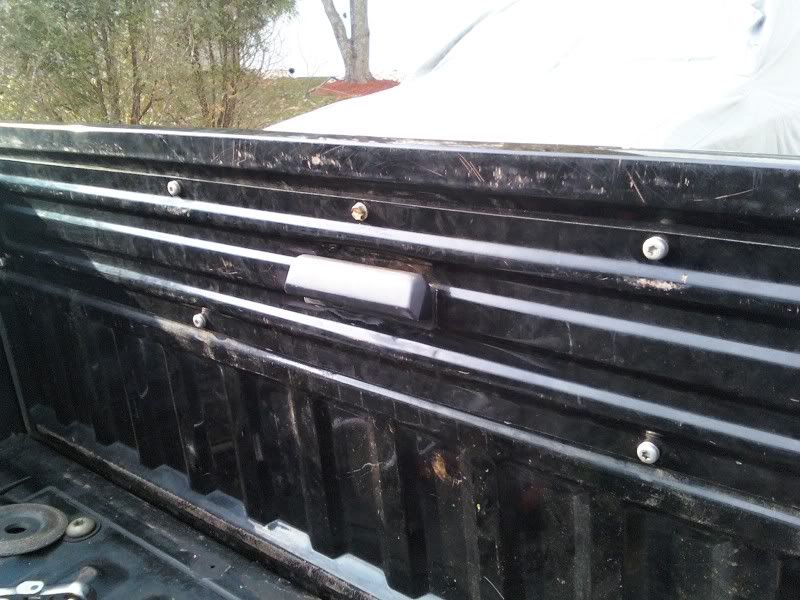 Ready to make the filler plate and weld up the old handle location  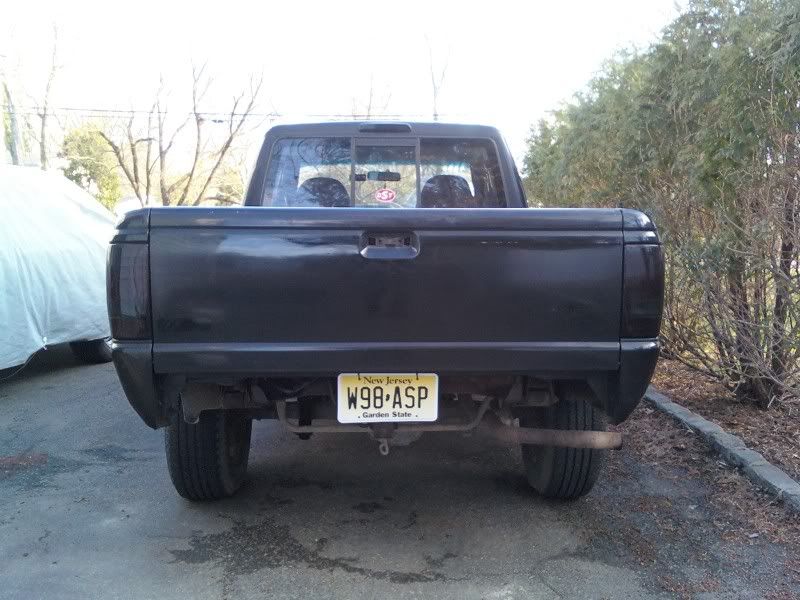 Easy way to move your handle and save a few bucks! Hope this helps someone! Last edited by 4LetterWord; 04-02-2011 at 09:51 PM. 
|

| Register and never see these ads again. | |
|
|
 |
«
Previous Thread
|
Next Thread
»
|
|
 Similar Threads
|
||||
| Thread | Thread Starter | Forum | Replies | Last Post |
| Want to Buy: Tailgate handle | 99fordrangerxlt | Exterior Parts | 4 | 12-16-2010 12:44 PM |
| Tailgate Handle Sizes | putty | Exterior Tech | 6 | 10-29-2010 06:55 PM |
| Tailgate Handle Broke | sports818 | Exterior Tech | 17 | 10-24-2010 06:41 AM |
| tailgate handle relocation | clawsonj | Exterior Tech | 6 | 12-31-2009 10:00 PM |
| Tailgate Handle Cracked | jodin5859 | Exterior Tech | 12 | 12-02-2009 06:10 PM |


 |
|
|


 |
|
 |
