 |


|
#1
 11-16-2009, 04:05 PM
|
||||
|
||||
|
ive heard of a couple people on here that baked their headlights and painted some black in them?
if you did it, can i get some directions on how to do it?? Luc
__________________
2001 XLT 4x4 V6 4.0L auto SAS'd D44 and 8.8. dual lockers, 38s, 12 bolt h1's, some other odds and ends 

|

| Register and never see these ads again. | |
|
|
|
#2
11-16-2009, 04:20 PM
|
||||
|
||||
|
GenerationEdge write up
Be warned, this project is not for the faint of heart. In order to complete this mod, you will have to place your perfectly good headlights into the oven. Shocking, yes I know, but the results are well worth it. Also be aware that this will take a long afternoon to a weekend to do properly. You could rush it, but that’s kinda risky. If you attempt this mod, you do so at your own risk. Headlights are expensive to replace, should you mess up. Please do not blame me if you melt your lights or otherwise render them useless, I cannot be held responsible. Mod at you’re own risk. Good luck! Please read the entire article before attempting any of the steps listed below. And PLEASE read the NOTES AND SAFETY WARNINGS at the bottom of the article. Tools:  Oven Flat tip screwdriver Masking tape Exacto knife Popsicle stick Paint, your color of choice Paint brush Q-tip Paint thinner Windex Lint free cloth Silicone adhesive (and caulking gun if needed) Heat resistant gloves/leather gloves Step 1: Removal First you gotta remove your stock headlamps from the truck. Lift up your hood and pull up on the two black retaining clips that hold them in place. Pull the headlamp away from the truck, twisting the turn/parking light bulb to remove it, and twisting the headlight retaining ring followed by the headlight bulb. Be sure NOT to touch the headlight bulb. Your greasy fingers will weaken it, and it just may pop like a balloon next time you turn it on... Step 2: Preheat Preheat the oven to 200 degrees. Please refer below for IMPORTANT notes on heating. Step 3: Heat Place the headlamp assembly on the middle rack for 15 mins. You don't have to prep it at all, or take anything off, just keep a close eye on it to make sure it’s not melting like GI Joe in the microwave. Step 4: Disassembly After removing the headlamp from the oven, carefully use your flat-tip screwdriver to pry apart the lens from the housing. You should have enough time to get it apart before the glue cools down. Just be careful to not crack either half.  Now it's time to tape. BE SURE TO TAKE YOUR TIME. The biggest, and most important step of any paint job is preparation, and taping is part of the prep work. Tape off everything you don't want to get painted. Be sure the edges are sealed nice and tight to prevent seepage. Use a Popsicle stick to get down into the hard to reach areas. You can also use an Exacto knife to make cut lines for a very crisp, clean edge. Just be sure you are always using a fresh, sharp blade.   Step 6: Paint Now it's time to lay down some paint. But first thoroughly clean the parts to be painted with some Windex or similar, use the lint free cloth here. Be sure there is no debris or dirt, or grease or fingerprints, or anything on the areas to be painted. If so, the paint may not stick and you'll be left with a poor finish. I've found that 'specialized' paints and colors are more finicky then a more industrial grade type of paint. I used, and primarily use, Rust-oleum brand spray paint. It dries fast, goes on easy and smooth, and doesn't mind if you miss a spot while cleaning. The Dupli-Color brand color matched paints want and need a nearly perfect surface to paint on or you'll get fish eyes and such. I have not tried Krylon Fusion, but if it's as good as they say it is, it should work well. But always clean and prep, no matter the paint you use. The most important thing to remember when painting is to take your time! I can't stress that enough. One of the easiest ways to ruin a paint job is by rushing. While other paint projects it might be easy to fix rush jobs, that is not the case for the headlamps. Not to mention they are always on display, and a shoddy paint job can ruin the look. Now, onto some actual painting. I did NOT use primer for this project, however, I would advise it. I did not because I had none. If you’re using a lighter color for The finish color, use a lighter color of primer; if you’re using a darker color, use darker primer. And as always, use light, even coats when painting. It will take at least 5 good, light coats to completely cover up the chrome. Don't let that discourage you and to start just going at the lamp willy-nilly with the spray paint. Runs will be a bitch to fix. Follow the instructions on your paint can to know when it's ok to lay down another coat of paint. After you've got a good even coat of primer, start laying down some color. Again, light, even coats are the key here. Runs are your enemy. Step 7: Wait Place your headlamp in the sun somewhere and let it cure; if you don't let the paint dry thoroughly, it will peel up on you when you try to unmask it. So put it in the sun somewhere and forget about it. Go watch a movie, go play some video games, go get lucky, whatever. Just let it cure for a few hours, at least as long as what is recommended on the label of your paint. Step 8: Unmask Now it's time to peel back the masking tape. Again, take your time, because there is a chance the paint will peel on you, or you might scratch the paint off, so be careful. Peel the tape back against itself at a 45 degree angle, away from the paint edge. This is decreasing the chances of the paint lifting and peeling on you. If you've ever watched Monster Garage and seen how their master painter peel back his mask, you'll see this is the method he used, so do it too. If there is any residual adhesive left over, use some tape that you've already pulled off and use it get rid of the stickies...sticky sticks to sticky.  If you used a common color (black, white, etc) for painting, you can use some model paint to touch up the areas that need it. Always test the color match on some scrap something before using the touch up paint. If it's not a common color, you can take the spray can and spray it in the can cap for a few seconds, this will get enough liquid paint in the cap to use for touch-up...you may need to repeat this a few times. You can also spray some paint into a clean, small glass paint bottle that you can buy at a hobby store. This way you can keep some handy in case you ever need it in the future. When spraying the paint into the cap or bottle, keep your face back, you may get some splatter, not to mention some wicked fumes...safety first. If you happen to have gotten some paint where you don't want it, use a Q-tip dipped into some paint thinner to rid yourself of the excess paint. Step 10: Reassembly When you’re happy with your new headlamp housing, it's time to reattach the lens. But first clean up all the chrome so it's nice and shiny. You can again use the Windex and the lint free cloth. Try not to use any paper products (paper towels, toilet paper, etc) or abrasive cloths to shine up the chrome...they may dull it and give you very tiny scratches...microfiber cloths work well. Be sure the inside of the lens is clean as well. To glue the lens back on, just use some silicone adhesive placed into the channel that the lens sits in on the housing. Make sure you get a good, watertight seal to prevent fogging. Let it dry and set-up as per label instructions. Reinstall the headlight. **Alternate assembly If by chance you want the reopen the headlight in the future for any reason, there are two alternate ways of resealing the headlight. One is instead of placing the silicone adhesive in the channel on the housing, you place the lens back onto the housing 'dry', then seal the gap with the silicone. You can then later use a utility knife to break the seal, if you so wish. The second alternative way is the use electrical tape around the gap between the lens and the housing, just be sure you get a good solid, watertight seal all the way around. This method is the easier of the two to use should you want to open the light again, but there is also a larger risk for water leaks and fogginess. Step 11: Repeat Now do that all again for the other light....or do both at the same time, either/or... Last edited by STL; 11-16-2009 at 04:55 PM.
|


|
#3
11-16-2009, 04:21 PM
|
||||
|
||||
|
__________________
Quote:
Quote:
|

|
#4
11-16-2009, 04:24 PM
|
||||
|
||||
|
NOTES AND WARNINGS!!
Note on heating: The temperatures and times are the results of my testing and will vary from oven to oven. Some people record using higher temps at shorter times, lower temps at shorter times, etc. I HIGHLY suggest that you use the same method I did when first doing this mod. Set your oven to the lowest heat setting it will go on, then bake the headlamp for 5 mins, then remove it and see if it separates. NEVER force it apart, if the lens is not separating or moving at all, stop! You may crack the lens or housing by forcing the lens off. If 5 mins at your lowest heat setting isn't working, after letting the lamp cool, try letting it bake for 10 mins, then try to separate the housing again. If 10 mins doesn't work, try 15 after letting the lamp cool down. If 15 mins is not working out for you, try bumping the heat up to the next marked heat setting, after letting the lamp cool let the lamp bake for 5 mins, then try to separate. Then 10 mins, cool, 15 mins, cool, next highest temp setting. Continue until you find the golden time and heat settings. ALWAYS keep a VERY close eye on the lamp while it is baking, I visually checked the lamp once every 2 mins or so while baking. If you see that ANY part is starting to melt, REMOVE THE LAMP and let it cool. Then turn down the heat and try again. Letting the lamp cool between heating sessions will help prevent the lamp from getting too hot too fast and possibly causing it to melt. If you can pick up a pair of spare headlamps, do the mod to those and just swap out the housings. You may be able to then sell the stock housings and recoup some of your money. Doing so will not only minimize the down time of the truck to a few mins, but it will also prevent any disasters from melted headlamps. Remember, safety first. Wear high-temp resistant gloves when handling the headlamps. I used a fresh pair of leather work gloves. They did a fairly decent job of minimizing heat transfer to my hands. When the lamp was fresh out of the oven, I couldn't handle the lamp for long, but long enough to do what I needed to do. Also be wary that there are a few metal 'studs' that will burn you if you happen to touch them, don't ask how I know. This method also works for sidemarker lamps, and should work for the tail lamps as well....
|
|
#6
11-16-2009, 04:43 PM
|
||||
|
||||
|
Why did you take the write up from Generation Edge without giving any indication the write up wasn't yours? Seems immoral to me, not that anyone cares.
") I posted the link so the person who actually did the write up would get the credit. I posted the link so the person who actually did the write up would get the credit.I guess I was typing up my reply as while you were posting yours. You beat me by 1 minute. I considered doing this mod, but decided just to buy the lights. Yes, it costs money, but there's zero downtime, zero chance of trashing the lights, and you could either keep the stock lights for backup or sell them to offset a little of the cost of the new ones. Just my 2¢.
__________________
Quote:
Quote:
|
|
#7
11-16-2009, 04:55 PM
|
||||
|
||||
|
Sorry Jay I thought I included it was taken from there
I was not taking credit
|
|
#8
11-16-2009, 04:57 PM
|
||||
|
||||
|
Quote:
but thx Mykhael
__________________
2001 XLT 4x4 V6 4.0L auto SAS'd D44 and 8.8. dual lockers, 38s, 12 bolt h1's, some other odds and ends
|
|
#9
11-16-2009, 05:01 PM
|
||||
|
||||
|
I baked mine and I will just say take your time. Since they are available on ebay now many people have just bought them.
If you buy from ebay Be aware that some say you get the clear corners but when you receive the package they are blacked out amber corners. Depending on how picky your local cops are you will want to install a amber bulb if you get clear corners I think these look better than the blacked out amber ones 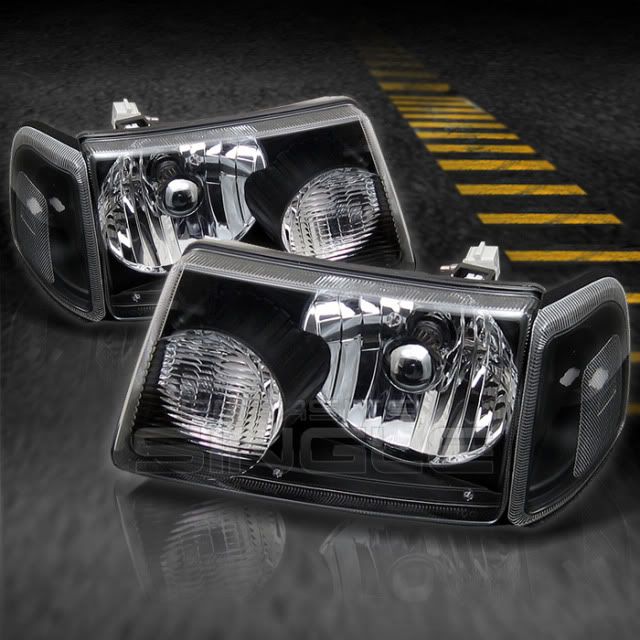 Ugly ones 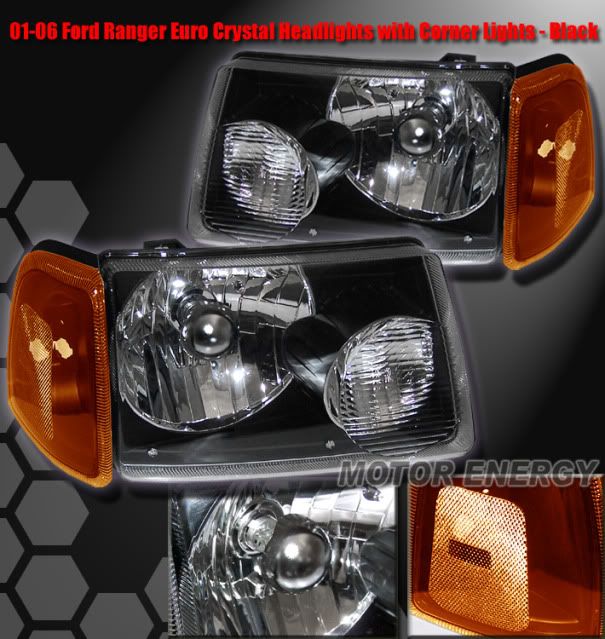
|
|
#10
11-16-2009, 05:05 PM
|
||||
|
||||
|
ya i agree, those blacked out ones are way sweeter. are your marker lights still orange? or did you do something to em to make em look cooler
__________________
2001 XLT 4x4 V6 4.0L auto SAS'd D44 and 8.8. dual lockers, 38s, 12 bolt h1's, some other odds and ends
|
|
#11
11-16-2009, 05:08 PM
|
||||
|
||||
|
This Mod is still on my 2 do list
|
|
#12
11-16-2009, 05:17 PM
|
||||
|
||||
|
Quote:
Quote:
__________________
Quote:
Quote:
|
|
#13
11-16-2009, 05:25 PM
|
||||
|
||||
|
Quote:
|
|
#14
11-16-2009, 05:35 PM
|
||||
|
||||
|
cool mod but sounds like a crack head scheme. lol.
__________________
1999 Ranger xlt 4-door off road splash 4.0 ohv 3" body lift 2 10,000lb warn front tow hooks 265/75/R16 Wild Cats,stock alloys Gabriel gold shocks torsion bar twist 1" Reese tow pack K&N box air filter,removed air muff Alpine deck w/ ipod 4-6" Fozgate 3-way speakers HO alternator Fozgate A series 150 amp,bridged 10" Mtx sub Midland detach face cb radio,Maxrad whip
|
|
#15
11-16-2009, 05:50 PM
|
||||
|
||||
|
crack head scheme cause they cost so much on ebay?
Total cost doing it ur self can be less than 20 dollars
|
 |
«
Previous Thread
|
Next Thread
»
|
|
 Similar Threads
|
||||
| Thread | Thread Starter | Forum | Replies | Last Post |
| headlight restoration help | smsranger | Cleaning and Detailing | 16 | 05-08-2010 01:39 PM |
| Headlight problem | HolyChikin | 4-Cylinder Tech | 6 | 01-29-2010 10:28 AM |
| Want to Buy: WTB 01/03 Headlight clips | Dcrymes99ranger | Exterior Parts | 2 | 10-30-2009 07:05 PM |
| Headlight and Nightshades | Superlifted06FX4 | Vehicle Snapshots | 19 | 09-28-2009 11:03 PM |
| headlight toggle?? | brownbb72 | Electrical Tech | 3 | 06-18-2009 03:28 PM |


 |
|
|


 |
|
 |
