DISCLAIMER: FordRangerForum.com, this site, Redneckstone and it's administration are not liable for anything that may occur as a result of someone who reads or follows any steps in this How-To. Proceed at your own peril. The reader assumes all responsibility for consequences that may occur by performing this modification.
Thank you legal Dept..
Ok Welcome to Body Lift 3” 101…
We are going to Discuss 98+ trucks at the moment. Sorry 97(down) I’ll get to you later…
RULE #1 – Read INSTRUCTIONS… PA (performance accessories) has great instructions but they do lack some info which will be discussed here…
98-00 Instructions Click me!
01-08 Instructions Click me!
STOP
If you didn’t Read any of those links I just posted..
DO IT NOW… please and thanks..
_________________
Ok onward
You want to Purchase a body lift, good job you have a few choices.. (Summits Pictures are not kit specific!!!)
STOP …
Read --> here is PA kits and Summit Kit. The Summit Kit is listed as 98-00 it will work on all 98+ trucks. Also a 98-00 Kit will work on 01-08 trucks only thing missing is parking brake extension which isn’t needed..
98-00 Performance Accessories 3” kit Click me!
01-08 Performance Accessories 3” kit Click me!
98-08 SummitRacing 3” kit Click me!
Shifter EXTENTION MANUAL TRANS Click me!
^^^^^ Needed with ANY manual trans truck!!!!!!!!!!!!
****Manual T-case guys sorry your SOL on extension needs to be custom****
_________________
Ok Time to talk TIPS and how to aid in doing a body lift so you don’t kill yourself.
Rule #2 BUY PROPER TOOLS… or good friend with some.. lol….
_________________
Ok in no specific order.
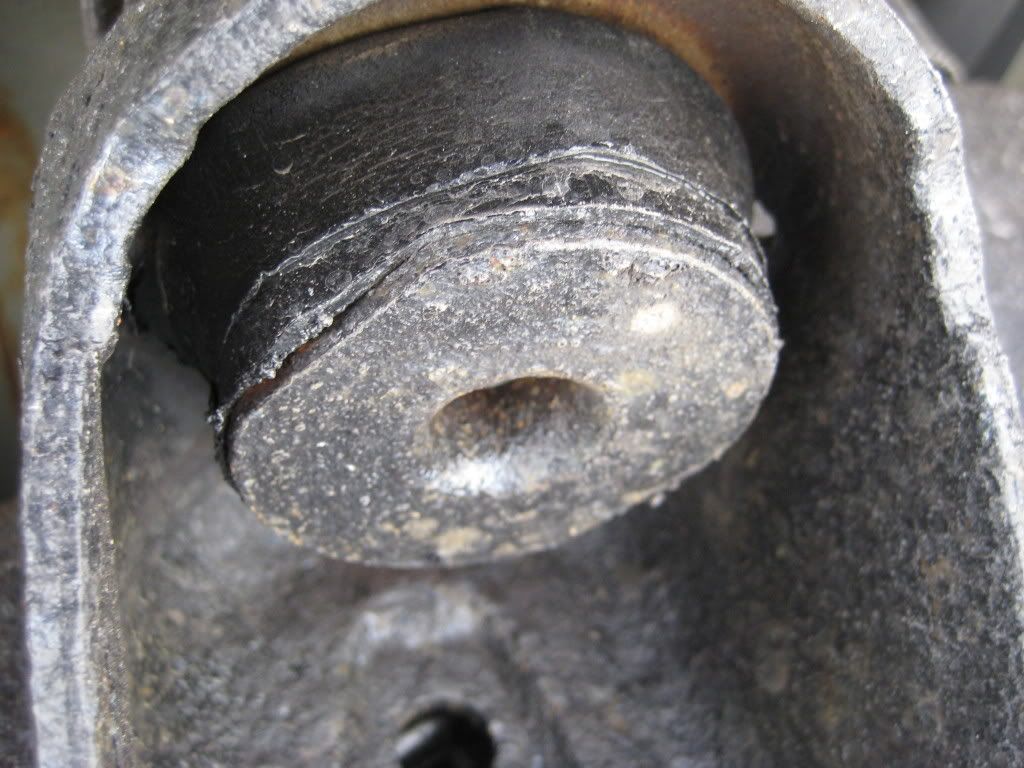
- With the main Body mounts you MUST HEAT THE BOLTS. A “MAP” gas torch you can buy will work just fine. HEAT threw the round hole in the bottom of the bushing. Heat it till you smell burning rubber and its GOOD AND HOT. Then IMPACT out with an impact gun. (hole in bushing shown here below), Reason for heating is the bolts have Loctite on them from the factory. Otherwise the bushing will spin and that causes all kind of problems
- Ok on the LOWER radiator Drop bracket, part of the Rad support protrudes and is in the way of the bracket. Best thing to do is bend the bracket in a little to help with installing the bracket and keeping it straight. (picture below)
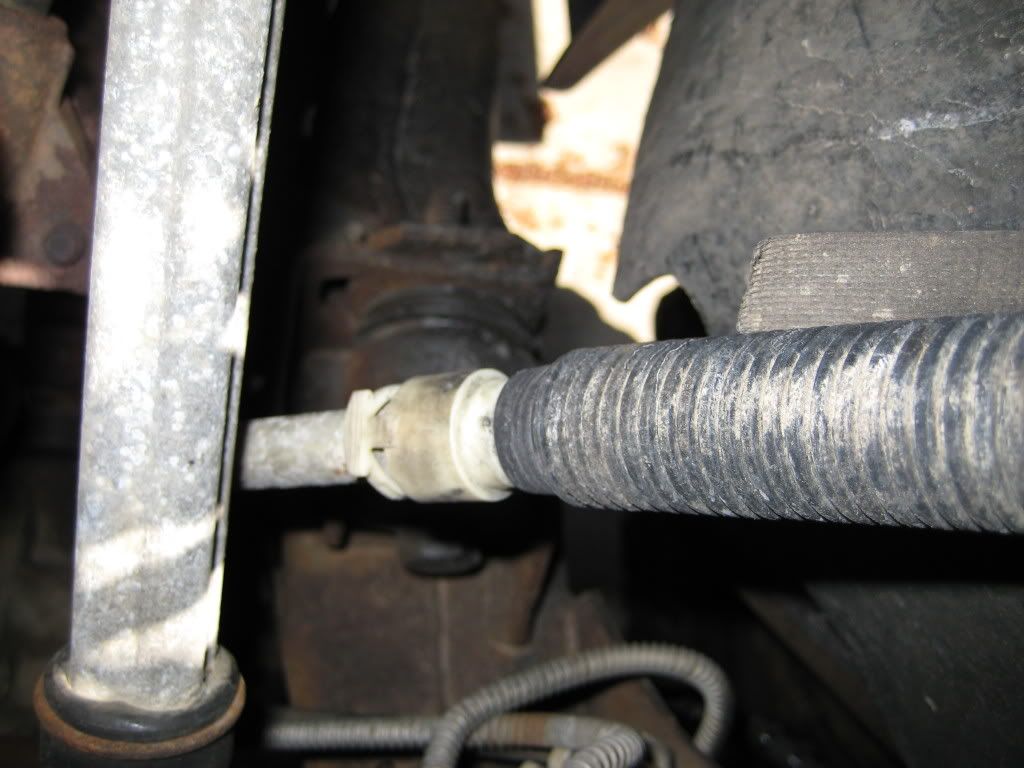
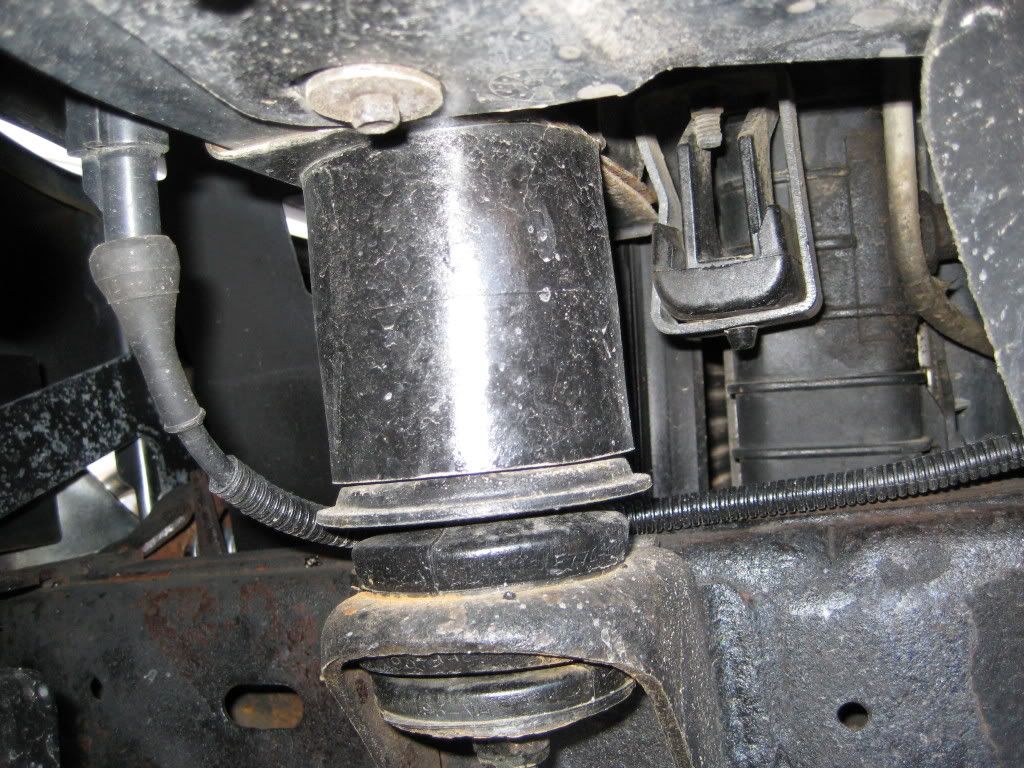
- Next (not all have) trucks equipped with Evap Line(located by steering shaft), after body lift install make sure line is still attached. Some people lengthen the line. My easy cheap way is just to detach it from both holders on the frame and run it on the TOP SIDE of the Brake line shield, slightly re-bending it up. (picture shown below)
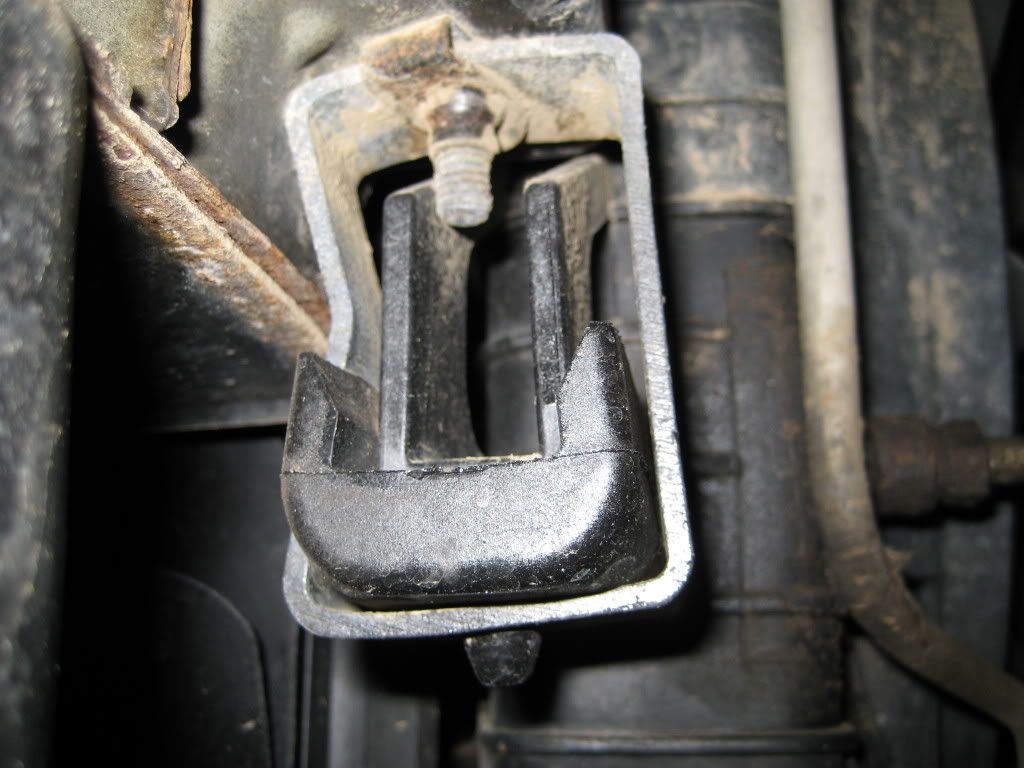
- If you are having problems with the Front body mount coming loose, take off the nut first (#1 in photo below), Then try and impact out the bolt (#5 in photo below), if the bushing washer on top is spinning and bolt is not coming out, (#3 shown in photo below, also in photo 2 just below body lift puck), have a friend sit on top of the Rad support right over the bushing to apply more pressure to it. Normally is enough to allow bushing to stop spinning. This is the bushing that has to be drilled out with ½ Bit.
If the sit on the radiator support doesn't work. Lift the body away from the washer. Head down into the bushing washer from the top get it good and hot. Now you have two options lower the truck and is the weight to hold it. And or use large channel locks to hold the washer
- Engine bay Ground extension, 98% of the time you get a socket on that upper nut and the whole stud spins. Use a ¼ drive impact to remove nut. There will be a nut behind it, tighten that nut. Then install new bracket, problem solved.
- When Raising the Body, have someone in the engine bay keeping an eye on all lines to make sure nothing is too tight.
- If you have a SOHC 4.0L 2001+ truck after body is lifted FIX THE A/C HOSE that’s infront by the pullies or it WILL GET sliced by the belt and you are out a $100+ line.
- After body is lifted IF AUTOMATIC make sure gear selector cable isn’t to tight. Remove from clip on body behind steering extension if needed
- Before installing FRONT BUMPER BRACKETS helpful tip Paint front side of the bracket with Black paint being it will be visible from the front and looks like crap.
- Rear bumper brackets. Most the time they do not fit right little tip before installing on the bumper use large hammer or large adjustable wrench and flare them out more.
- Northern trucks applying Heat to the J-clips in frame for Bed bolts will help with taking them out and not breaking them. WARNING becareful of the one by the gas tank, usually you can not safely get a torch in there.
- After 1 week or 500 miles go back and retighten EVERY BODY BOLT and BED BOLT. Will guarantee they will loosen up some, if your having trouble with body bushing spinning reheat to tighten.
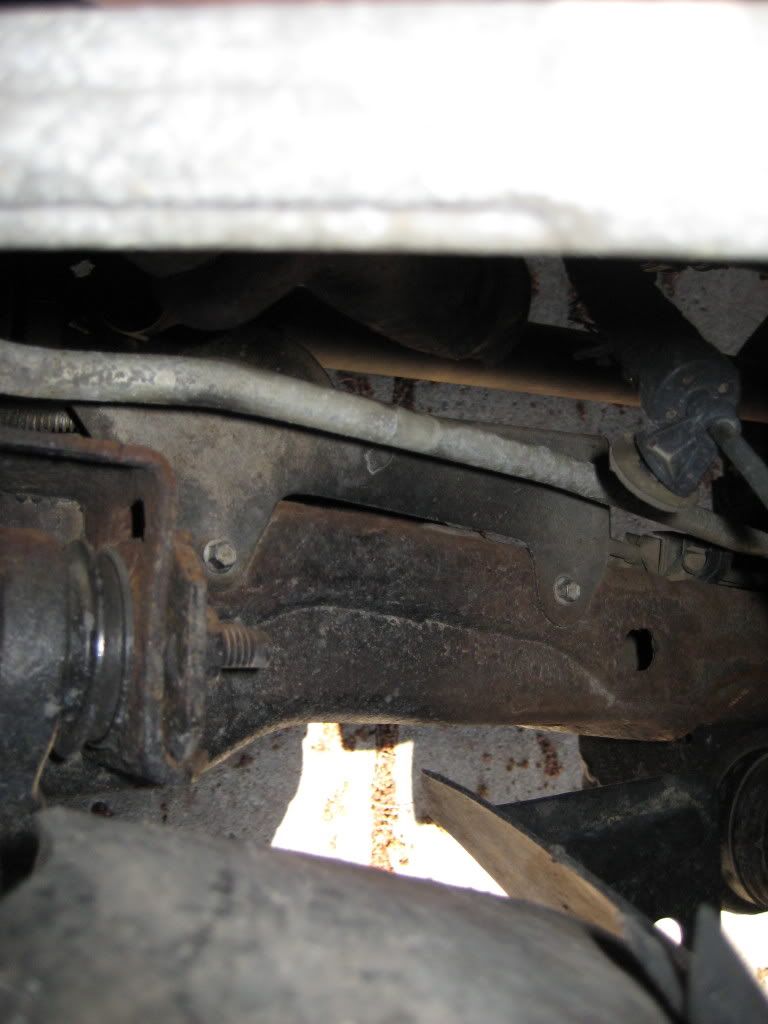
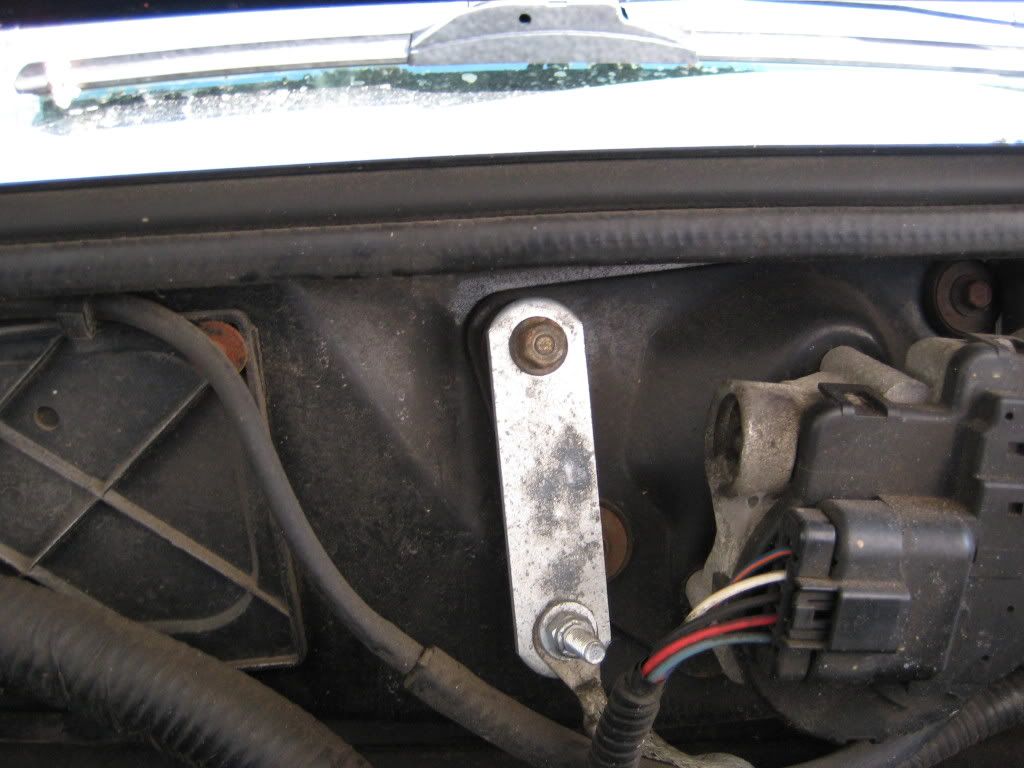
- If 4 wheel ABS move front ABS wire on back side of bushing after install keeps it out of the way. (picture below)
- Remember to loosen the Radiator before lifting the body take it out of the lower mounts so its free.
- REMOVE battery cables from battery BEFORE LIFTING the body. Both cables might need to be loosen at hold down clips to give them more slack.
- Put some Anti seize on the steering extension both sides because its alum going into a steel part incase you ever have to remove it again.
- CHECK FILLER/VENT Extensions BEFORE doing lift. There is a few different size’s there is usually never the right size in the box, you might have to go out and get the right size pipe to extend either one before starting!!!!!
- Shane took some nice pics that are labeled if you would like to look… Click me!
- If stock Exhaust and can not afford to replace it right away. Take Sawall to the tail pipe right AFTER the last hanger after the axle. It will hide it enough so it doesn’t bother you will you get it replaced
- Need T55 socket for bed bolts, buy a few they like to break…
- No need to buy PA Gap Guards you can make your own like so….
- No need to Weld in Crush blocks some Black RTV placed on the Crush block place it between the bed and frame and tighten down it will Crush it in place.
- Make sure you have enough Nuts and Bolts. Had a few times, its missing 2 Nylon Nuts for the Front bumper brackets, and have to run out and get them before we can install the front bumper.
- Remove Manual Shifter BEFORE lifting cab leave off till cab is lifted.
Everyone please be safe and don’t hurt yourselves use jack stands when needed. And keep out of harms way. Have fun enjoy and be lifted!!